
Magnum SRT-8 V8-6.1L VIN 3 (2006)
-
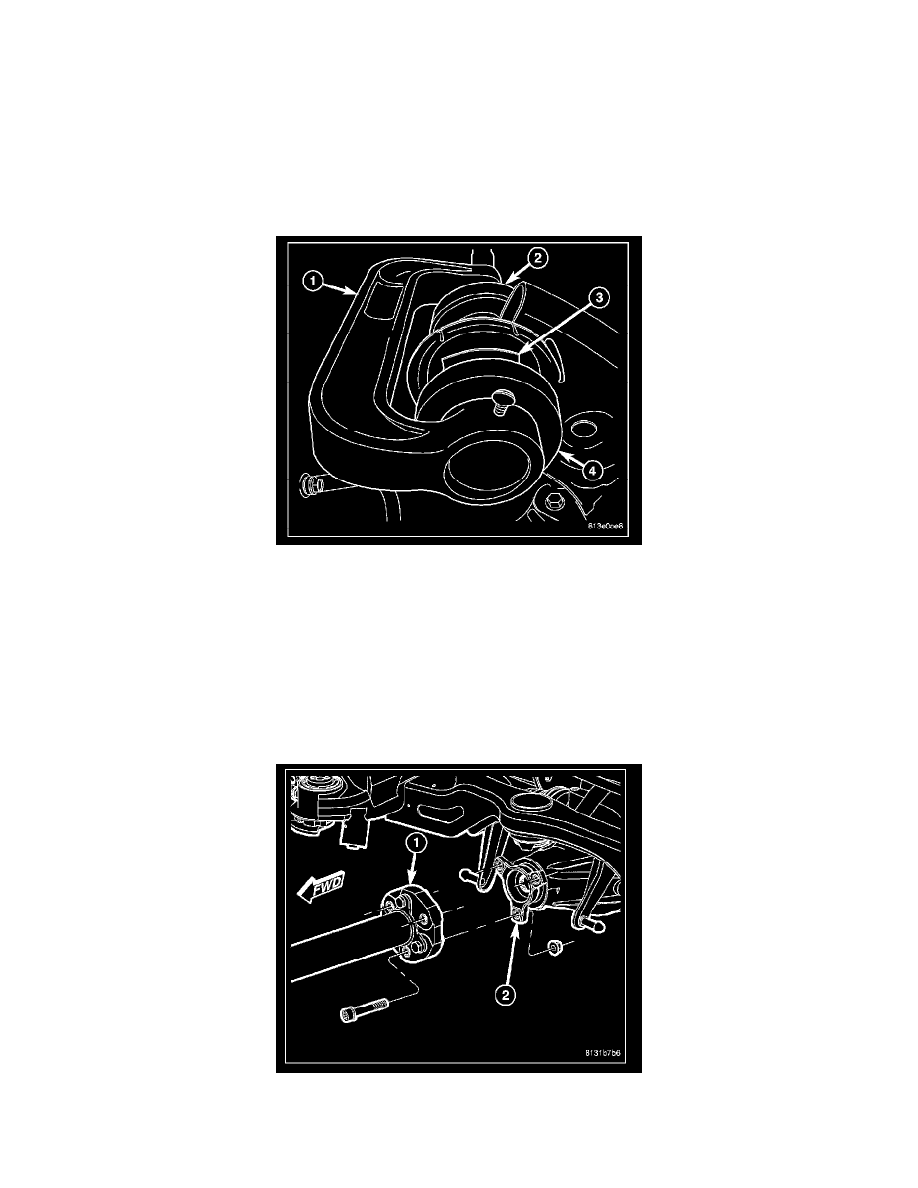
(1) Press C-4212F
-
(2) Remover 9031-2
-
(3) Receiver 9031-1
35. Tighten Press (1) screw-drive, pressing bushing out of crossmember.
36. Remove all tools.
INSTALLATION
CAUTION: It is very important that bushing be installed in same position as original to maintain vehicle ride quality and bushing longevity.
That is why bushing, once installed, needs to closely match reference marks applied upon removal of original bushing.
1. Position bushing on crossmember bushing bore aligning bushing can flange (3) with reference marks applied during removal.
2. Assemble tools (See following list) over bushing (3) and crossmember as shown.
-
(1) Press C-4212F
-
(2) Receiver 9031-3
-
(4) Installer 9031-4
3. Tighten Press (1) screw-drive, pressing bushing into crossmember. Install bushing until bushing can flange contacts surface of crossmember.
4. Remove tools.
5. Verify bushing closely lines up with reference marks applied during removal.
NOTE: Do not reinstall coil springs on spring links at this time. Install as directed in later steps.
6. Raise crossmember to body mounting points. As crossmember is raised, slide propeller shaft (1) onto rear axle differential flange (2) and align
shock absorbers with pockets in spring links.