
Magnum SRT-8 V8-6.1L VIN 3 (2006)
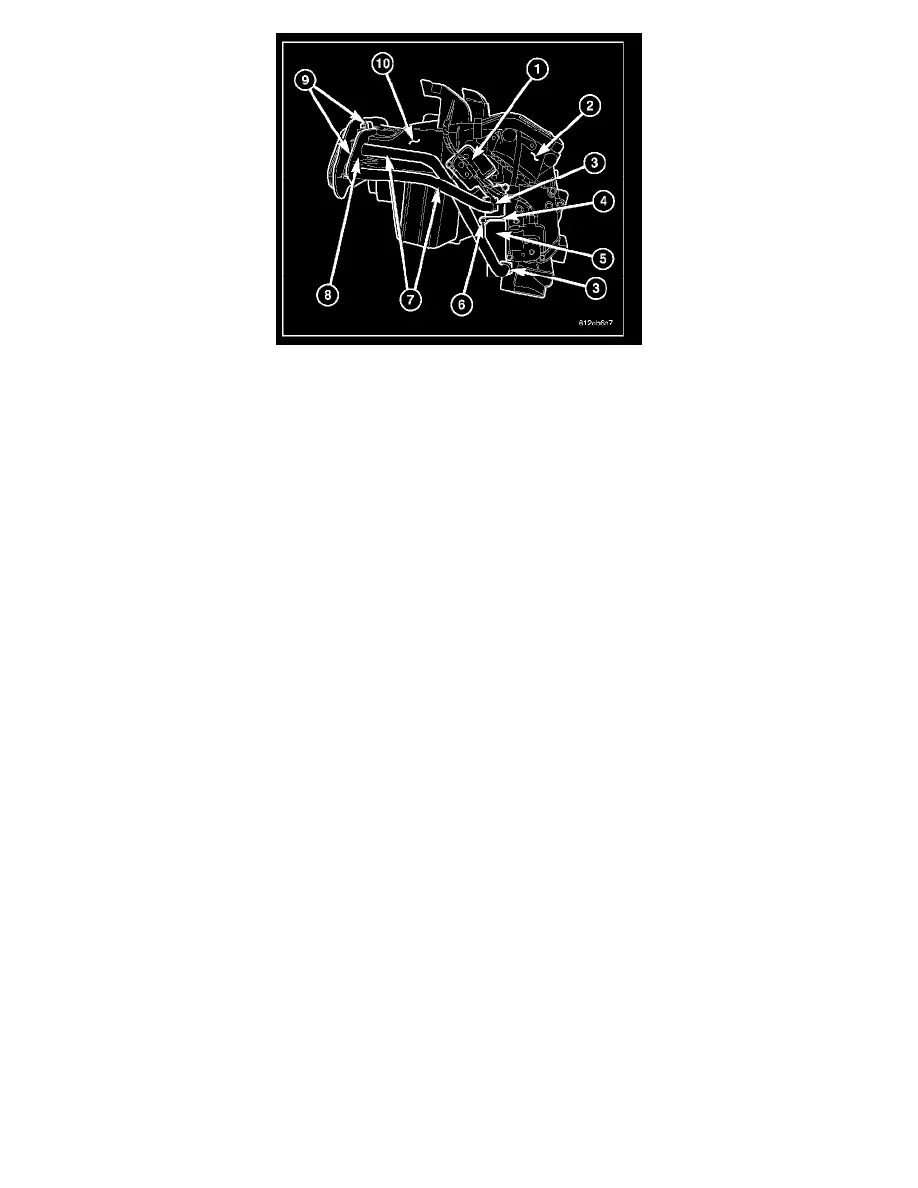
1. Carefully install the heater core (5) into the driver side of the HVAC air distribution housing (2).
2. Install heater core retaining bracket (4) onto the air distribution housing.
3. Install the screw (6) that secures the heater core retaining bracket onto the air distribution housing. Tighten the screw to 2.2 N.m (20 in. lbs.).
4. Remove the tape or plugs from the heater core ports.
5. Lubricate new rubber O-ring seals with clean engine coolant and install them onto the heater core tube fittings. Use only the specified O-rings as
they are made of a special material for the engine cooling system.
6. Install the heater core tubes (7) through the dash panel and onto the heater core.
7. Install the two retaining clamps (3) that secure the heater core tubes to the heater core. Make sure that the clamps are installed correctly and
securely.
8. Install the flange (8) over the heater core tubes and onto the HVAC housing (10) near the dash panel.
9. Install the two screws (9) that secure the flange to the HVAC housing. Tighten the screws to 2.2 N.m (20 in. lbs.).
10. On LHD models, install the blend door actuator (1) to the driver side of the air distribution housing.
11. On RHD models, install the steering column and parking brake bracket.
12. Install the instrument panel silencer onto the driver side of the instrument panel.
13. Connect the heater hoses to the heater core tubes.
14. Connect the negative battery cable.
15. If the heater core is being replaced, flush the cooling system.
16. Refill the engine cooling system.