Magnum SRT-8 V8-6.1L VIN 3 (2006)

6. Remove the tape or plugs from the evaporator tube fittings and all of the expansion valve ports.
7. Lubricate new rubber O-ring seals with clean refrigerant oil and install them on the evaporator tube fittings. Use only the specified O-rings as they
are made of a special material for the R-134a system. Use only refrigerant oil of the type recommended for the A/C compressor in the vehicle.
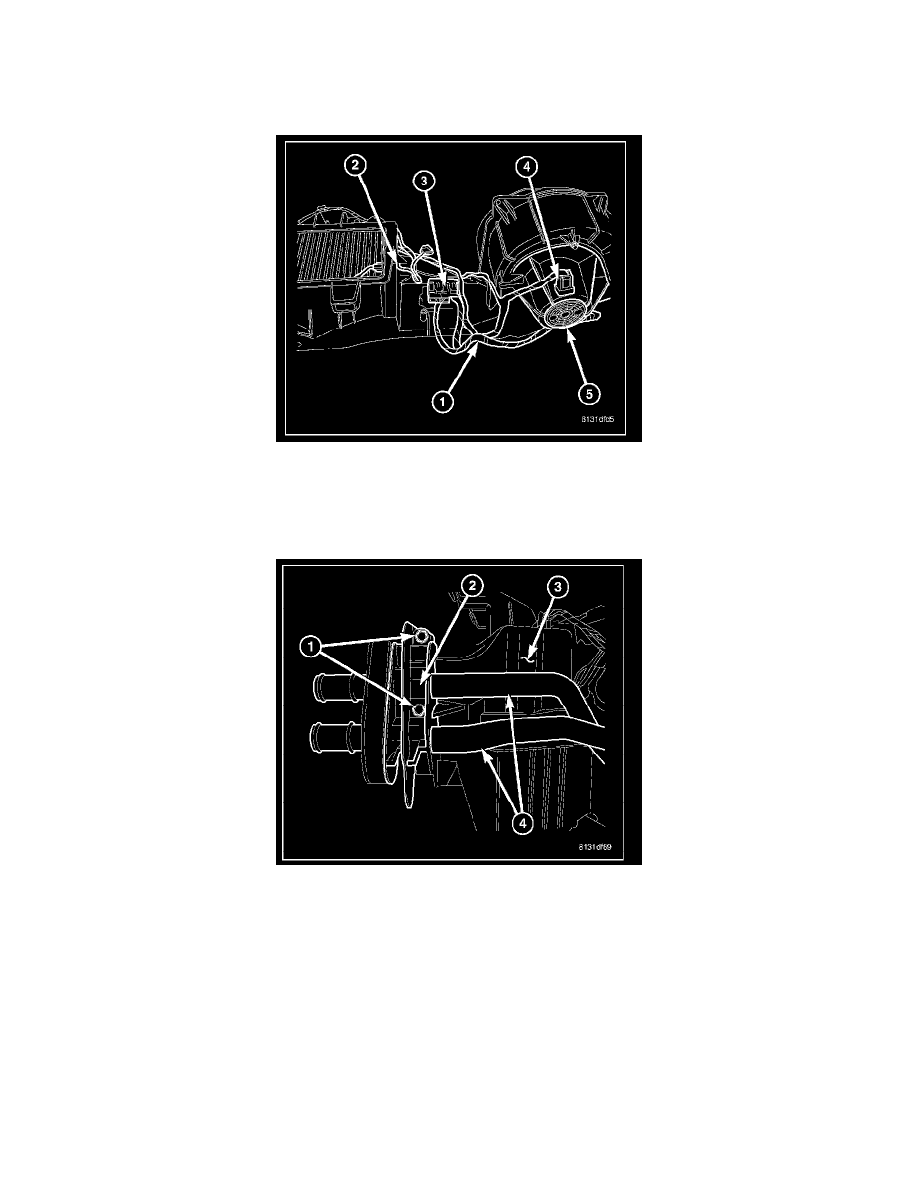
8. Install the A/C expansion valve (2) onto the evaporator tube tapping block located within the foam seal (3).
9. Install the two bolts (1) that secure the A/C expansion valve to the evaporator tube tapping block. Tighten the bolts to 11 N.m (97 in. lbs.).
10. Install the evaporator temperature sensor (2).
11. Install the blower motor resistor or power module (3), depending on application.
12. Install the blower motor (4).
13. Connect the HVAC wire harness (1) to the evaporator temperature sensor, blower motor resistor or power module (depending on application) and
the blower motor.
14. Install the two HVAC wire harness retainers (5) onto the blower motor.
15. Install the heater core tubes (4) and the flange (2) to the front of the HVAC housing (3).
16. Install the two screws (1) that secure the flange to the HVAC housing. Tighten the screws to 2.2 N.m (20 in. lbs.).
