
Magnum SRT-8 V8-6.1L VIN 3 (2006)
REMOVAL
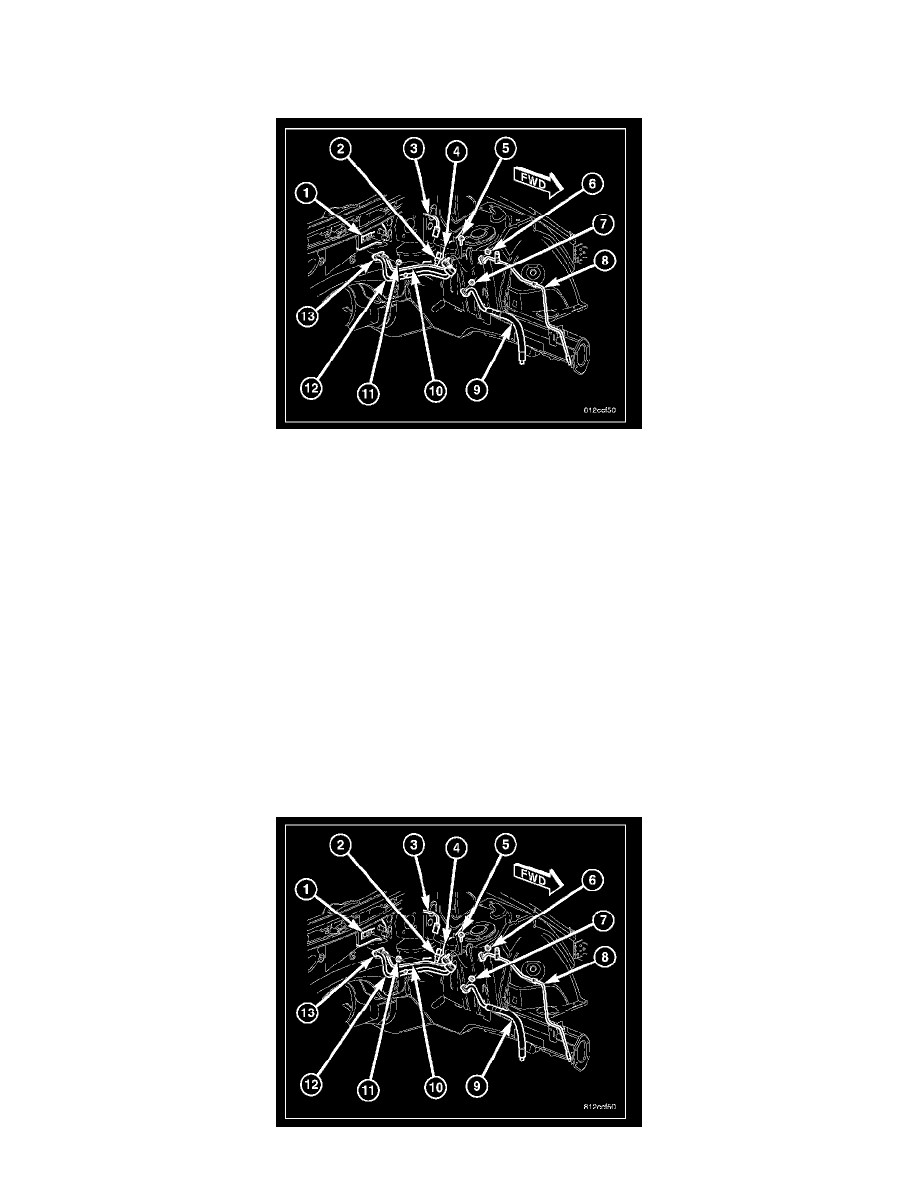
NOTE: LHD model shown. RHD model similar.
1. Recover the refrigerant from the refrigerant system.
2. Disconnect and isolate the negative battery cable.
3. Remove the air cleaner housing.
4. Remove the nut (7) that secures the front section of the A/C suction line (9) to the rear section of the suction line (12).
5. Disconnect the front section of the A/C suction line from the rear section of the suction line and remove and discard the dual plane seal.
6. Install plugs in, or tape over the opened suction line fittings.
7. Remove the nut (6) that secures the front section of the A/C liquid line (8) to the rear section of the liquid line (10).
8. Disconnect the front section of the A/C liquid line from the rear section of the liquid line and remove and discard the dual plane seal.
9. Install plugs in, or tape over the opened liquid line fittings.
10. Disconnect the wire harness (3) from the A/C pressure transducer (2).
11. Remove the bolt (5) that secures the refrigerant line mounting bracket to the left front shock tower (4).
12. Remove the nut (11) that secures the liquid and suction line tapping block (13) to the A/C expansion valve (1).
13. Disconnect the rear section of the A/C suction and liquid lines from the A/C expansion valve.
14. Remove the dual plane seal from the suction and liquid line fittings and discard.
15. Install plugs in, or tape over the opened suction and liquid line fittings and the expansion valve ports.
16. Remove the rear section of the A/C suction and liquid lines as an assembly from the engine compartment.
17. If required, remove the A/C pressure transducer from the rear section of the A/C liquid line.
INSTALLATION
NOTE: LHD model shown. RHD model similar.