
Magnum SRT-8 V8-6.1L VIN 3 (2006)
Valve Housing Components
4. Install all valves and springs into the valve housing (2). Check all valves for ease of movement and shavings.
5. Install the screws to hold the side covers to the valve housing. Tighten the screws to 4 Nm (35 inch lbs.).
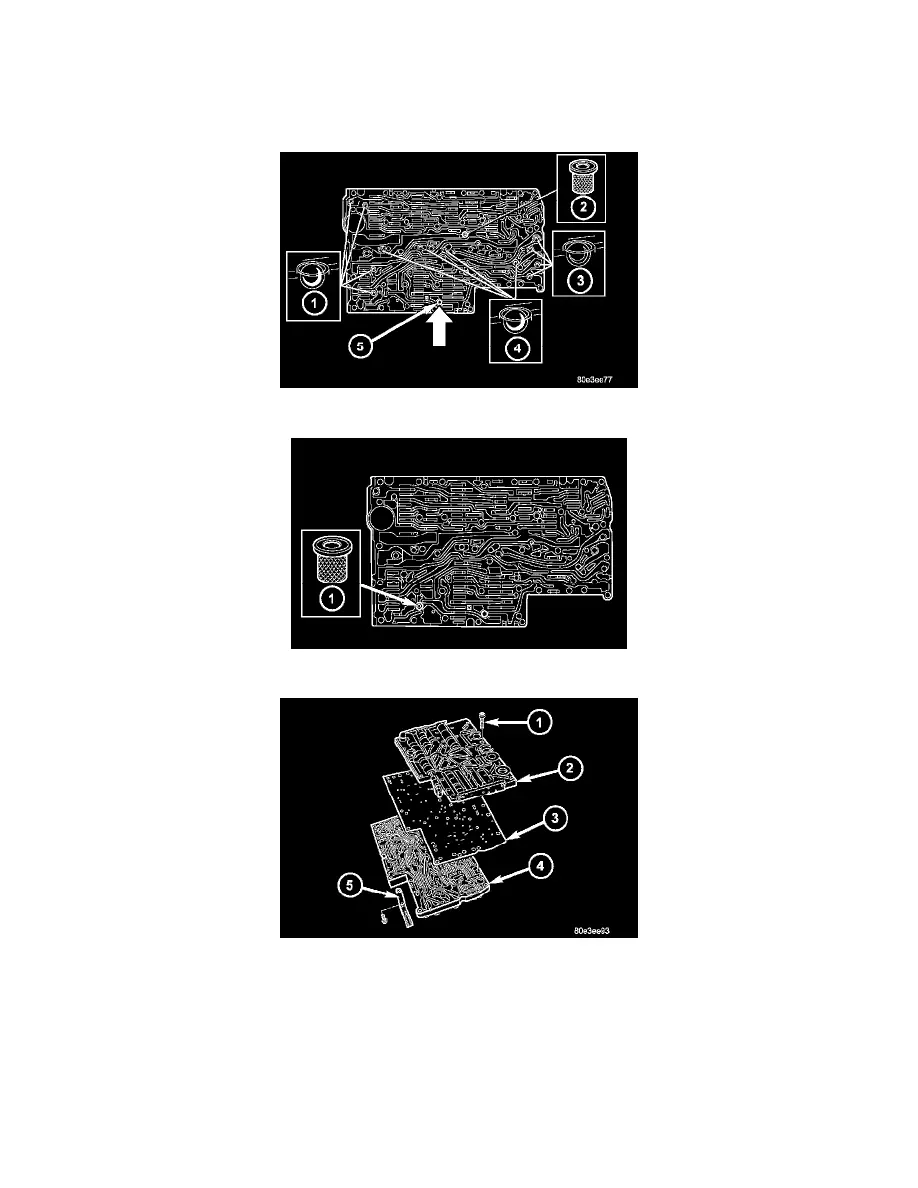
NOTE: A total of 12 valve balls are located in the valve body, four made from plastic (4) and eight from steel (1, 3).
6. Install all check balls (1, 3, 4) and the central strainer (2).
7. Install the strainer (1) in the inlet to torque converter lock-up control solenoid valve.
8. Position the sealing plate (3) onto the valve body (4).
9. Install the valve housing (2) onto the valve body (4) and sealing plate (3).
10. Install the shift plate Torx bolts (1). Tighten the bolts to 8 Nm (71 inch lbs.).
11. Install leaf spring (5).