
Neon L4-2.0L SOHC (1995)
19.
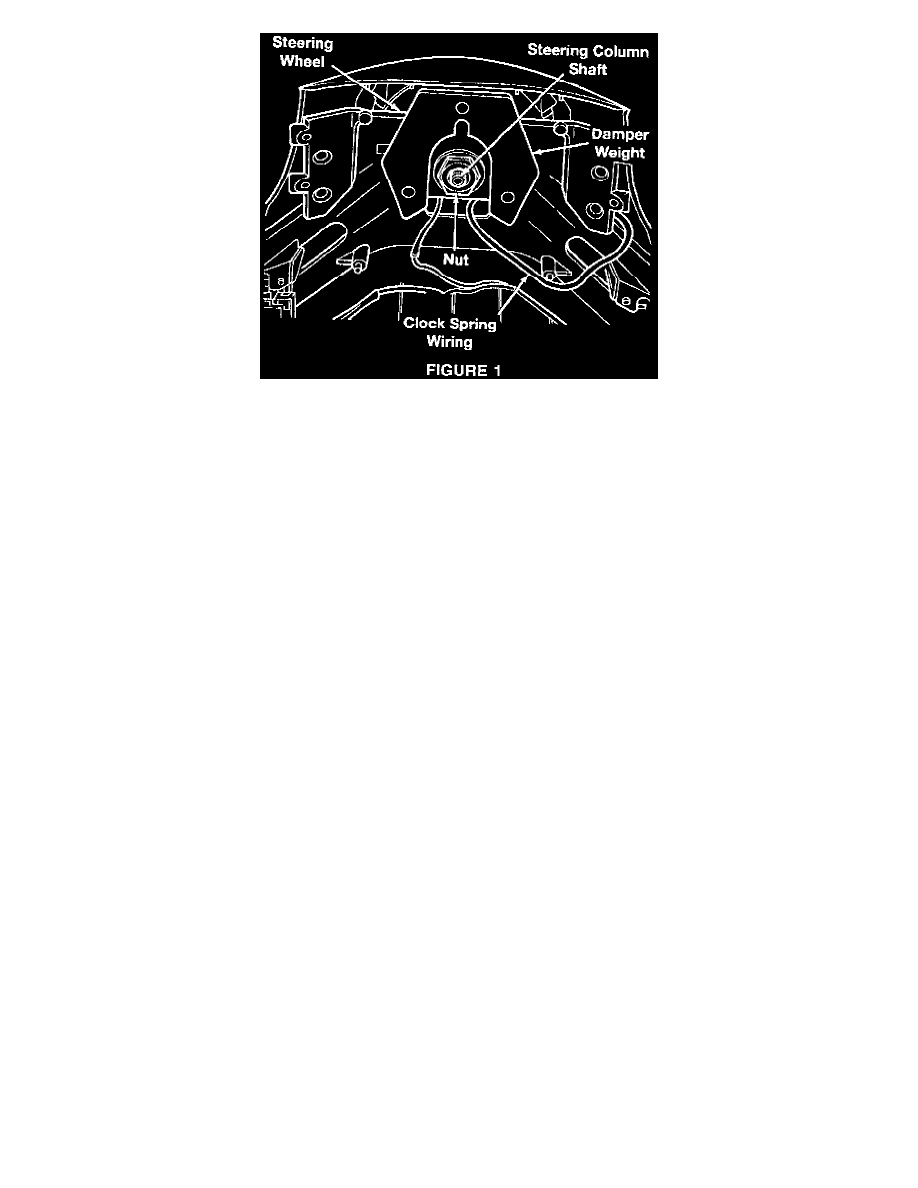
Position the new damper weight as shown in Figure 1, and install the steering column shaft retaining nut and tighten until steering wheel is fully
seated on the shaft. Torque the steering wheel retaining nut to 54 N-m (40 ft.lbs.).
20.
Connect the clockspring lead to the horn switches. Route speed control leads (one to each speed control opening).
21.
Install the air bag electrical lead from the clockspring into the connector on the back of the air bag module.
NOTE:
** BE SURE CONNECTOR IS SECURELY LATCHED INTO THE AIR BAG MODULE CONNECTOR AND THAT THE WIRE IS
ORIENTED TOWARD THE BOTTOM OF THE AIR BAG.**
22.
Continue installation of the components that were removed to gain access to the clockspring. Make sure original or correct attaching bolts are
used.
23.
Refer to the Air Bag System Check listed in the Neon Service Manual (Publication No. 81-270-5025) Page SM-4, to verify that Air Bag is
installed and operating properly.
NOTE:
STEPS 23 THROUGH 26 ARE REQUIRED ONLY ON VEHICLES EQUIPPED WITH AIR CONDITIONING.
24.
Remove the 2 upper radiator isolator bracket mounting screws. Loosen the radiator to battery strut attaching screw.
25.
Raise the cooling module high enough to free the 2 lower mounting isolator bushings from the front crossmember and support the cooling module
in this position.
26.
Replace the 2 lower mounting isolator bushings with new bushings.
27.
Install the cooling module into the lower mounting brackets. Install and tighten the 2 upper radiator isolator bracket mounting screws to 7.4 N-m
(65 in.lbs.).
NOTE:
THE MOPAR DIAGNOSTIC SYSTEM IS REQUIRED TO PERFORM THE FOLLOWING STEPS AND THE SYSTEM MUST BE
OPERATING WITH RELEASE 13 OR HIGHER.
28.
Connect the Mopar Diagnostic System (MDS) and DRBIII Scan Tool to the vehicle and power them up.
29.
Use the arrow keys and select # 2 MDS DIAGNOSTICS on the DRBIII MAIN MENU Screen.
30.
Use the arrow keys and select DIAGNOSTIC MENU on the MDS, then press NEXT MENU.
31.
Use the arrow keys and select CONTROLLER PROGRAMMING on the MDS, then press NEXT MENU.
32.
Use the arrow keys and select PROGRAM CONTROLLER PART on the MDS, then press NEXT MENU.