
Neon L4-2.0L SOHC (1995)
J.
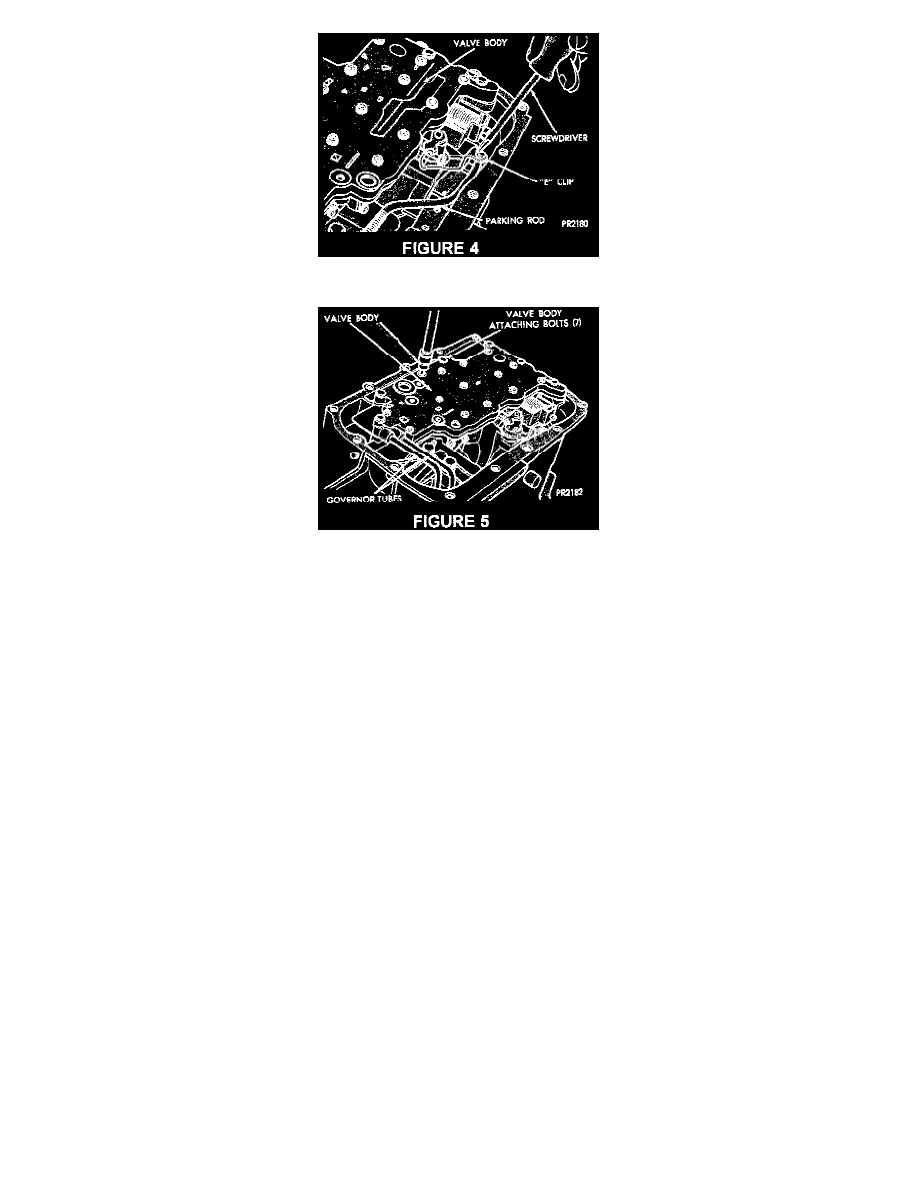
Remove the "E"-clip holding the parking rod to the valve body and separate the rod from the valve body. Refer to Figure 4.
K.
Remove the 7 bolts attaching the valve body to the transaxle and separate the valve body and governor tubes from the transaxle. Refer to
Figure 5.
L.
Install the new valve body (P/N 4659879) and governor tubes to the transaxle, torque the 7 attaching bolts to 105 in. lbs. (12 Nm).
M.
Install the parking rod and secure with the "E"-clip previously removed.
N.
Install a new transaxle oil filter (P/N 4269649), torque the screws to 40 in. lbs. (5 Nm).
0.
Install the neutral start/back-up lamp switch.
P.
Apply a 1/8 in. (3 mm) bead of Mopar Silicone Sealant (P/N 4318025) to the transaxle oil pan mounting flange. Attach the transaxle oil pan
to the transaxle and torque the attaching bolts to 165 in. lbs. (19 Nm).
Q.
Install the throttle pressure cable lever and gear shift cable lever on their shafts and tighten their pinch bolts.
R.
Lower the vehicle and connect the cruise control, if equipped.
S.
Install the battery, PDC and connect the battery cables.
T.
Add 4 quarts Mopar Automatic Transmission Fluid Type 7176 (P/N 4467721) through the dipstick opening.
U.
Start the engine, and allow to idle for a minimum of one minute. With the parking brake and the service brakes applied, move the gear
selector lever momentarily to each gear position. Place the gear selector lever in either park or neutral.
V.
Check the transaxle fluid level and add an appropriate amount of transmission fluid to bring the level to 1/8 in. (3 mm) below the ADD mark
on dipstick.
W.
Recheck the fluid level after the transaxle is at normal operating temperature. The level should be in the HOT range of the dipstick.
X.
Repeat Step 1 of this bulletin.
Y.
Program the previously recorded radio station presets, and set the clock.
POLICY: Reimbursable within the provisions of the warranty.