
Neon L4-2.0L VIN C (1998)
Oil Pan: Service and Repair
REMOVAL
1. Drain engine oil.
2. Remove front engine mount bracket.
3. Remove powertrain bending strut.
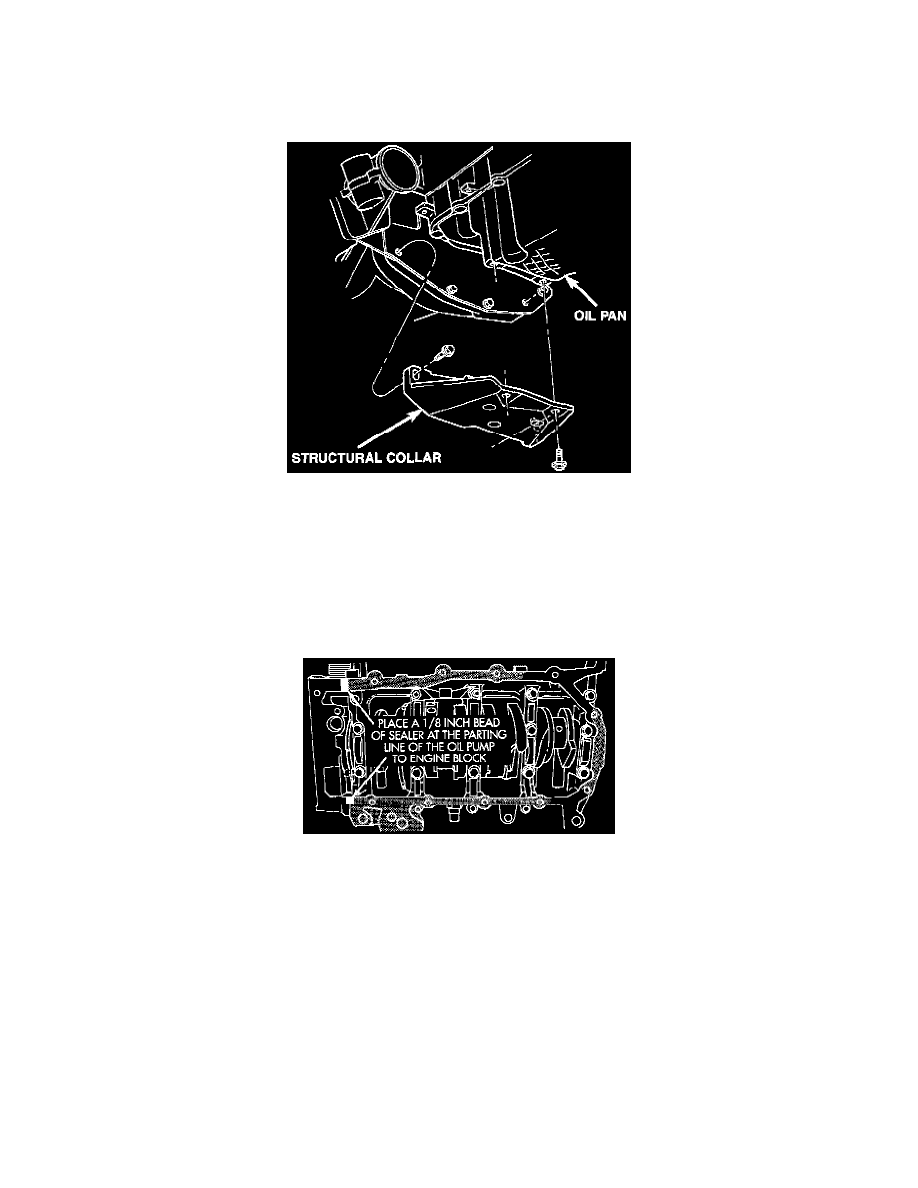
Structural Collar-Removal And Installation
4. Remove structural collar from oil pan to transaxle.
5. Remove transaxle lower dust cover.
6. If equipped with air conditioning remove oil filter and adaptor.
7. Remove oil pan.
8. Clean oil pan and all gasket surfaces.
INSTALLATION
Oil Pan Sealing
1. Apply Mopar Silicone Rubber Adhesive Sealant or equivalent at the oil pump to engine block parting line.
2. Install a new oil pan gasket to pan.
3. Install pan and tighten screws to 12 Nm (105 inch lbs.).
4. Install oil filter and adaptor.
5. Install transaxle lower dust cover.
6. Install powertrain bending strut.
7. Install front engine mount and bracket.
CAUTION: The torque procedure for the structural collar must be followed, as damage to oil pan or collar could occur.
8. Install the structural collar using the following 3 step torque sequence:
-
Step 1: Install the collar to oil pan bolts and tighten to 3 Nm (30 inch lbs.).
-
Step 2: Install collar to transaxle bolts and tighten to 108 Nm (80 ft. lbs.).
-
Step 3: Final torque the collar to oil pan bolts to 54 Nm (40 ft. lbs.).
9. Fill engine crankcase with proper oil to correct level.