
Neon L4-2.0L VIN C (1998)
Control Assembly: Service and Repair
Heater-A/C Control Replacement
REMOVAL
1. Disconnect and isolate the negative battery cable.
2. Using a trim stick (special tool #C-4755), gently pry up on the top cover and cluster bezel to remove.
3. Open the ash receiver.
4. Using a trim stick (special tool #C-4755), gently pry out on the center bezel and remove.
5. Remove the six attaching screws across the forward portion of the right upper trim panel. Then pull the panel rearward to disengage the three
locator pins and remove.
6. Reach in and disconnect the wiring connector(s) for the rear window defogger and/or fog lamp switch(s) as required.
7. If equipped with RKE, remove the two screws retaining the module and lay over the instrument cluster.
8. Gently pull on the center A/C outlet duct to remove.
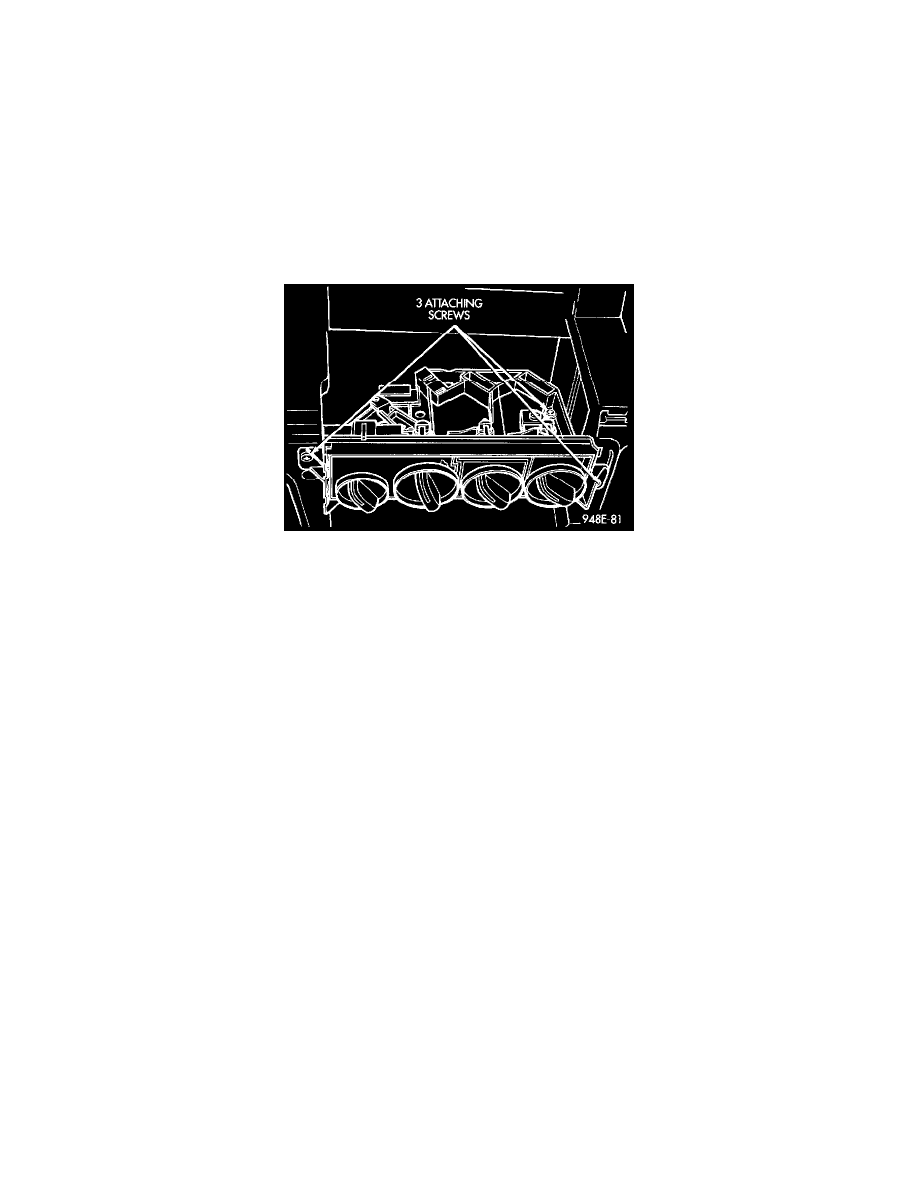
Heater A/C Control
9. Remove three attaching screws at corners of the control, two front retaining and one retaining from the top rear.
10. Pull the control rearward and disconnect the wiring connector.
11. Using a screwdriver, disengage the cable attachment clips.
INSTALLATION
-
For installation, reverse the above procedures.