
Neon L4-2.0L VIN C (1998)
C.
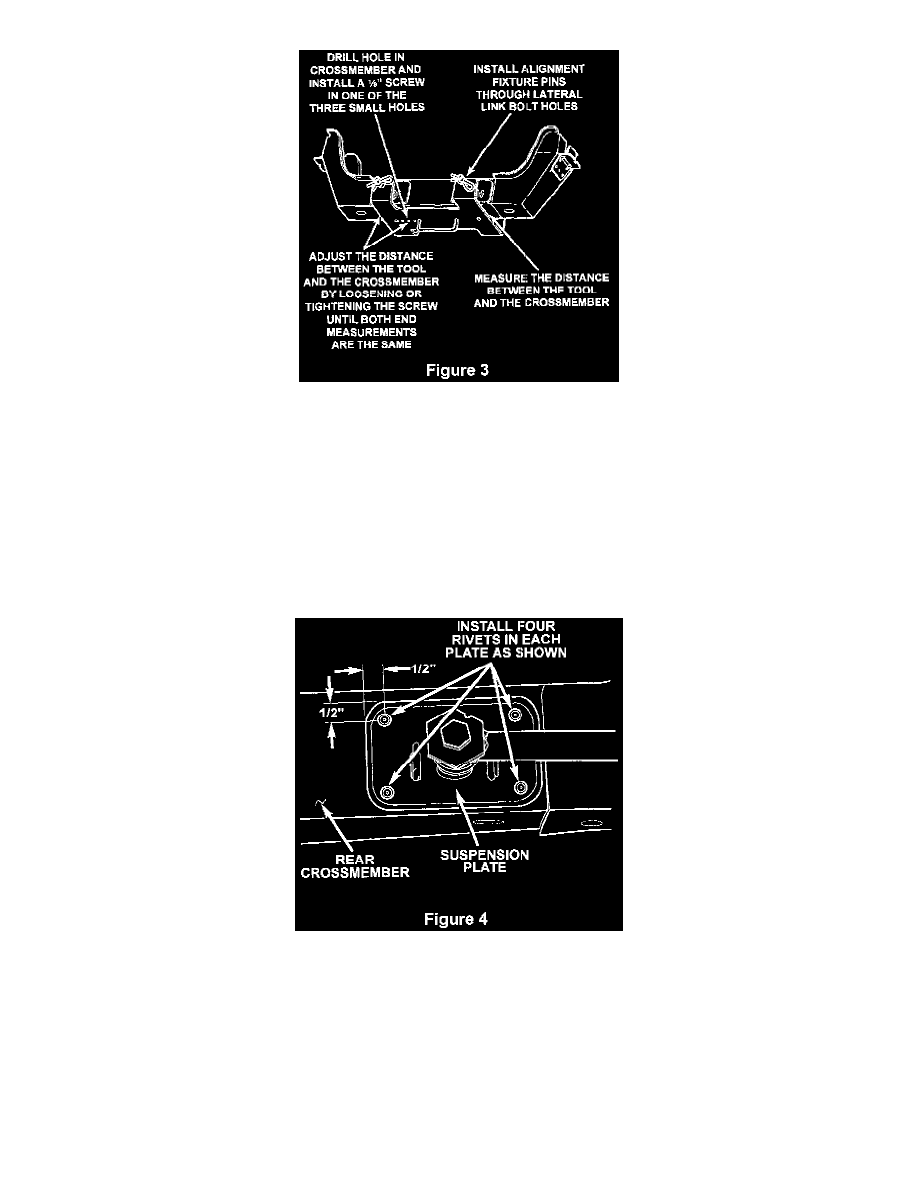
Install the alignment fixture (obtained from the STAR Center). Install each fixture bolt/alignment pin through the lateral link bolt hole of
each plate (Figure 3).
D.
Drill a small hole in the crossmember that aligns with one of the three small holes in the alignment tool and then install a 1/8" screw into the
crossmember. Measure the distance between the tool and crossmember at the end of the tool where both lateral link plates are still attached.
Adjust the distance between the tool and crossmember at the other end of the tool by loosening or tightening the 1/8" screw until both end
measurements are the same.
NOTE:
Tightly clamp the lateral link plate against the crossmember.
For all vehicles with arc welded lateral link plates (Steps 2 through 5):
2.
At the corner of each plate, measure 1/2" in from the sides and 1/2" in from the top or bottom of each plate as shown in Figure 4. Mark and center
punch four (4) rivet locations on each lateral link plate (Figure 4).
3.
Using a 1/8 (3 mm) bit, drill a pilot hole at each of the center punched rivet locations.
NOTE:
A right angle (90°) drill must be used on the front (fuel tank) side of the crossmember.
4.
Enlarge each hole using a 17/64" (7 mm) (letter size "G") drill bit.
5.
Using the supplied power set riveter (W-AK175ACH), install one of the supplied structural rivets in each location -- 4 rivets per plate for all four