
Neon R/T L4-2.0L VIN F HO (2001)
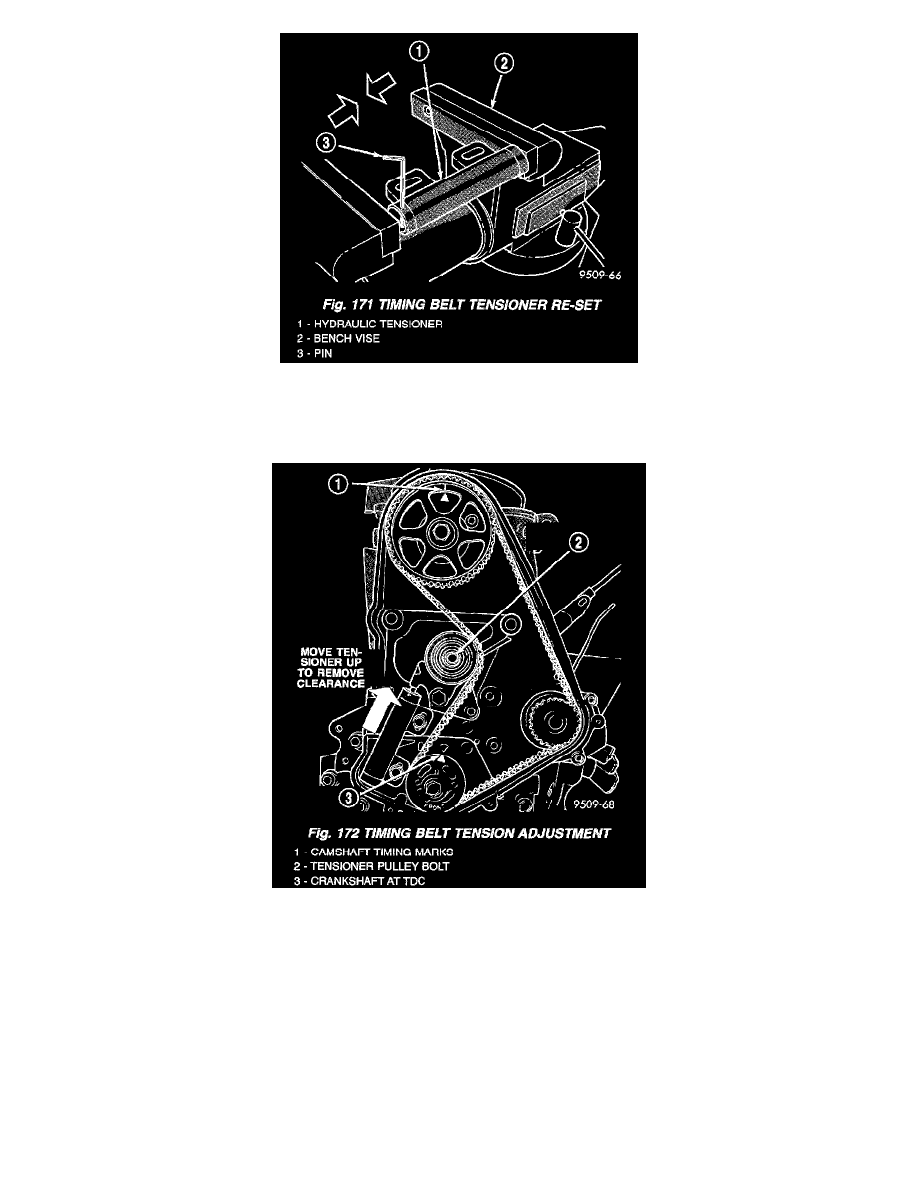
6. Re-set the hydraulic tensioner by placing tensioner body in a vise equipped with soft jaws (Fig. 171). Slowly compress the plunger.
7. Compress the plunger until a 1.9 mm (5/64) Allen wrench or pin can be inserted through the body and the plunger (Fig. 171).
8. Remove hydraulic tensioner from vise and install on engine, Do not tighten attaching bolts at this time.
9. Using a torque wrench on the tensioner pulley bolt, apply 28 Nm (250 in. lbs.) of torque against the timing belt.
10. With torque applied to the tensioner pulley/ timing belt, move the tensioner up against the pulley pivot bracket and tighten tensioner bolts to 31
Nm (23 ft. lbs.). (Fig. 172).
11. Pull the tensioner plunger retaining pin. Pretension is correct when the pin can be removed and installed into tensioner housing and plunger.
12. Rotate crankshaft 2 revolutions and check the alignment of the timing marks (Fig. 170) and (Fig. 169).
13. Check belt tension by installing pin into tensioner housing. If pin cannot be re-installed, repeat belt tension procedure.
14. Install the timing belt front cover.
15. Install the engine mount bracket.
16. Install the engine right mount to engine mount bracket through bolt.
17. Remove jack from under engine.
18. Install the upper torque strut.
19. Install power steering pump assembly.
20. Raise vehicle and install lower torque strut.
21. Install the crankshaft damper.
22. Install accessory drive belts.