
Neon R/T L4-2.0L VIN F HO (2001)
Power Steering Pressure Switch: Service and Repair
REMOVAL
1. Disconnect negative battery cable from the negative post of the battery. Be sure cable is isolated from negative post on battery.
2. Raise the vehicle.
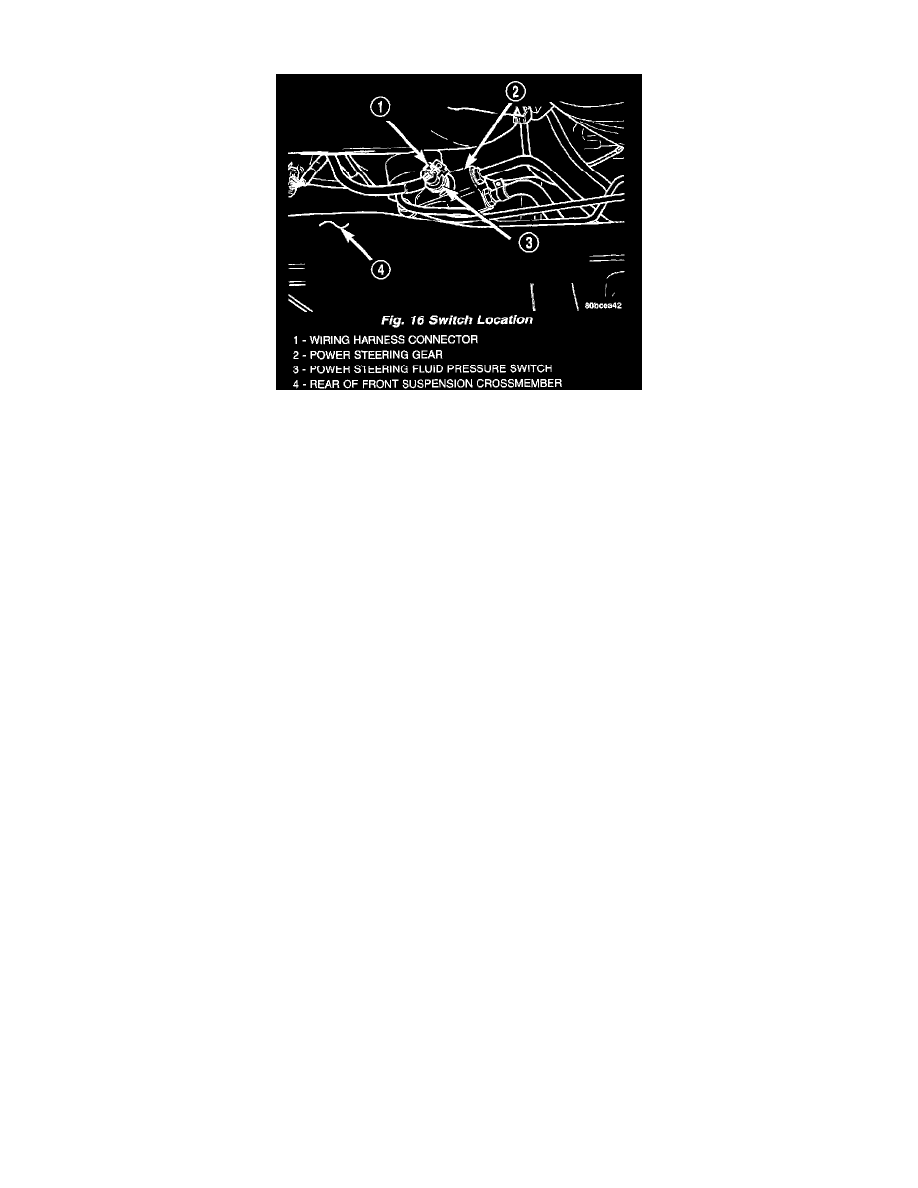
3. Locate the power steering fluid pressure switch on the back side of the power steering gear.
4. Remove the vehicle wiring harness connector from the power steering fluid pressure switch.
NOTE: When removing and installing the power steering pressure switch, use a 7/8 inch deep well socket. The deep well socket will prevent
damage to the plastic electrical connector area of the power steering fluid pressure switch.
5. Unscrew and remove the power steering fluid pressure switch from the power steering gear.
INSTALLATION
1. By hand, screw the power steering pressure switch into the power steering gear until it is fully seated. Tighten the power steering pressure switch
to a maximum torque of 8 Nm (70 inch lbs.). Over-torquing will result in stripping the threads out of the power steering pressure switch port in the
steering gear.
2. Install the vehicle wiring harness connector. Be sure the latch on the wiring harness connector is fully engaged with the locking tab on the power
steering pressure switch.
3. Lower the vehicle.
4. Fill the power steering fluid reservoir to the correct fluid level. Use only Mopar Power Steering Fluid, or equivalent.
5. Connect the negative cable to the negative post of the battery.
6. Start the engine and turn the steering wheel several times stop-to-stop to bleed any air from the fluid in the power steering system. Stop the engine,
check the fluid level, and inspect the system for leaks.