
Neon R/T L4-2.0L VIN F HO (2001)
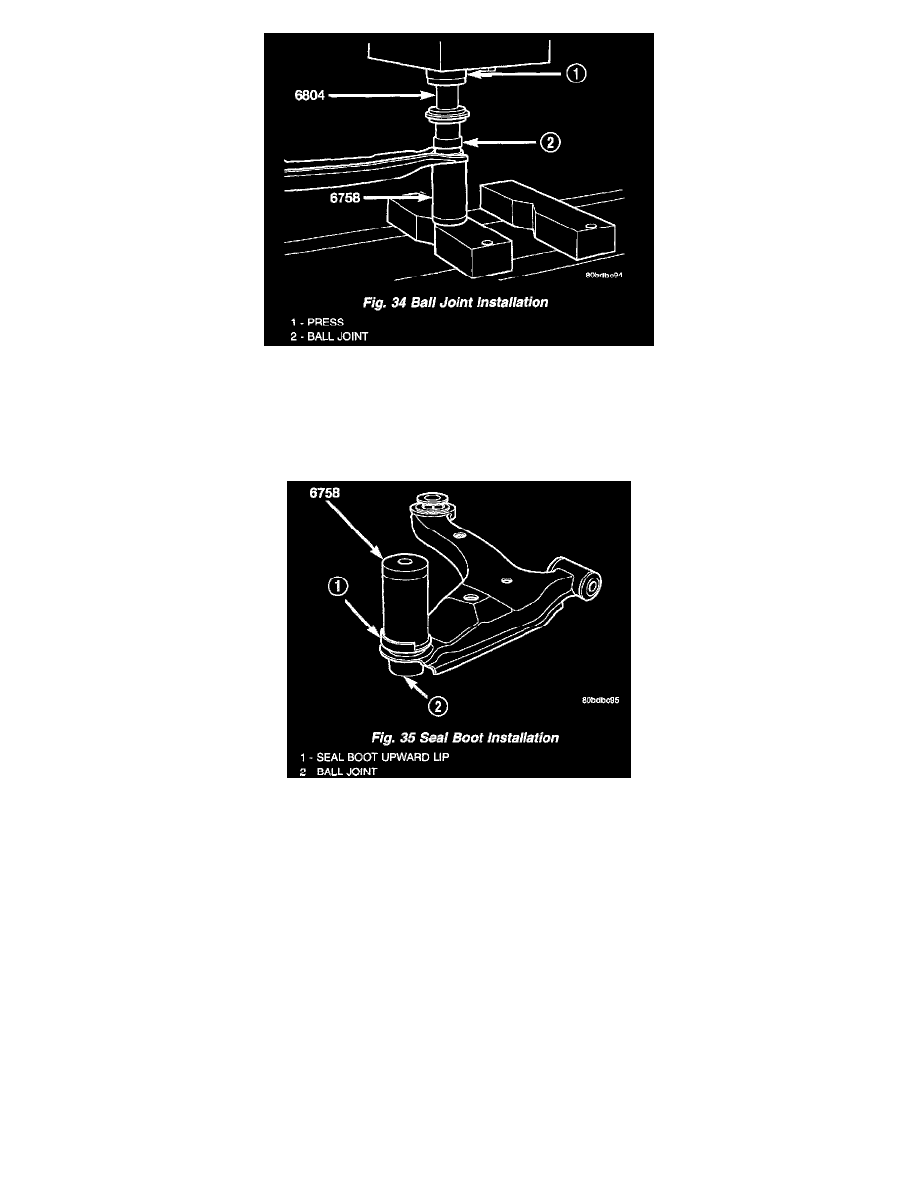
2. Position the Installer, Special Tool 6758, on a hydraulic press to support the lower control arm. Place the control arm on top of Tool 6758 in the
upside-down position, aligning the ball joint stud squarely with the Installer's cup.
3. Place the larger end of the Adapter, Special Tool 6804, on top of the ball joint as shown.
4. Using the hydraulic press, press the ball joint into the lower control arm until the shoulder on the ball joint bottoms against the lower control arm
ball joint bore. Do not apply excessive pressure against ball joint and lower control arm once the ball joint bottoms.
5. Remove the tools and arm from the hydraulic press.
CAUTION: When installing the sealing boot on the ball joint, position the upward lip on the outside perimeter of the seal boot outward, away
from the control arm once installed. It is there to help shield heat from the sealing boot.
6. Place a new ball joint seal boot over the ball joint stud. The upward lip located on the outside perimeter of the seal boot must point outward away
from the control arm once installed. Start the sealing boot over the sides of the ball joint by hand.
7. Position the Installer, Special Tool 6758, over the sealing boot outer diameter as shown. By hand, apply pressure to the top of the Installer until the
seal boot is pressed squarely down against the top surface of lower control arm.
8. Remove the tool.
9. Install the lower control arm on the vehicle.
NOTE: If the ball joint is equipped with a lubeable grease fitting, the joint will need to be lubricated once the lower control arm installation is
complete.
ASSEMBLY - LOWER CONTROL ARM (REAR ISOLATOR BUSHING)