
Neon R/T L4-2.0L VIN F HO (2001)
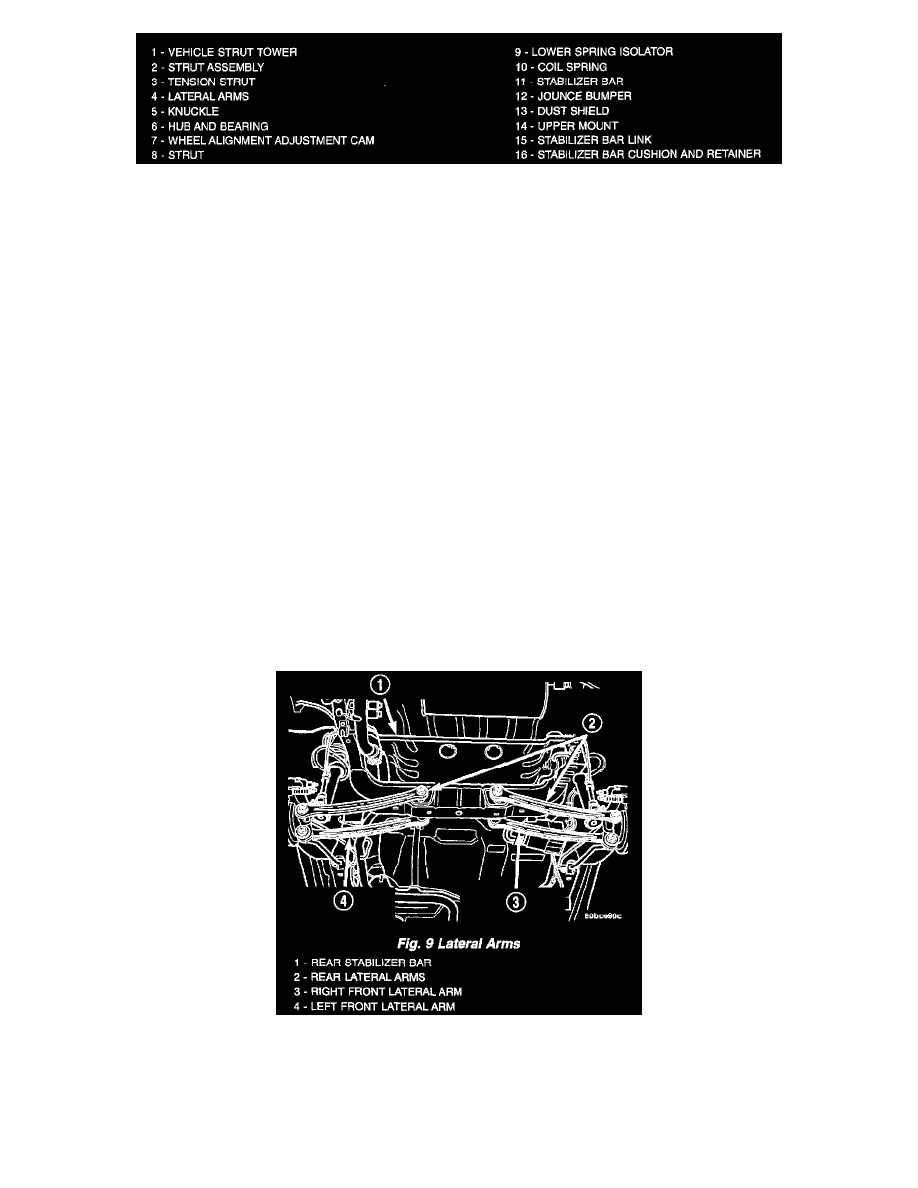
Use the following procedure for removal of one or both lateral arms on one side of the vehicle's rear suspension.
1. Raise the vehicle.
2. Remove the rear tire and wheel assembly.
3. Remove the nut, bolt and washers attaching both lateral arms to the knuckle.
4. Remove nut, washer, bolt and wheel alignment cam attaching the lateral arms to the rear crossmember.
5. Remove the lateral arms from vehicle.
INSTALLATION
Use the following procedure for installation of one or both lateral arms on one side of the vehicle's rear suspension.
NOTE: Both lateral arms when being installed, must be specifically positioned and orientated on the vehicle. The lateral arm that has the same size
bushing sleeves on both ends must be mounted on the forward side of the crossmember and knuckle with the trimmed outer edge facing rearward. This
front arm is also marked with the word "FORWARD." The side of the arm displaying this must face forward.
The lateral arm with two different size bushing sleeves must be mounted on the rearward side of the crossmember and knuckle. Position the smaller
bushing sleeve end at the knuckle and the larger bushing sleeve end at the rear crossmember (the larger bushing sleeve is necessary to accommodate
the rear wheel alignment adjustment cam). If the rear arm is to be mounted on the right side, the trimmed outer edge must face rearward. If the rear
arm is to be mounted on the left side, the trimmed outer edge must face forward.
1. Following the note above, place the forward lateral arm against the leading end of the knuckle, and then install the short lateral arm mounting bolt
with a washer through the lateral arm and knuckle and out the trailing end of the knuckle.
2. Following the note above, install the small bushing sleeved end of the rear lateral arm onto the end of the bolt just installed through the knuckle.
Install a washer and nut onto the end of the mounting bolt, but do not completely tighten the bolt at this time.
3. Install a wheel alignment adjustment cam on the long arm mounting bolt.
4. Hold the rear lateral arm up against the crossmember and install the long mounting bolt with the adjustment cam through the lateral arm bushing
and rear crossmember. The bolt must be installed with the notch in the adjustment cam pointing straight up.
5. Position the forward lateral arm against the rear crossmember hole. Pass the long mounting bolt through the lateral arm bushing sleeve.
6. Install a washer and nut onto the end of lateral arm mounting bolt at the rear crossmember, but do not completely tighten the bolt at this time.
NOTE: Once installed, each lateral arm should have the bow in its length facing downward. Both right side arms should have the trimmed outer
edge facing toward the rear of the car. Left side arms should leave the trimmed outer edge facing each other. The mounting bolt at the knuckle
should have the nut at the rear and the mounting bolt at the crossmember should have the nut at the front.
7. Install tire and wheel assembly on the vehicle. Tighten the wheel mounting nuts in proper sequence until all nuts are torqued to half specification.
Repeat the tightening sequence to the full specified torque of 136 Nm (100 ft. lbs.).
8. Lower the vehicle to the ground.
9. With suspension at curb height, tighten the lateral arm mounting bolt nut at the knuckle to 95 Nm (70 ft. lbs.).