
Neon R/T L4-2.0L VIN F HO (2001)
9. Loosen and remove the four bolts attaching the power steering gear to the front suspension crossmember (Fig. 13). Remove the power steering
gear from the front suspension crossmember.
10. Remove the drive-belt splash shield fasteners. Remove the shield.
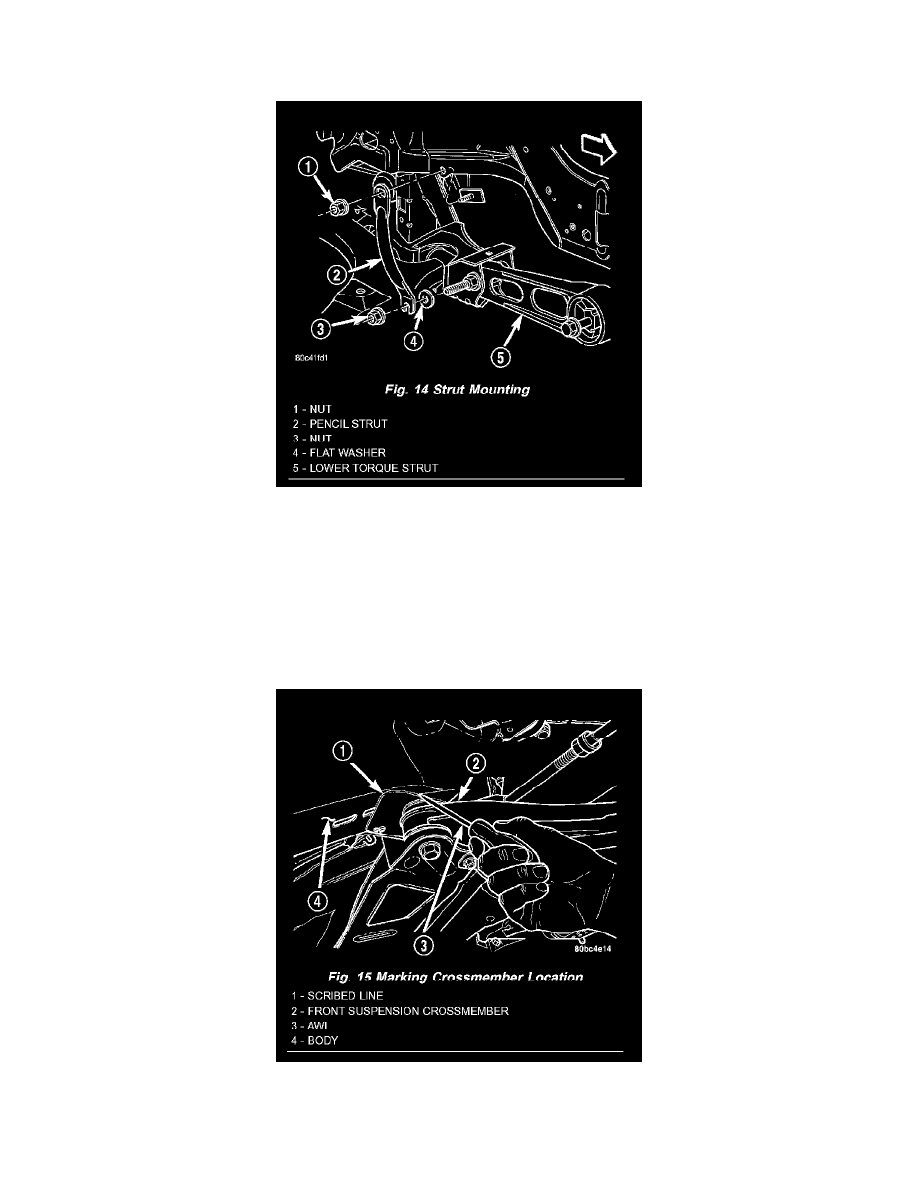
Fig. 14
11. Remove the pencil strut from the right front corner of the crossmember and body of the vehicle (Fig. 14). Remove the washer behind the strut from
the torque strut bolt.
12. Remove the bolts mounting the engine torque strut in place (Fig. 14), then remove the engine torque strut from the vehicle.
NOTE: Before removing the front suspension cross-member from the vehicle, the location of the crossmember must be scribed on the body of the
vehicle (Fig. 9). Do this so that the crossmember can be relocated upon reinstallation against the body of vehicle in the same location as before
removal. If the front suspension crossmember is not reinstalled in exactly the same location as before removal, the preset front wheel alignment
settings (caster and camber) will be lost.
Fig. 15
13. Using an awl, scribe a line (Fig. 15) marking the location of where the front suspension crossmember is mounted against the body of the vehicle.
14. Position a transmission jack under the center of the front suspension crossmember and raise it to support the bottom of the crossmember.