
Nitro 2WD V6-4.0L (2007)
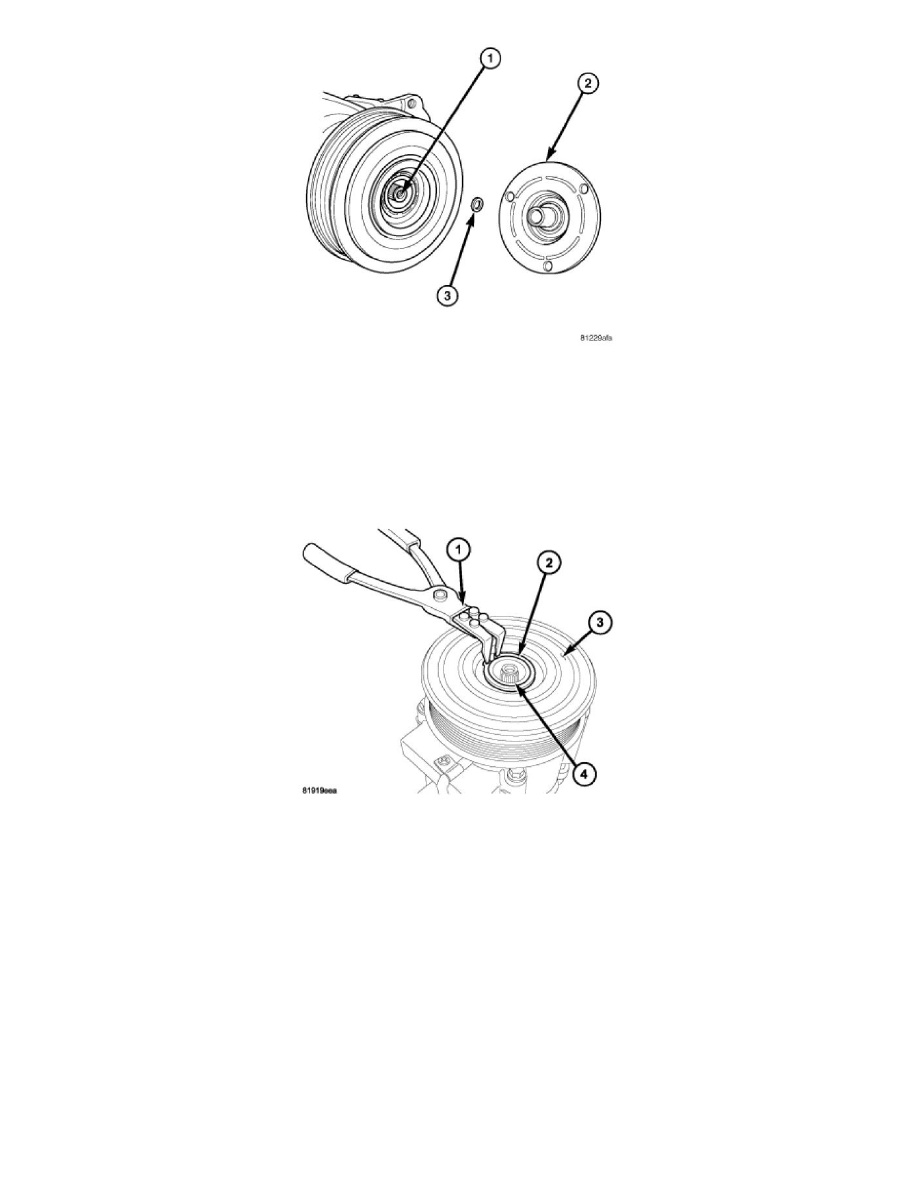
CAUTION: Do not pry between the clutch plate and the pulley and bearing assembly to remove the clutch plate from the compressor
shaft as this may damage the clutch plate.
NOTE: Use care not to lose any clutch shim(s) during removal of the clutch plate, as they may be reused during the clutch plate installation
process.
8. Tap the clutch plate (2) lightly with a plastic mallet to release it from the splines on the compressor shaft (1) and remove the clutch plate and
shim(s) (3).
NOTE: The pulley and bearing assembly can be removed from the compressor by hand or, if required, with a two jaw puller.
9. Using Snap Ring Pliers 9764 or equivalent (1), remove the snap ring (2) that secures the pulley and bearing assembly (3) to the front of the A/C
compressor (4).
10. Remove the pulley and bearing assembly from the front of the A/C compressor. If required, install a two jaw puller and turn the puller center-bolt
clockwise until the pulley and bearing assembly is completely removed.
Visteon A/C Compressor
VISTEON A/C COMPRESSOR
NOTE: The compressor clutch assembly can be serviced with the refrigerant system fully-charged.