
Nitro 2WD V6-4.0L (2007)
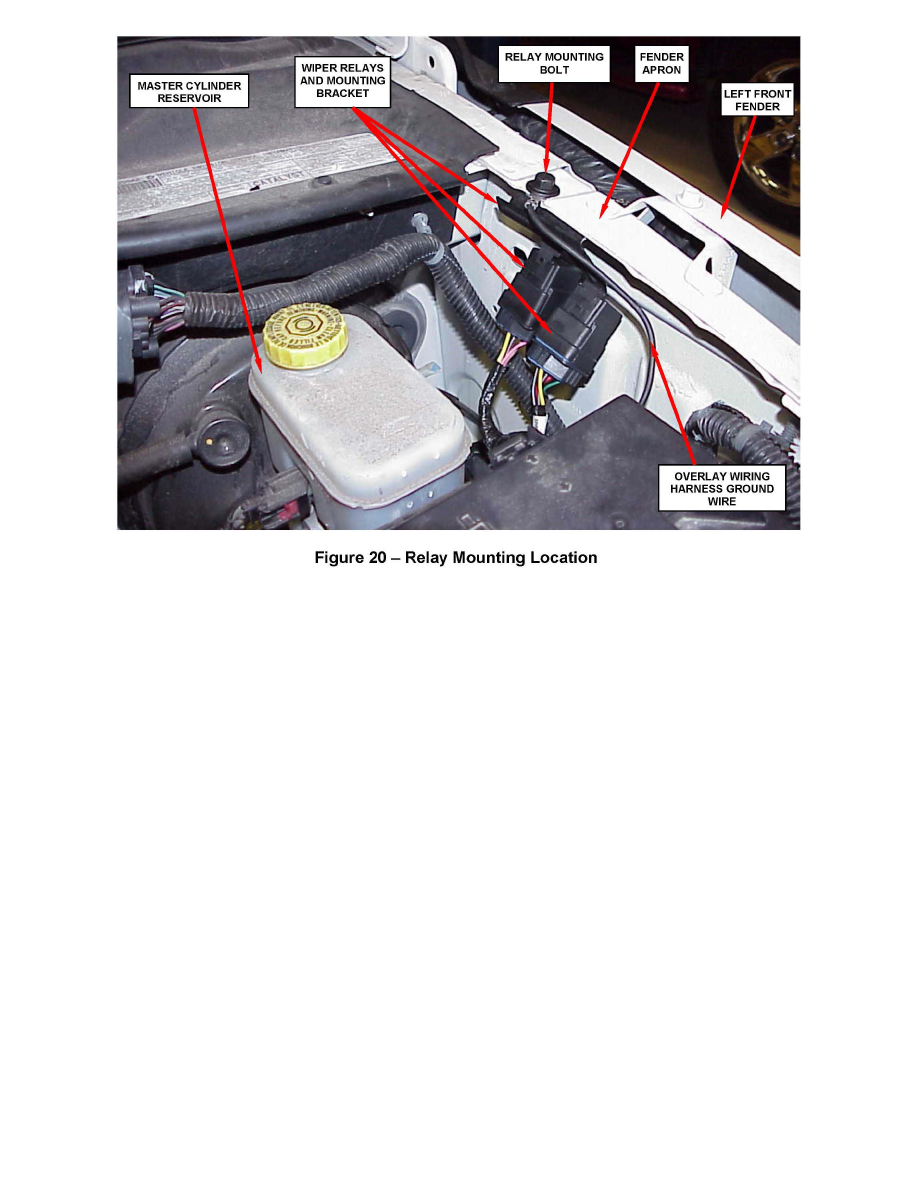
14. Install the relay bracket and ground wire from the overlay wiring harness using the supplied bolt into the existing hole on the left fender apron
(Figure 20). Tighten the bolt to 195 in. lbs. (22 N.m).
15. Carefully bend the relay bracket so that the relays are point downward approximately 45 degrees (Figure 20).
16. Connect the negative battery cable.
17. Continue with Section B to reprogram the TIPM with wiTECH, Section C to reprogram the TIPM with StarSCAN or Section D to reprogram the
TIPM
with StarMOBILE.
NOTE:
The TIPM must be reprogrammed before the windshield wipers will
operate.
B. Install TIPM Wiper Relay and Overlay Wiring Harness
CAUTION:
The TIPM may not support "abort - recovery" mode. If this flash
process is interrupted/aborted and you are unable to read the TIPM Flash Part Number, the TIPM may be damaged beyond repair and may require
replacement. Always verify if the module has truly been damaged beyond
repair by attempting to restart the flash process.
1. Open the hood. Install a battery charger and verify that the charging rate provides 13.2 to 13.5 volts. Do not allow the charger to time out during the
flash process. Set the battery charger timer (if so equipped) to continuous charge.
NOTE:
Use an accurate stand-alone voltmeter. The battery charger
voltmeter may not be sufficiently accurate. Voltages outside of the specified range will cause an unsuccessful flash. If voltage reading is too high, apply
an electrical load by activating the park or headlamps and/or HVAC blower motor to lower the voltage.
2. Connect the wiPOD to the vehicle data link connector.