
RAM 1500 Truck 2WD V6-3.9L VIN X (1999)
2.
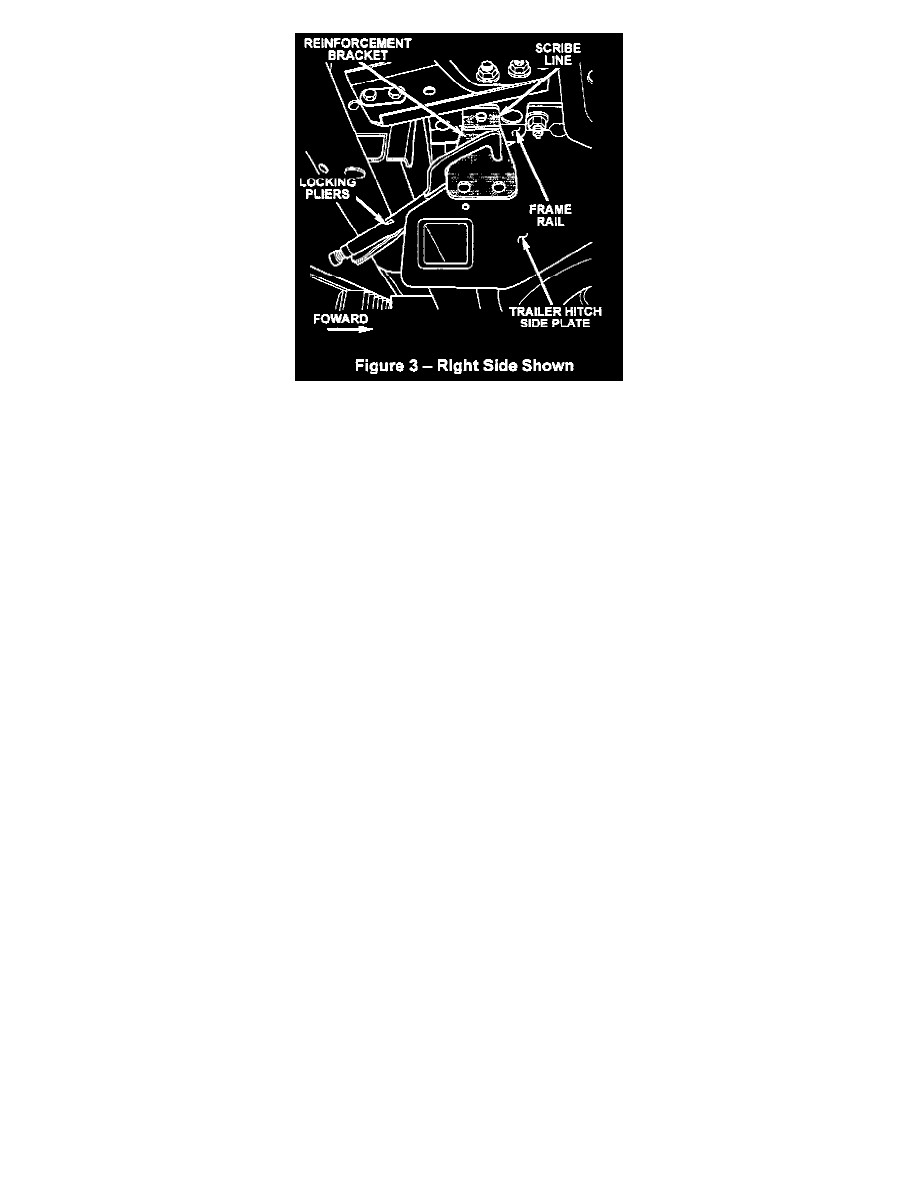
Position the front edge of the reinforcement bracket at the scribe line made on the frame rail in Step 1 (Figure 3).
NOTE:
If either of the reinforcement brackets interfere with the bumper brackets, loosen the trailer hitch mounting nuts and center the hitch as required.
Tighten mounting nuts to 80 ft. lbs. (108 Nm).
3.
With the reinforcement bracket tight up against the frame rail, clamp the reinforcement bracket tot he trailer hitch side plate (Figure 3).
4.
Using the clamped reinforcement bracket as a template, center punch the location for the two holes in the side plate of the trailer hitch assembly.
CAUTION:
Before drilling the left side holes into the side plate, check the trailer wiring harness routing to prevent damaging the harness.
5.
With the bracket still in place, use a 3/16 inch (4.76 mm) diameter drill bit to drill two (2) pilot holes in the side plate. Use the center punch marks
as a guide.
NOTE:
To make drilling easier, use hardened drill bits or a 3/16-1/2 inch step drill (UNIBIT(R), etc.). If using a step drill, a 3/16 inch pilot hole is still
required.
6.
Enlarge the two holes to 1/2 inch (12.7 mm) diameter using the pilot holes made in Step 5 as a guide.
7.
Apply a coat of zinc primer (P/N 4443636) to the bare metal inside of the new holes.
8.
Secure the reinforcement bracket to the side plate with two bolt and washer assemblies and two nut and washer assemblies. The bolt heads must be
facing toward the outside of the vehicle. Tighten the nuts to 80 ft. lbs. (108 Nm).
CAUTION:
Do not apply any type of lubricant or anti-seize to the bolt threads.
9.
Remove the reinforcement bracket retaining clamp.