
RAM 1500 Truck 2WD V6-3.9L VIN X (1999)
Camshaft: Service and Repair
Camshaft Replacement
REMOVAL
1. Disconnect battery negative cable.
2. Drain cooling system. Refer to Cooling System for the correct procedure.
3. Remove radiator.
4. Remove intake manifold.
5. Remove distributor assembly.
6. Remove cylinder head covers.
7. Remove rocker arms.
8. Remove push rods and tappets. Identify each part so it can be installed in the original locations.
9. Remove timing chain cover.
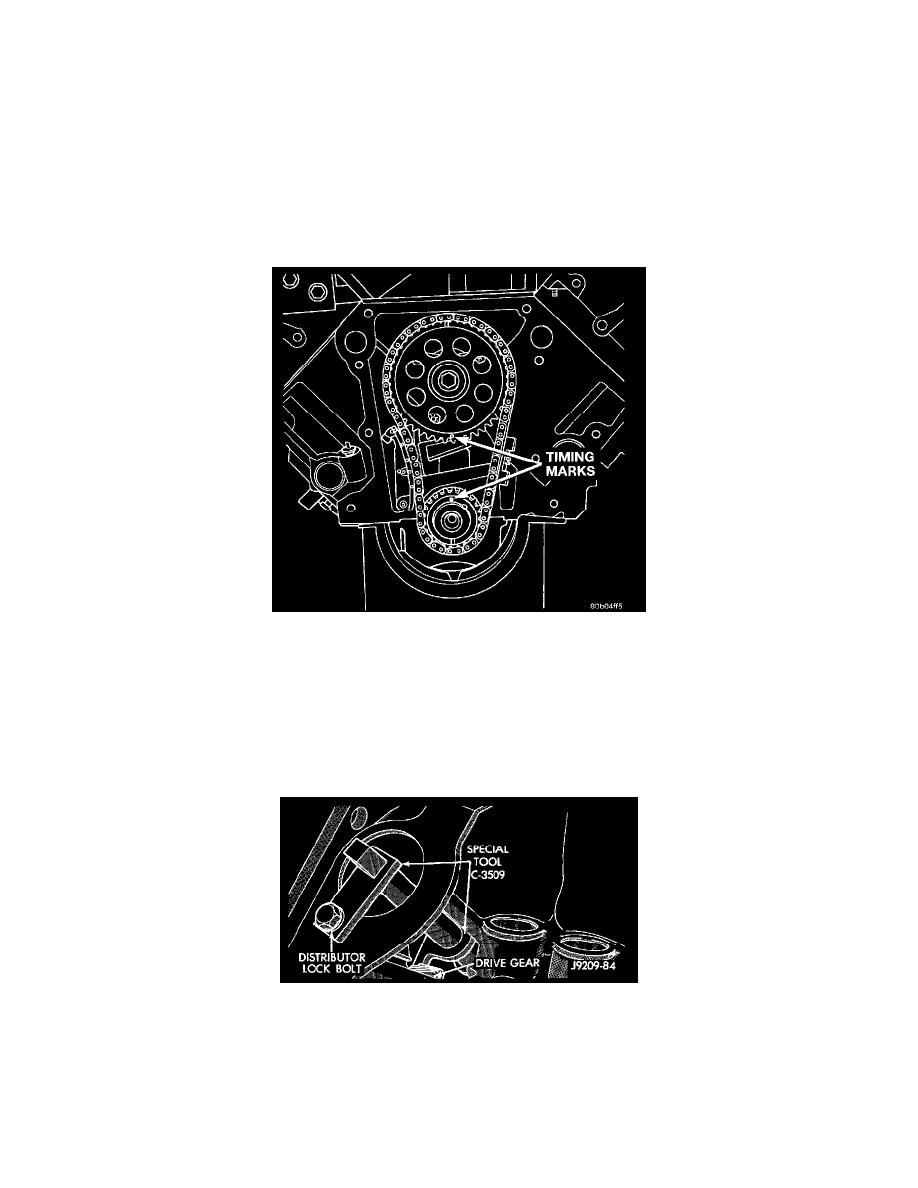
Alignment Of Timing Marks
10. Align timing marks and remove timing chain and sprockets.
11. Remove the three tensioner to block mounting bolts and remove tensioner.
12. Install a long bolt into front of camshaft to facilitate removal of the camshaft. Remove camshaft, being careful not to damage cam bearings with
the cam lobes.
INSTALLATION
1. Lubricate camshaft lobes and camshaft bearing journals and insert the camshaft to within 51 mm (2 inches) of its final position in cylinder block.
Camshaft Holding Tool C-3509 (Installed Position)
2. Install Camshaft Gear Installer Tool C-3509 with tongue back of distributor drive gear.
3. Hold tool in position with a distributor lockplate bolt. This tool will restrict camshaft from being pushed in too far and prevent knocking out the
welch plug in rear of cylinder block. Tool should remain installed until the camshaft and crankshaft sprockets and timing chain have been installed.
4. Install timing chain tensioner. Torque bolts to 24 Nm (210 inch lbs.) torque.