
RAM 1500 Truck 2WD V8-5.7L VIN 2 (2006)
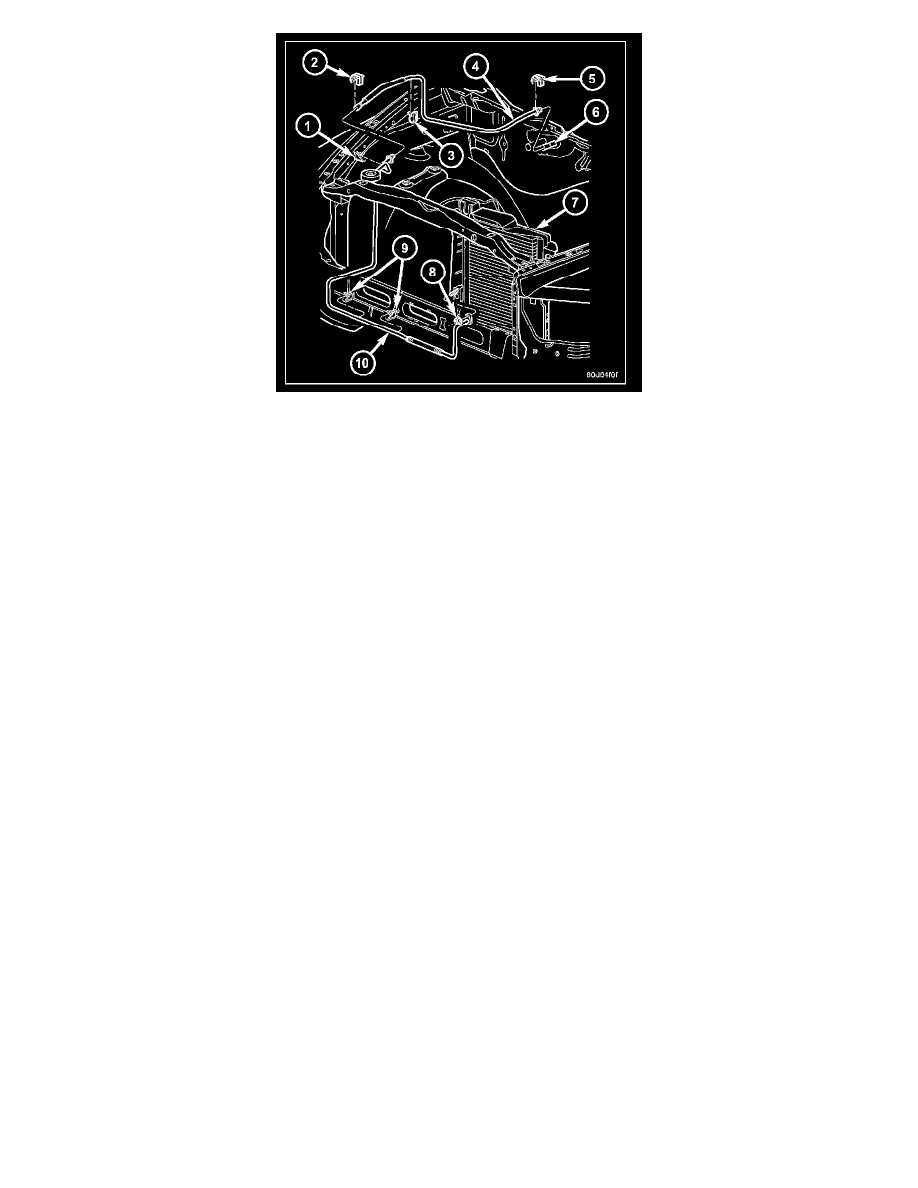
1. Position the front section of the A/C liquid line (10) into the engine compartment.
2. Remove the tape or plugs from the opened ends of the A/C liquid lines and the condenser outlet port.
3. Lubricate new O-ring seals with clean refrigerant oil and install them onto the front liquid line spring-lock coupler fitting. Use only the specified
seals as they are made of a special material for the R-134a system. Use only refrigerant oil of the type recommended for the A/C compressor in the
vehicle.
4. Connect the front section of the A/C liquid line to the rear section of the liquid line (4).
5. Install the secondary retaining clip (2) onto the spring-lock coupler that secures the front section of the A/C liquid line onto the rear section of the
liquid line.
6. Engage the A/C liquid line into the body retaining clips (1 and 9).
7. Lubricate a new O-ring and dual plane seal with clean refrigerant oil and install them onto the front liquid line fitting. Use only the specified seals
as they are made of a special material for the R-134a system. Use only refrigerant oil of the type recommended for the A/C compressor in the
vehicle.
8. Connect the front section of the A/C liquid line to the outlet port of the A/C condenser (7).
9. Install the nut (8) that secures the A/C liquid line to the A/C condenser. Tighten the nut to 20 N.m (15 ft. lbs.).
10. Install the plastic cover onto the condenser outlet stud.
11. If equipped with a gasoline engine, install the air filter housing mounting bracket and air filter housing.
12. If equipped with the diesel engine, install the passenger side battery tray.
13. Reconnect the negative battery cable(s).
14. Evacuate the refrigerant system.
15. Charge the refrigerant system.
REAR SECTION
REMOVAL