
RAM 1500 Truck 2WD V8-5.7L VIN 2 (2006)
2. Remove cover over electrical connectors. Cover snaps onto PCM.
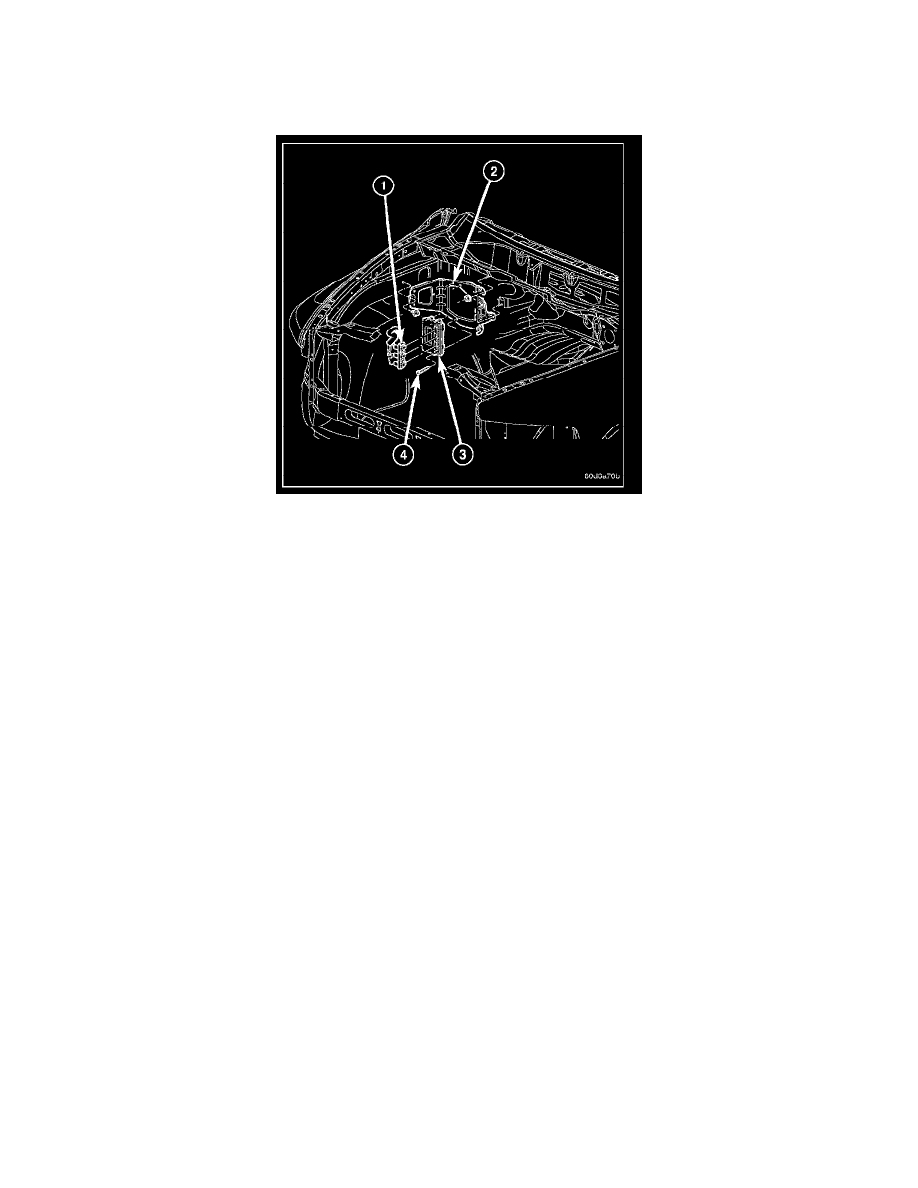
3. Carefully unplug the three 32-way connectors (four 38-way connectors if equipped with NGC) from PCM (1).
4. Remove three PCM mounting bolts (4) and remove PCM from vehicle.
INSTALLATION
1. Install PCM (3) and 3 mounting bolts (4) to vehicle.
2. Tighten bolts. Refer to torque specifications.
3. Check pin connectors in the PCM and the three 32-way connectors (four 38-way connectors if equipped with NGC) for corrosion or damage. Also,
the pin heights in connectors should all be same. Repair as necessary before installing connectors.
4. Install three 32-way connectors (four 38-way connectors if equipped with NGC).
5. Install cover over electrical connectors. Cover snaps onto PCM.
6. Install negative battery cable.
7. The 5.7L V-8 engine is equipped with a fully electronic accelerator pedal position sensor. If equipped with a 5.7L, also perform the following 3
steps:
a. Connect negative battery cable to battery.
b. Turn ignition switch ON, but do not crank engine.
c. Leave ignition switch ON for a minimum of 10 seconds. This will allow PCM to learn electrical parameters.
d. The scan tool may also be used to learn electrical parameters. Go to the Miscellaneous menu, and then select ETC Learn.
8. If the previous step is not performed, a Diagnostic Trouble Code (DTC) will be set.
9. If necessary, use a scan tool to erase any Diagnostic Trouble Codes (DTC's) from PCM. Also use the scan tool to reprogram new PCM with
vehicles original Vehicle Identification Number (VIN) and original vehicle mileage.