
RAM 1500 Truck 2WD V8-5.7L VIN 2 (2006)
LATCH PLATE OR ANCHOR PLATE. REPLACE ANY CHILD RESTRAINT ANCHOR OR THE UNIT TO WHICH THE ANCHOR IS
INTEGRAL THAT HAS BEEN BENT OR DAMAGED. NEVER ATTEMPT TO REPAIR A SEAT BELT OR CHILD RESTRAINT
COMPONENT. ALWAYS REPLACE DAMAGED OR FAULTY SEAT BELT AND CHILD RESTRAINT COMPONENTS WITH THE
CORRECT, NEW AND UNUSED REPLACEMENT PARTS LISTED IN THE DAIMLERCHRYSLER MOPAR PARTS CATALOG.
NOTE:
-
The only component of this seat belt and retractor unit that is available for individual service replacement is the plastic web stop button that
prevents the latch plate from falling to the floor while in the stored position. Refer to the instructions supplied with the service kit for the proper
web stop button replacement procedures.
-
The following procedure is for replacement of a faulty or damaged seat belt and retractor unit. The front retractor also includes a seat belt
tensioner. If the front seat belt or retractor is faulty or damaged, but the seat belt tensioner is not deployed, review the recommended procedures
for handling non-deployed supplemental restraints. If the seat belt tensioner has been deployed, review the recommended procedures for service
after a supplemental restraint deployment before removing the unit from the vehicle.
-
The seat belt retractor on the driver's side of all standard cab models includes a tension reducer. All seat belt retractors except the driver's side
front retractor include a switchable automatic locking mechanism.
REMOVAL
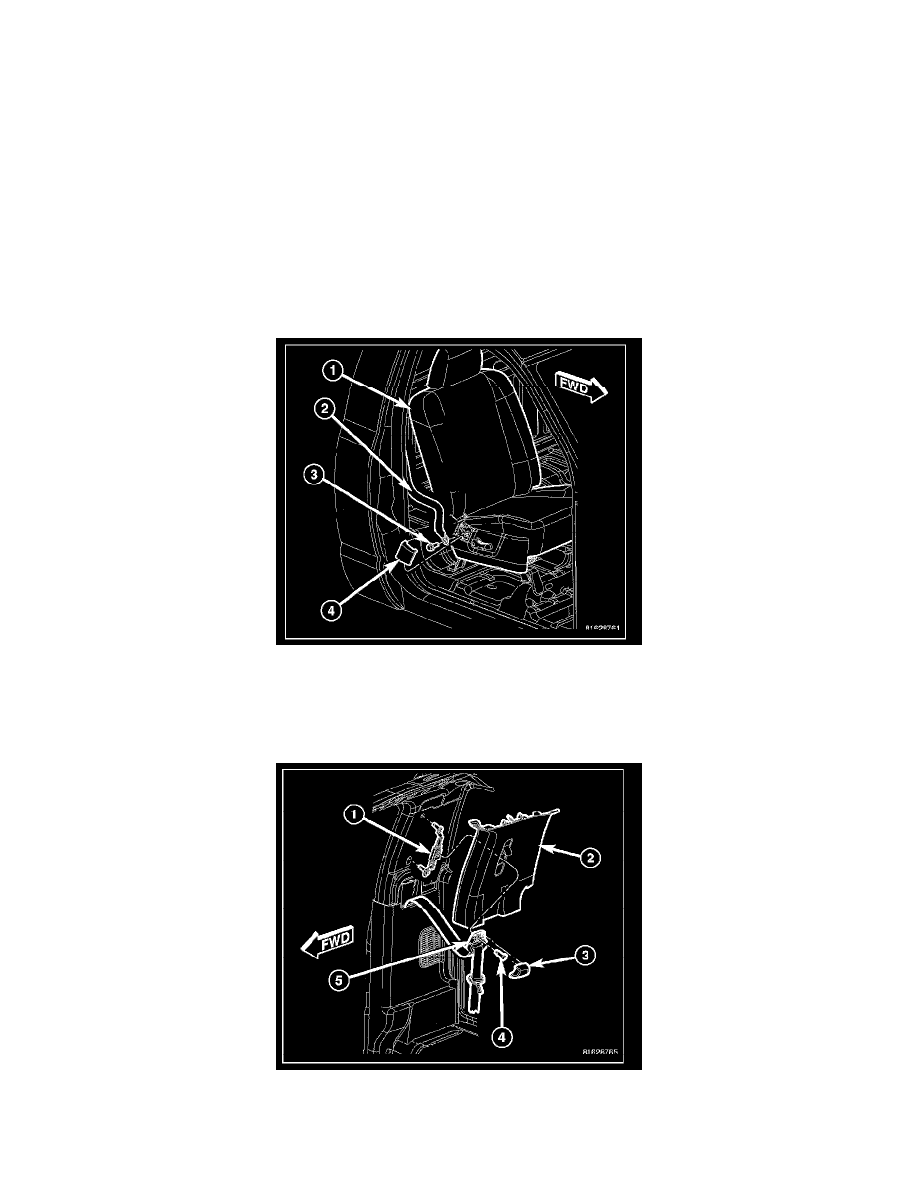
1. Adjust the front seat (1) to its most forward position for easiest access to the front seat belt (2) lower anchor cover (4) and the B-pillar trim.
2. Disconnect and isolate the battery negative cable. Wait two minutes for the system capacitor to discharge before further service.
3. Remove the stowage tray from the rear floor panel behind the seat.
4. Grasp the upper edge of the lower anchor cover and pull upward to unsnap it from the front seat cushion outboard side shield.
5. Remove the screw (3) that secures the lower anchor to the outboard side of the front seat cushion frame.
6. Unsnap the trim cover (3) from the front seat belt turning loop (5) and discard.
7. Remove the screw (4) that secures the seat belt turning loop to the height adjuster (1) on the upper B-pillar.
8. Remove the seat belt turning loop from the height adjuster.