
RAM 1500 Truck 2WD V8-5.7L VIN 2 (2006)
Clutch Disc: Service and Repair
DISC CLUTCH REMOVAL
1. Support engine with wood block and adjustable jack stand, to prevent strain on engine mounts.
2. Remove transmission and transfer case, if equipped.
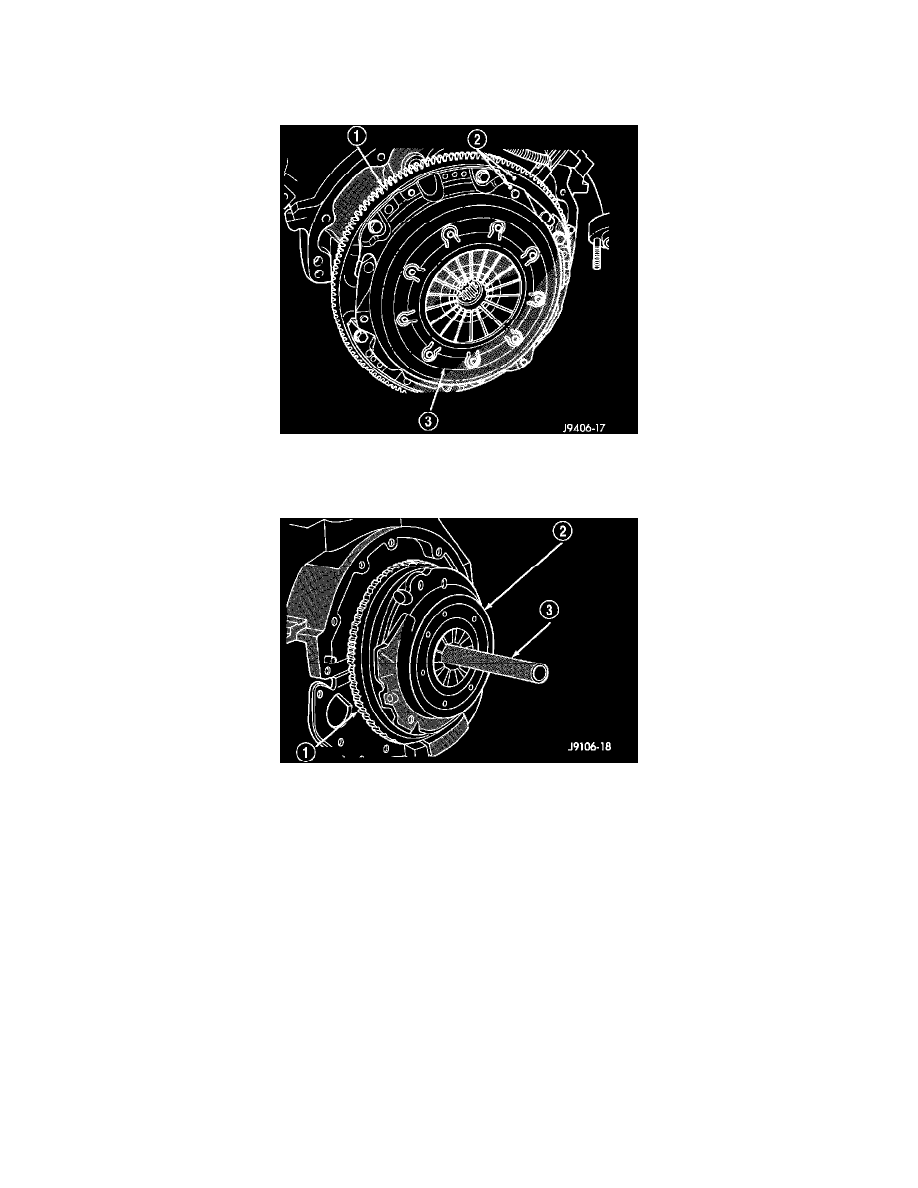
3. If pressure plate (3) will be reused, mark (2) the position on flywheel (1) with paint or scriber. Also note location marks on the pressure next to the
bolt holes. The mark will be a L or a circle with an X in it.
4. Insert clutch alignment tool (3) through pressure plate (2) and into pilot bushing, to hold disc in place while removing bolts.
5. Loosen pressure plate bolts evenly, a few threads at a time and in a diagonal pattern to prevent warping the plate.
6. Remove bolts completely and remove pressure plate, disc and alignment tool.
INSTALLATION
CAUTION: Before installing a clutch disc on 5.9 L Diesel with Dual Mass Flywheel and self-adjusting pressure plate, the pressure plate must be
reset. Failure to reset the pressure will result in damage to the clutch disc.
1. Check runout and free operation of new clutch disc.
2. Lubricate crankshaft pilot bearing with a NLGI-2 rated grease.
3. Install clutch alignment tool in clutch disc hub with the raised side of hub is facing away from the flywheel.
NOTE: Flywheel side is imprinted on the disc face.