
RAM 1500 Truck 4WD V8-5.2L VIN Y (1997)
4. Apply Mopar Silicone Rubber Adhesive Sealant, or equivalent, to the four corner joints. An excessive amount of sealant is not required to ensure a
leak proof seal. However, an excessive amount of sealant may reduce the effectiveness of the flange gasket. The sealant should be slightly higher
than the cross-over gaskets, approximately 5 mm (0.2 in).
5. Install the front and rear cross-over gaskets onto the dowels.
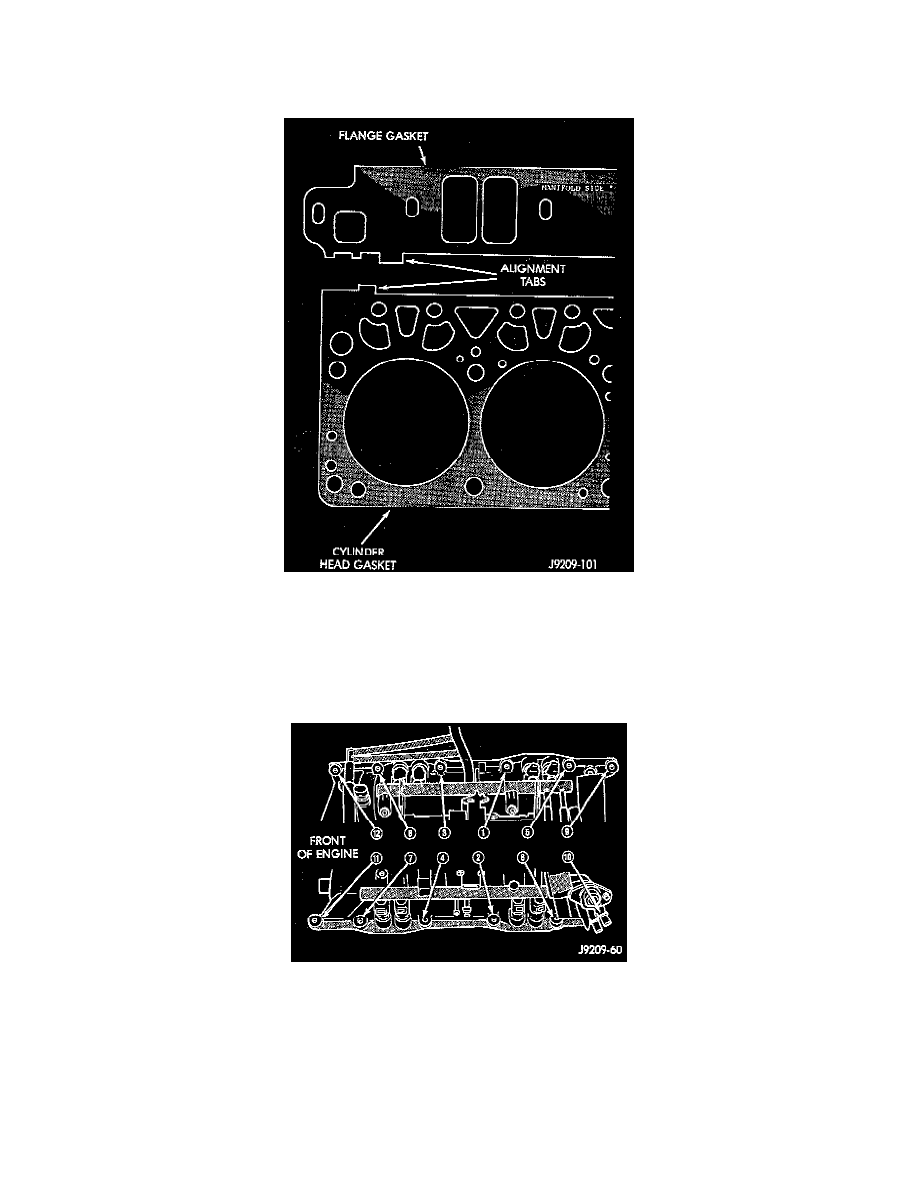
Intake Manifold Flange Gasket Alignment
6. Install the flange gaskets. Ensure that the vertical port alignment tab is resting on the deck face of the block. Also the horizontal alignment tabs
must be in position with the mating cylinder head gasket tabs. The words MANIFOLD SIDE should be visible on the center of each flange gasket.
7. Carefully lower intake manifold into. position on the cylinder block and cylinder heads. Use the alignment dowels in the cross-over gaskets to
position the intake manifold. After intake manifold is in place, inspect to make sure seals are in place.
8. Install the intake manifold bolts and tighten as follows:
Intake Manifold Bolt Tightening Sequence
Step 1 - Tighten bolts 1 through 4, in sequence, to 8 Nm (72 in. lbs.) torque. Tighten in alternating steps 1.4 Nm (12 in. lbs.) torque at a time.
Step 2 - Tighten bolts 5 through 12, in sequence, to 8 Nm (72 in. lbs.) torque.
Step 3 - Check that all bolts are tightened to 8 Nm (72 in. lbs.) torque.
Step 4 - Tighten all bolts, in sequence, to 16 Nm (12 ft. lbs.) torque.
Step 5 - Check that all bolts are tightened to 16 Nm (12 ft. lbs.) torque.
9. Install closed crankcase ventilation and evaporation control systems.
10. Connect the coil wires.