
RAM 1500 Truck 4WD V8-5.7L VIN D (2005)
process.
6. Tap the clutch plate (2) lightly with a plastic mallet to release it from the splines on the compressor shaft (1). Remove the clutch plate and shim(s)
(3) from the compressor shaft.
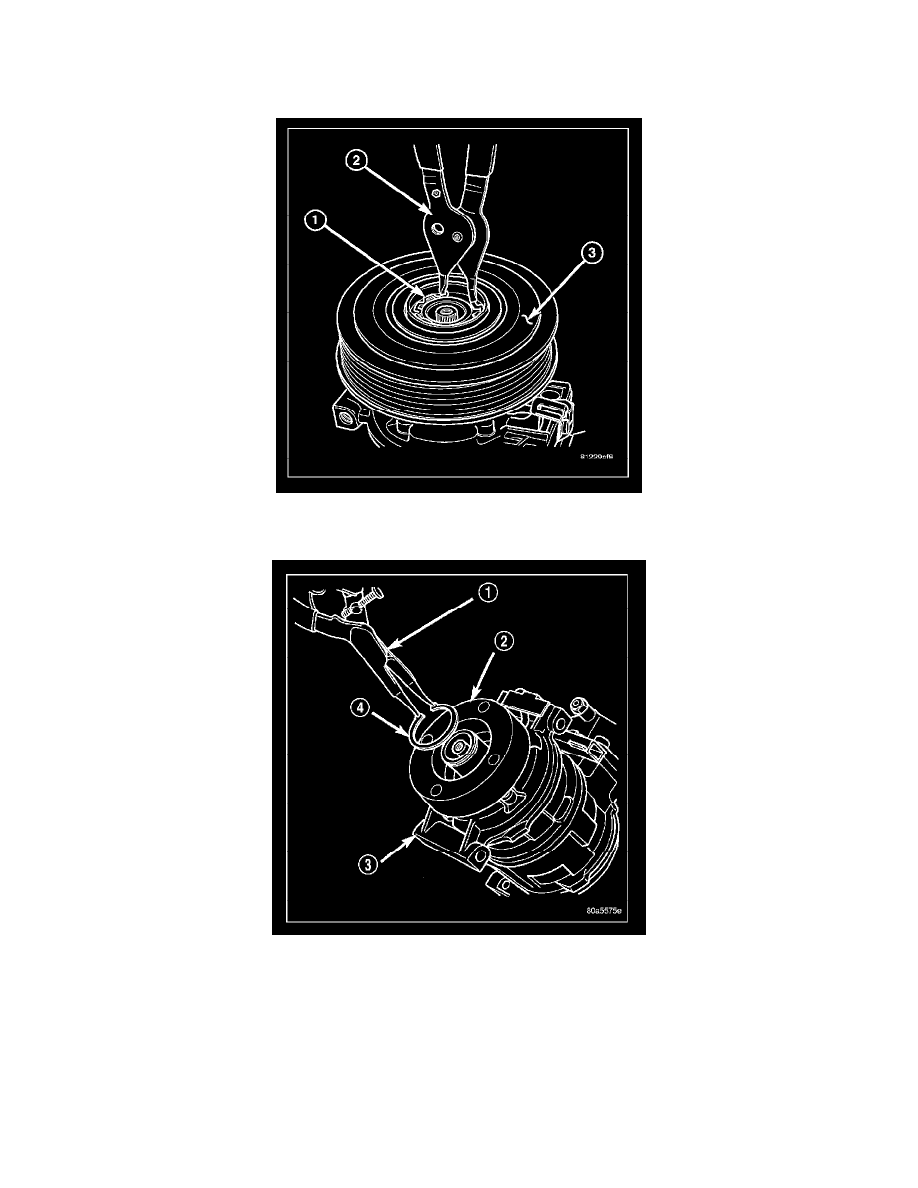
7. Using snap ring pliers (Special Tool C-4574 or equivalent) (2), remove the external snap ring (1) that secures the pulley and bearing assembly (3)
to the front cover of the A/C compressor, then slide the pulley and bearing assembly off of the A/C compressor.
8. Remove the screw that secures the clutch coil pigtail wire connector bracket and ground clip to the top of the compressor housing (3).
9. Using snap ring pliers (Special Tool C-4574 or equivalent) (1), remove the external snap ring (4) that secures the clutch field coil (2) to the front
cover of the compressor housing, then slide the clutch field coil off of the A/C compressor.
INSTALLATION