
RAM 1500 Truck 4WD V8-5.7L VIN D (2005)
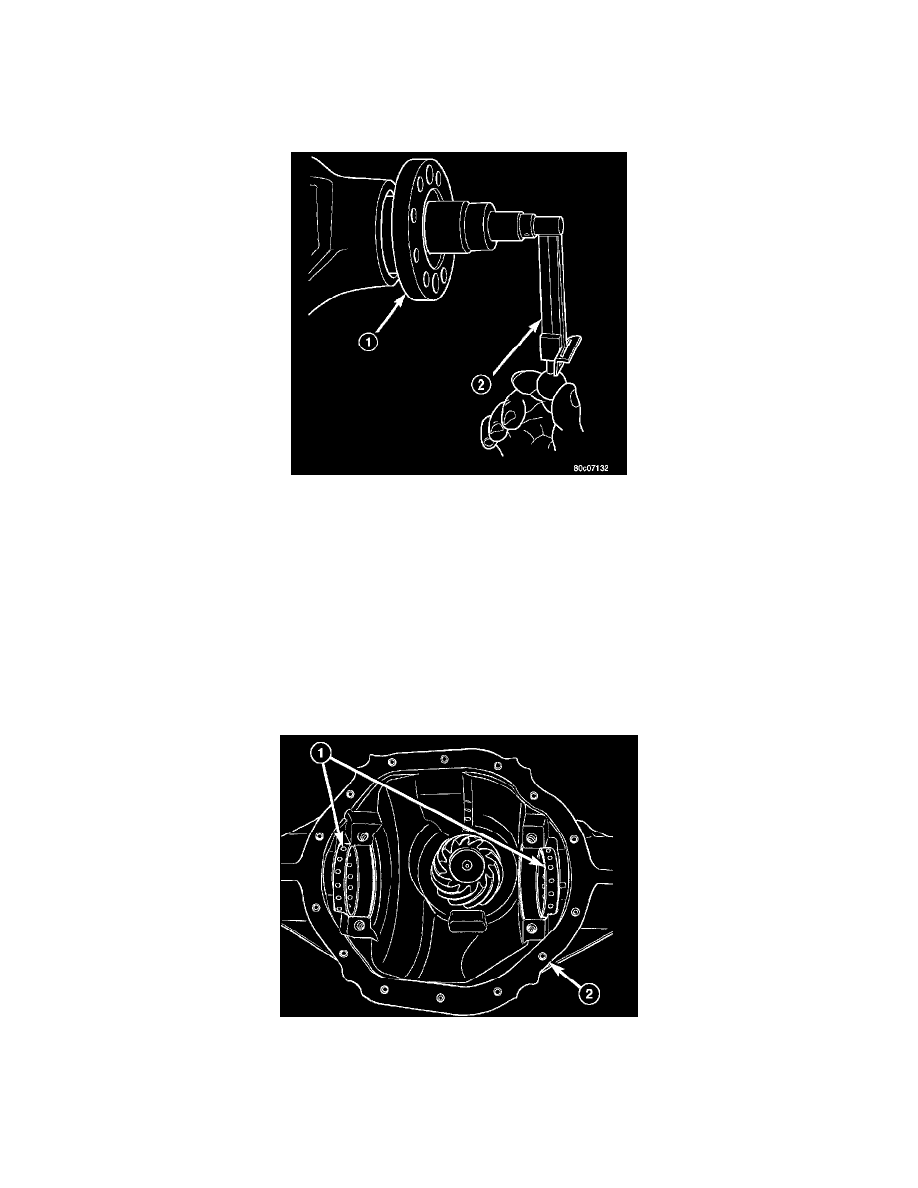
holder is held to the flange.
5. Install a new pinion nut onto the pinion shaft and tighten the pinion nut until there is zero bearing end-play
CAUTION: Do not exceed 271 Nm (200 ft. lbs.) the minimum tightening torque when installing the companion flange at this point. Never
loosen pinion nut to decrease pinion bearing rotating torque and never exceed specified preload torque. Failure to these instruction will damage the
axle.
6. Record pinion rotating torque using an inch pound torque wrench (2). The rotating torque should be equal to the reading recorded during removal
plus an additional 0.56 Nm (5 inch lbs.).
7. If rotating torque is low, tighten the pinion nut in 6.8 Nm (5 ft. lbs.) increments until the proper rotating torque is achieved.
CAUTION: If maximum tightening torque 475 Nm (350 ft. lbs.) is reached prior to reaching the required rotating torque, the collapsible spacer
may have been damaged. Failure to these instruction will damage the axle.
8. Install propeller shaft.
Seal - Axle Shaft
SEAL-AXLE SHAFT
REMOVAL
1. Remove hub bearings and axle shafts.
2. Remove differential from differential housing (2).
3. Remove differential bearing adjusters (1).