
RAM 1500 Van V6-239 3.9L Magnum (1995)
3.
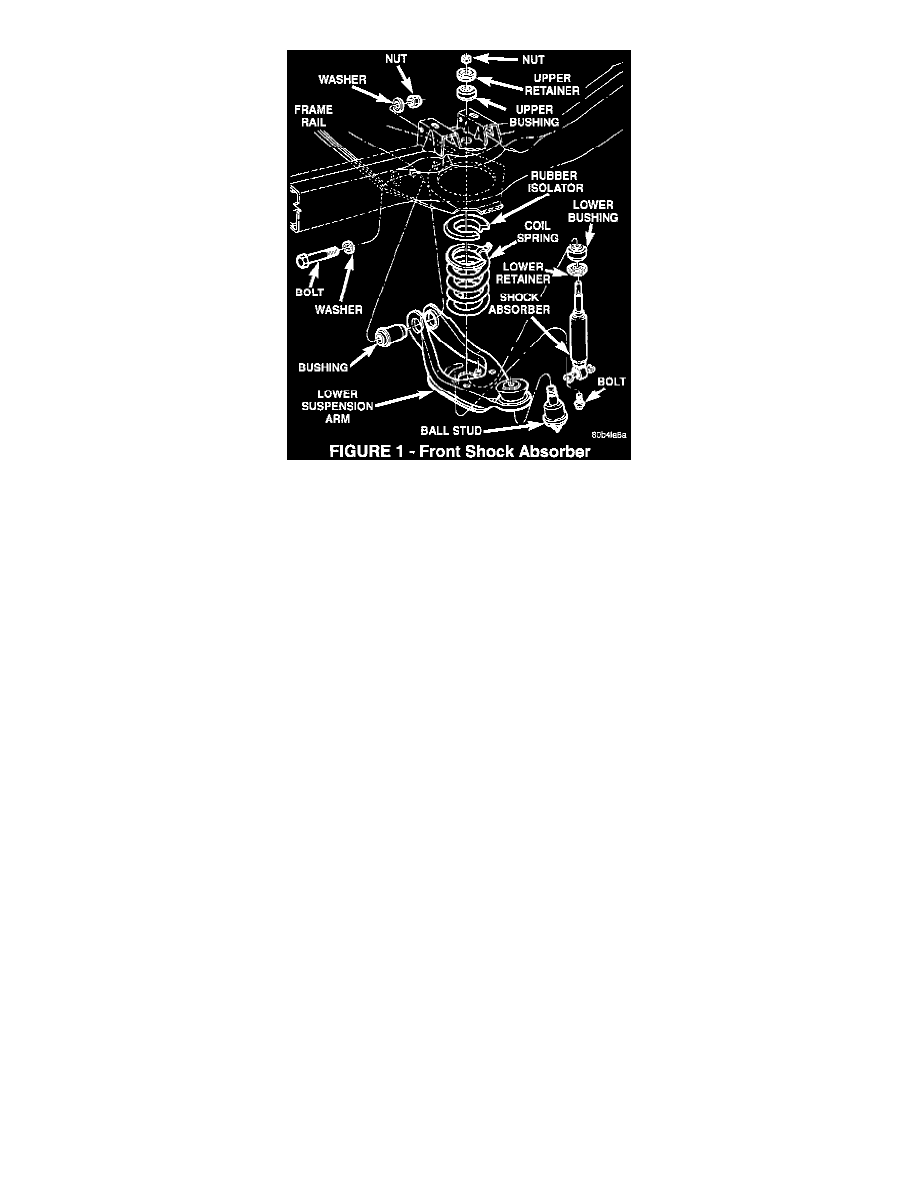
Remove the nut, retainer, and bushing from the shock absorber upper stud (Figure 1).
4.
Remove the lower bushing and retainer.
5.
Install the lower bushing retainer, p/n 52039233, onto the upper stud of the shock absorber. Then install the lower bushing, p/n 52039187, onto the
upper stud of the shock absorber. Insert the shock absorber stud through the frame hole.
6.
Install the lower shock bolts and tighten to 27 N.m (20 ft. lbs.).
7.
Install the upper bushing, p/n 52039223, and retainer, p/n 52039232, onto the shock absorber stud. Install the nut and tighten the nut to 34 N.m (25
ft. lbs.).
8.
Install the tire and wheel assembly onto the vehicle and tighten the lugs nuts according to the procedures identified in Group 22 of the appropriate
Service Manual. Then, lower the vehicle.
Repair Procedure B
1.
Raise and support the vehicle.
2.
Remove the front wheel and tire assembly.
3.
Remove the shock absorber (see Repair Procedure A).
4.
Disconnect the stabilizer bar and control arm strut bar from the lower suspension arm.
5.
Install Spring Compressor DD-1278 up through the lower suspension arm and coil spring and compress the spring.
NOTE:
THIS WILL RETAIN THE SPRING IN PLACE UNTIL THE LOWER SUSPENSION ARM IS DETACHED FROM AND LOWERED
FOR SPRING REMOVAL.
6.
Remove the inboard lower control arm nut and bolt assembly.
7.
Remove the spring compressor tool, coil spring and isolator pad from the vehicle.
8.
Position the new isolator pad, p/n 52038732AB, onto the coil spring.
9.
Position the spring in the lower suspension arm well. Be sure that the coil spring is seated in the well.
NOTE:
THE FLAT OR CLOSED END OF THE COIL SPRING IS THE TOP. THE RAMPED OR OPEN END OF THE COIL SPRING IS THE