
RAM 1500 Van V6-3.9L VIN X (1997)
Oil Pan: Service and Repair
Removal and Installation
Removal
1. Disconnect the negative cable from the battery.
2. Remove engine oil dipstick.
3. Remove the engine cover.
4. Remove air cleaner assembly.
5. Remove the engine controller.
6. Raise vehicle on a hoist.
7. Remove the right and left transmission support braces.
8. Loosen the exhaust pipe support bracket.
9. Remove the starter motor.
10. Remove the transmission dust shield.
11. Drain the engine oil.
12. Remove the O2 sensor.
13. Remove the exhaust pipe.
14. Remove the right engine mount nut. Loosen (DO NOT REMOVE) the left engine mount nut.
15. Support the right side of the engine with an adjustable jack stand.
16. Remove the rear engine support (transmission) insulator bolts.
17. Position a transmission jack under the transmission.
18. Raise the transmission and engine jacks as required to allow for the oil pan removal.
19. Remove the oil pan and one-piece gasket.
Installation
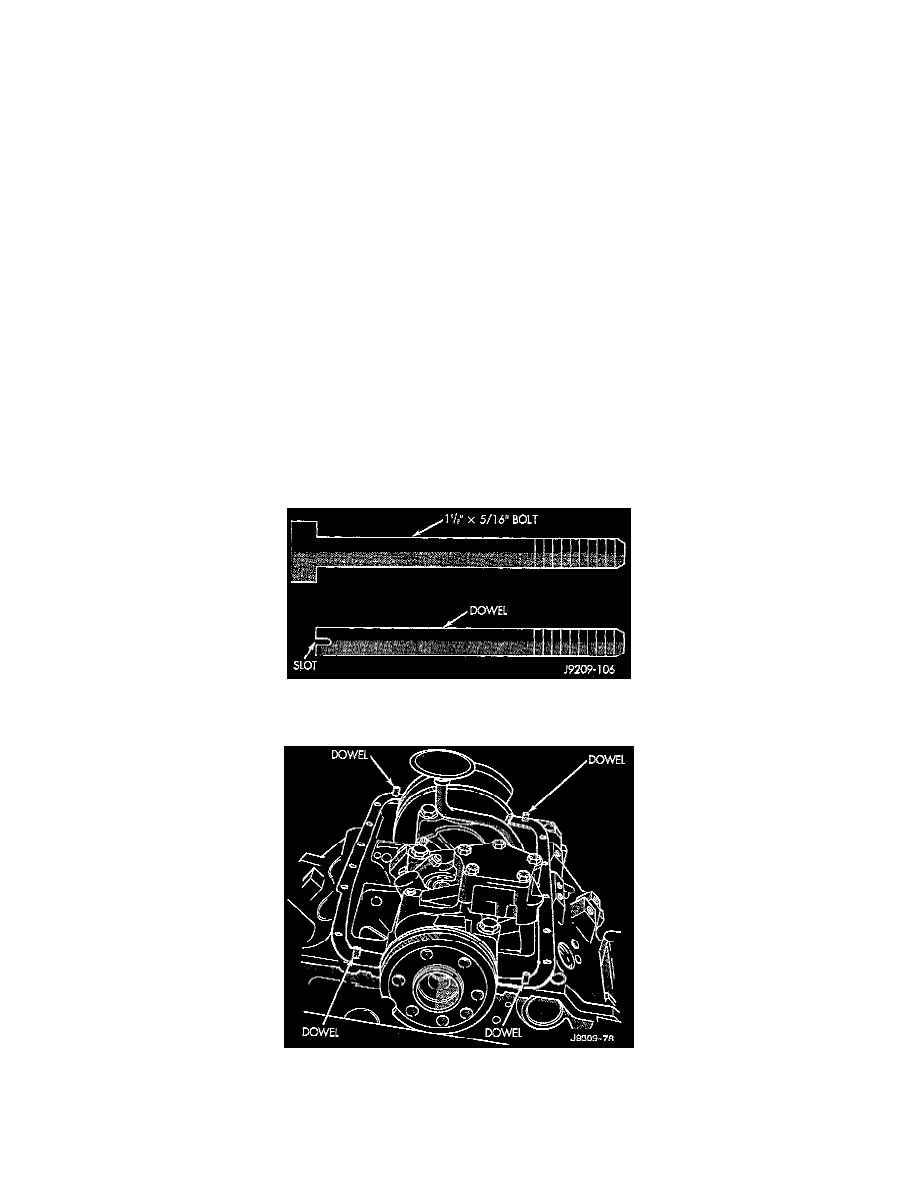
1. Fabricate 4 alignment dowels from 1 1/2 x 5/16 inch bolts. Cut the head off the bolts and cut a slot into the top of the dowel. This will allow easier
installation and removal with a screwdriver.
2. Install the dowels in the cylinder block.
3. Apply small amount of Mopar Silicone Rubber Adhesive Sealant, or equivalent in the corner of the cap and the cylinder block.
4. Slide the one-piece gasket over the dowels and onto the block.
5. Position the oil pan over the dowels and onto the gasket.
6. Install the oil pan bolts. Tighten the bolts to 23 Nm (200 inch lbs.) torque.