
RAM 1500 Van V8-5.2L CNG VIN T (1999)
2. Reconnect the instrument panel wire harness connector to the glove box lamp and switch connector receptacle.
3. Feed the instrument panel wire harness back into the glove box lamp and switch mounting hole in the mounting tab on the glove box opening
upper reinforcement.
4. Align the glove box lamp and switch housing with the mounting hole in the mounting tab on the instrument panel glove box opening upper
reinforcement.
5. Push the glove box lamp and switch into the mounting hole in the mounting tab on the instrument panel glove box opening upper reinforcement
until the retaining latches are fully engaged.
6. Close the glove box.
7. Reconnect the battery negative cable.
Glove Box Roll Down
GLOVE BOX ROLL DOWN
1. Disconnect and isolate the battery negative cable.
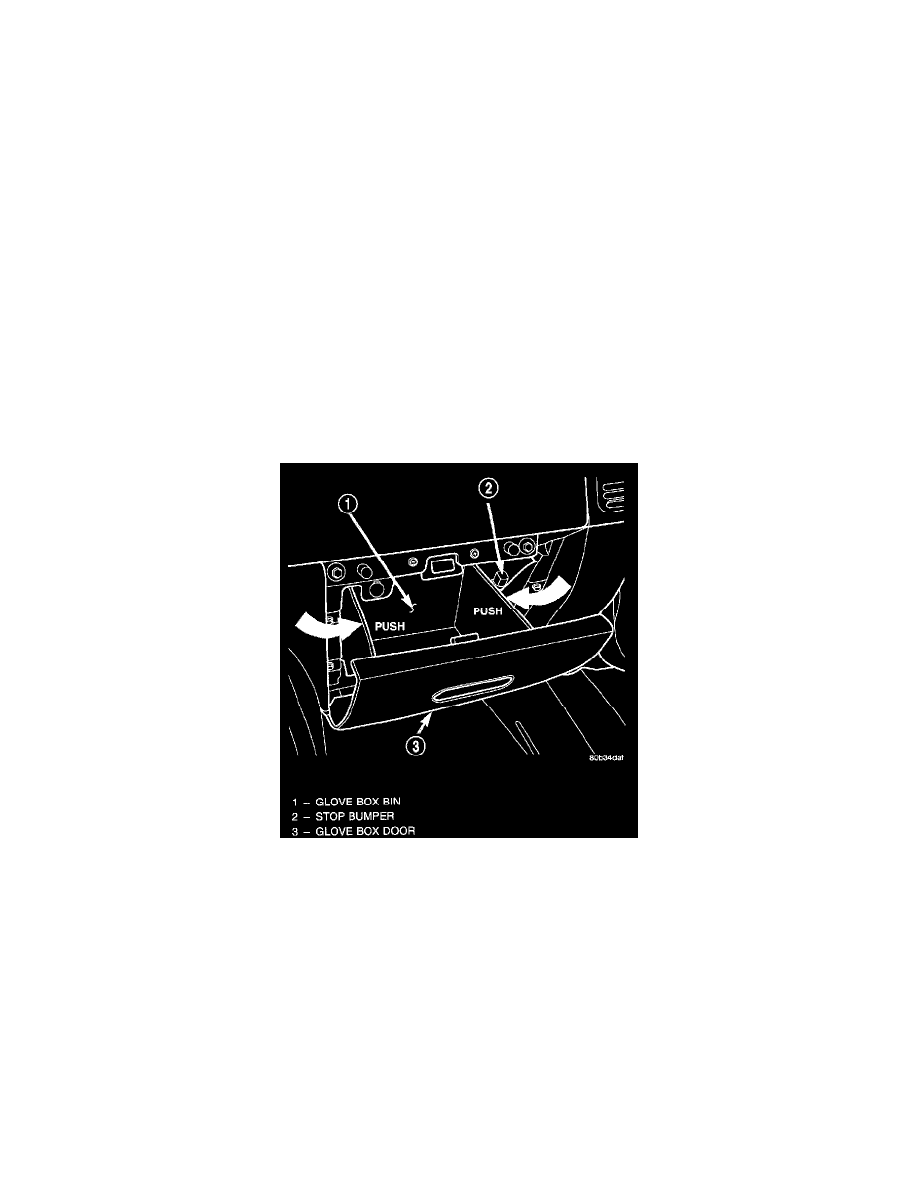
2. Open the glove box.
3. Locate the two rubber stop bumpers on the sides of the instrument panel glove box opening.
Glove Box Roll Down
4. Depress both sides of the glove box bin inwards far enough so that the glove box stops that are integral to each side of the bin can be moved past
the rubber stop bumpers.
5. Holding the sides of the glove box bin depressed, roll the glove box downward until the stops molded into the sides of the glove box bin are
beyond the rubber stop bumpers, then release the sides of the glove box bin.
6. Reverse the roll down procedure to roll the glove box back up into the instrument panel.