
RAM 1500 Van V8-5.2L CNG VIN T (1999)
Note: The crankshaft may have to be rotated from the oil pan to clear the #1&2 journal counterweight on removal.
CLEANING
1. Clean the cylinder block and oil pan mating surfaces.
2. Trim or remove excess sealant film in the rear main cap oil pan gasket groove. DO NOT remove the sealant inside the rear main cap slots.
3. If present, trim excess sealant from inside the engine. Clean oil pan in solvent and wipe dry with a clean cloth. Clean oil screen and pipe
thoroughly in clean solvent. Inspect condition of the screen.
INSPECTION
1. Inspect the oil pan drain plug and hole for stripped or damaged threads. Repair as necessary.
2. Inspect oil pan mounting flange for bends or distortion. Straighten flange, if necessary.
INSTALLATION
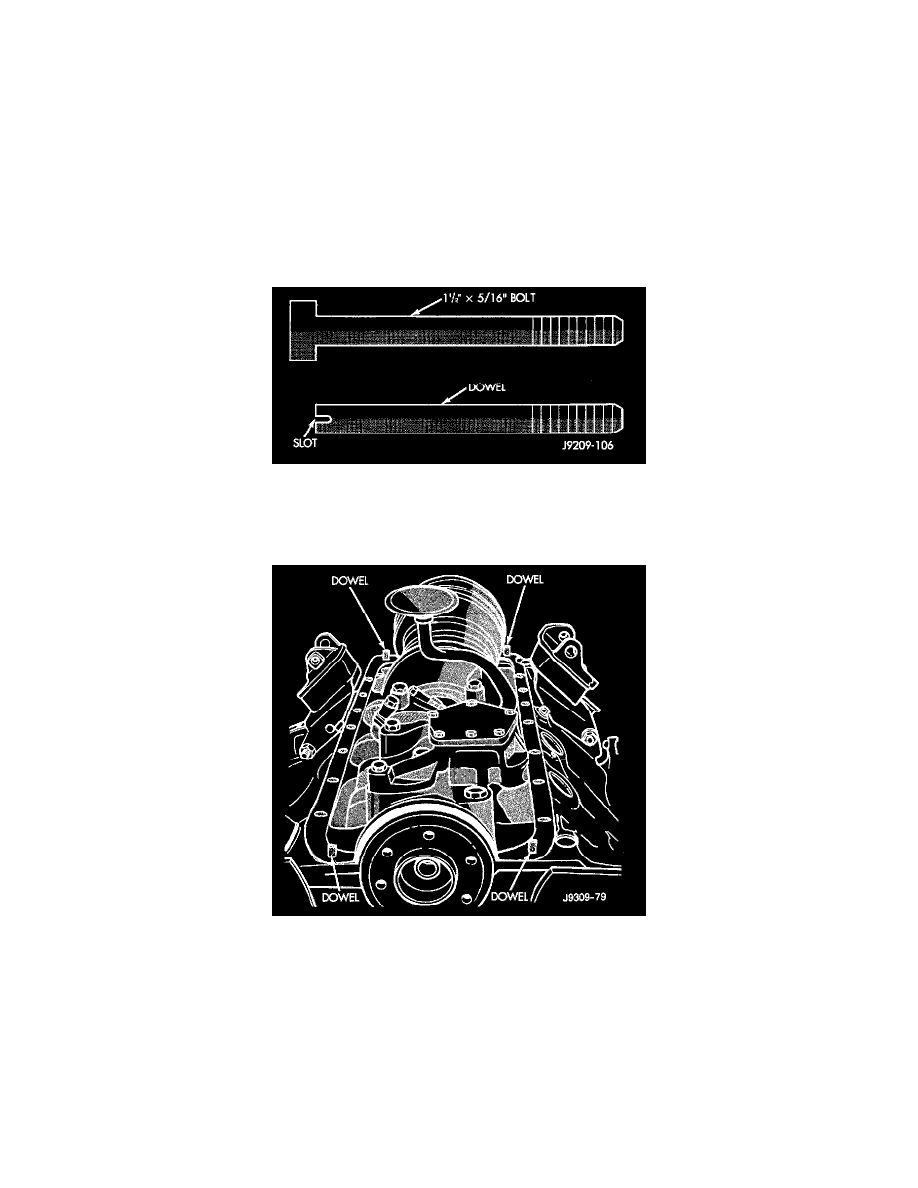
Fabrication Of Alignment Dowels
1. Fabricate four alignment dowels from 5/16 x 1 1/2 inch bolts. Cut the head off the bolts and cut a slot into the top of the dowel. This will allow
easier installation and removal with a screwdriver.
Position Of Dowels In Cylinder Block
2. Install the dowels in the cylinder block.
3. Apply a small amount of Mopar Silicone Rubber Adhesive Sealant, or equivalent in the corner of the cap and the cylinder block.
4. Slide the one piece gasket over the dowels and onto the block.
5. Position the oil pan over the dowels and onto the gasket.
6. Install the oil pan bolts. Tighten the bolts to 24 Nm (215 inch lbs.).
7. Remove the dowels. Install and tighten the remaining pan bolts to 24 Nm (215 inch lbs.).
8. Install and tighten the oil pan drain plug to 34 Nm (25 ft. lbs.).
9. Lower the engine while aligning the engine mount insulators with the brackets.
10. Install the mount insulator nuts and tighten to 102 Nm (75 ft. lbs.).
11. Install the transmission inspection cover.