
RAM 1500 Van V8-5.2L CNG VIN T (1999)
DISASSEMBLY
1.
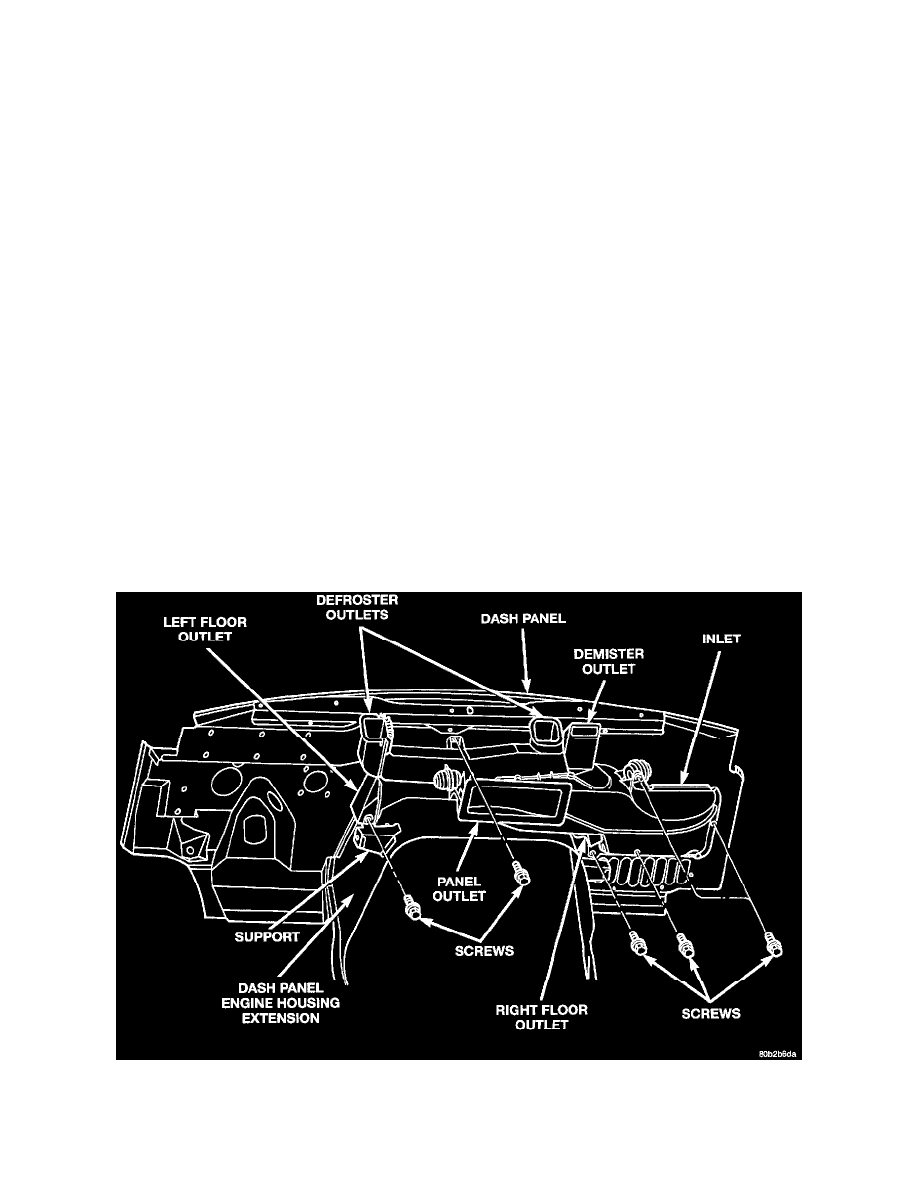
Remove the seals from the inlet flange and the panel outlet flange of the distribution duct.
2.
Remove the fifteen remaining screws that secure the upper half of the distribution duct to the lower half.
3.
Carefully separate the two halves of the distribution duct.
INSPECTION
Examine all of the distribution duct seals for damage. Replace all damaged or deformed seals. Clean all of the upper and lower distribution duct
mating flanges prior to reassembly
Inspect the distribution duct components for damage. Repair or replace any faulty or damaged components as required. Remove any foreign
material or other restrictions to air flow.
ASSEMBLY
1. Position the upper half of the distribution duct over the lower half. Be certain that the pivot shafts for both mode doors are in their proper
positions.
2. Install fifteen of the screws that secure the upper half of the distribution duct to the lower half, leaving out the screw on the left rear corner of the
duct that also secures the vacuum harness retaining strap. Tighten the mounting screws to 2.2 Nm (20 in. lbs.).
3. Install new seals on the inlet flange and the panel outlet flange of the distribution duct.
INSTALLATION
1. Position the distribution duct to the dash panel.
2. Install the four screws that secure the distribution duct to the right side of the dash panel. Tighten the mounting screws to 2.7 Nm (24 in. lbs.).
Distribution Duct Remove/Install
3. Install the one screw that secures the left floor outlet of the distribution duct to the instrument panel support on the left side of the dash panel
engine housing extension, and the one screw that secures the distribution duct to the dash panel between the two defroster outlets. Tighten the