
RAM 1500 Van V8-5.2L VIN Y (1999)
Brake Rotor/Disc: Service and Repair
Rotor Removal and Installation
REMOVAL
1. Raise and support vehicle.
2. Remove wheel and tire assembly.
3. Remove caliper.
NOTE: Do not allow brake hose to support caliper assembly.
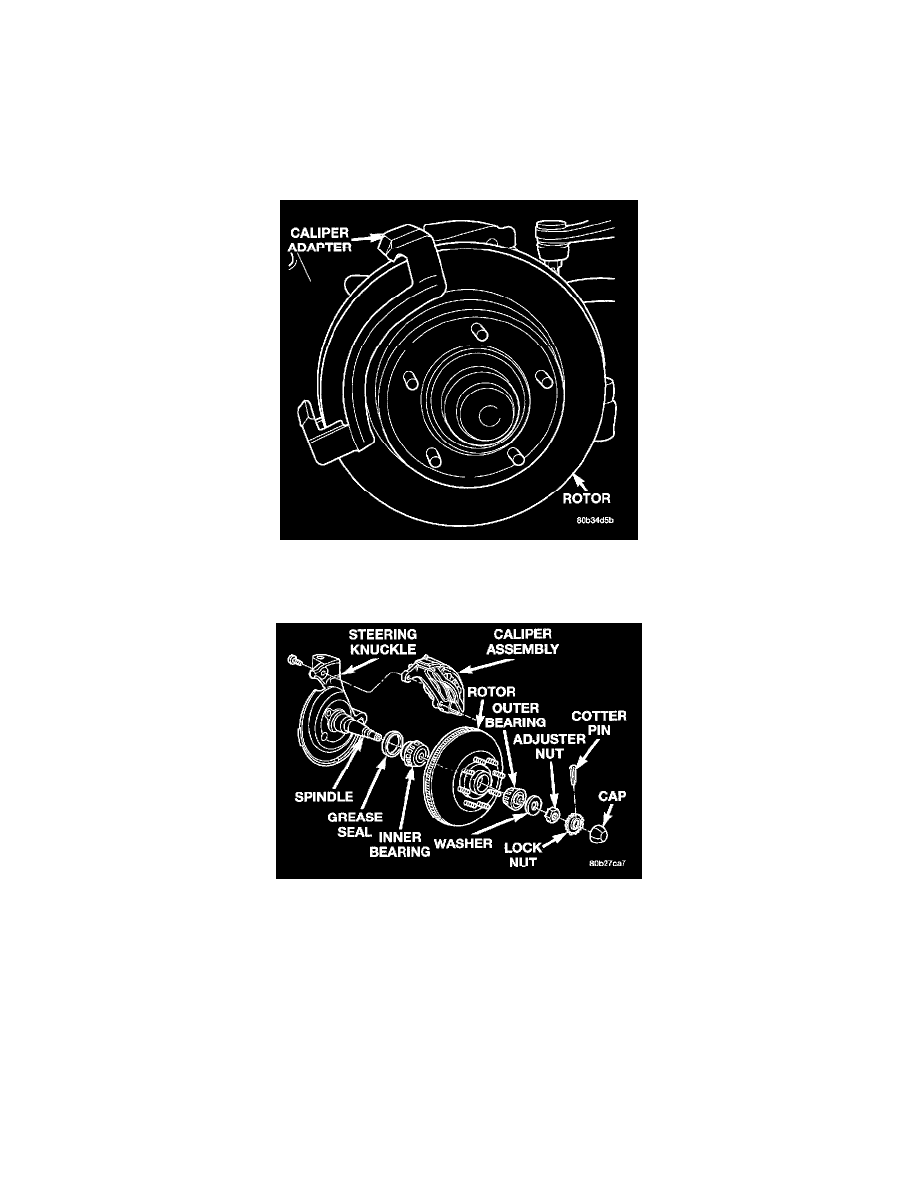
Caliper Adapter
4. Remove caliper adapter bolts from the steering knuckle and remove adapter.
Disc Brake Rotor
5. Remove grease cap, cotter pin, nut lock, nut, washer and outer wheel bearing.
6. Remove the rotor from the spindle.
INSTALLATION
1. Inspect and repack wheel bearings if necessary. Install new grease seals if inner bearing was removed.
2. On models with All-Wheel Antilock System (ABS), check condition of tone wheel in rotor hub. If teeth on wheel are damaged, rotor and hub
assembly will have to be replaced (tone wheel is not serviced separately).
3. Carefully slide the hub/rotor onto the spindle. Install outer wheel bearing, washer and retaining nut.
4. Tighten the nut to 41-54 Nm (30-40 ft. lbs.) to preload bearing while rotating the hub/rotor. Stop hub/rotor and loosen nut to completely release
bearing preload torque. Tighten the nut finger-tight and install the nut lock. Install a new cotter pin.
NOTE: The end play should be 0.25-0.076 mm (0.001-0.003 inches).