
RAM 1500 Van V8-5.2L VIN Y (1999)
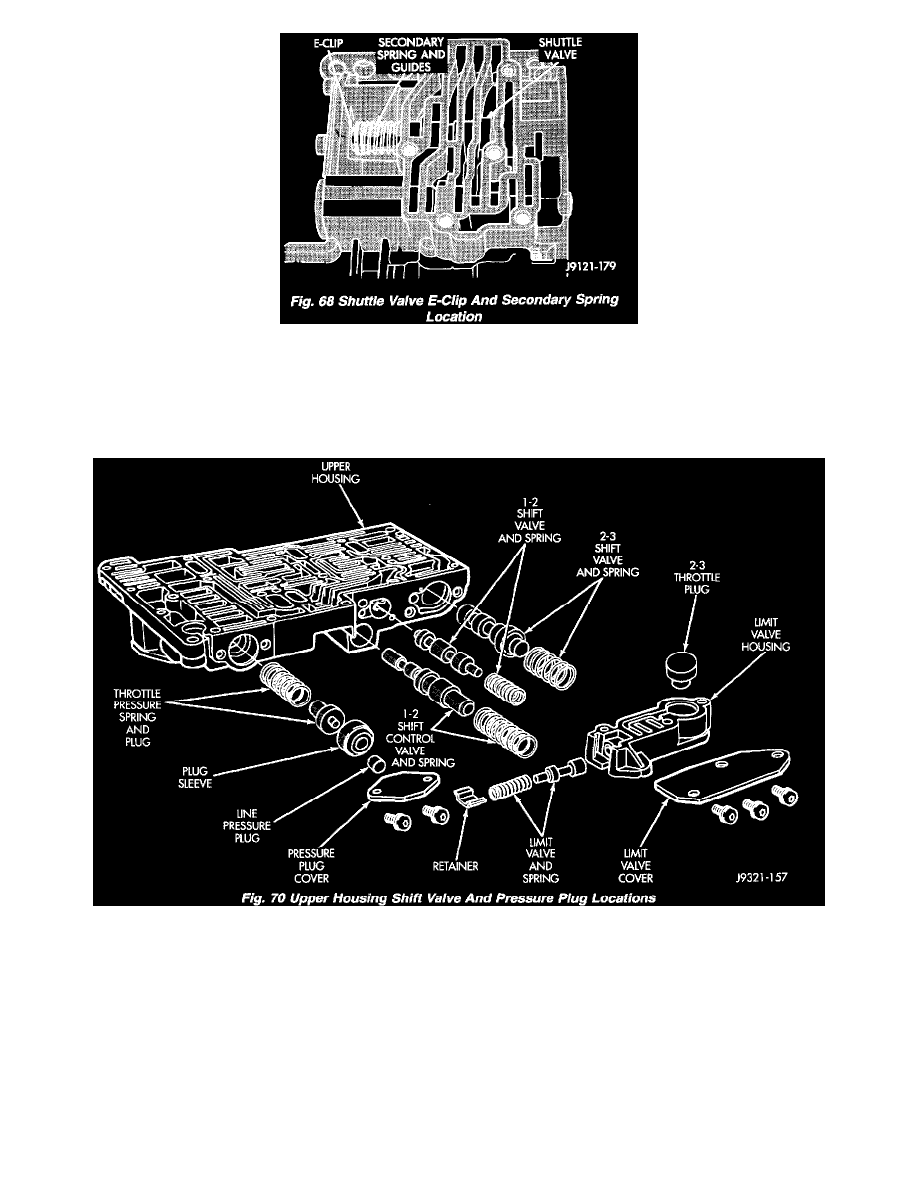
Fig. 68
3. Remove E-clip that secures shuttle valve secondary spring on valve stem (Fig. 68).
4. Remove throttle plug, primary spring, shuttle valve, secondary spring, and spring guides (Fig. 69).
5. Remove boost valve retainer, spring and valve if not previously removed.
6. Remove throttle plug and 1-2 and 2-3 governor plugs (Fig. 56).
Fig. 70
7. Turn upper housing around and remove limit valve and shift valve covers (Fig. 70).
8. Remove limit valve housing. Then remove retainer, spring, limit valve, and 2-3 throttle plug from limit valve housing (Fig. 70).
9. Remove 1-2 shift control valve and spring (Fig. 70).
10. Remove 1-2 shift valve and spring (Fig. 70).
11. Remove 2-3 shift valve and spring from valve body (Fig. 70).
12. Remove pressure plug cover (Fig. 70).
13. Remove line pressure plug, sleeve, throttle pressure plug and spring (Fig. 70).
VALVE BODY LOWER HOUSING
1. Remove timing valve cover.
2. Remove 3-4 timing valve and spring.