
RAM 1500 Van V8-5.9L VIN Z (1998)
Clockspring Remove/Install
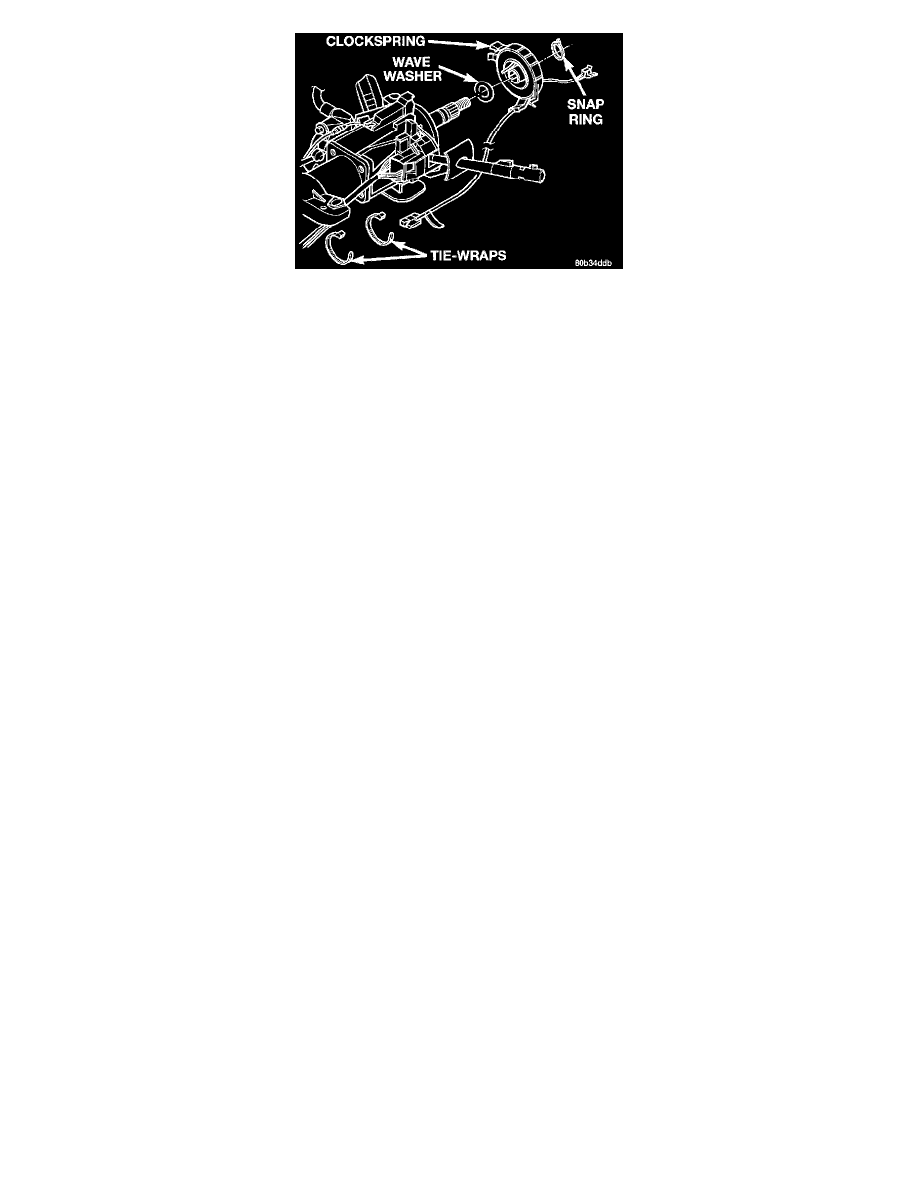
16. Using snap ring pliers, remove the snap ring that secures the clockspring to the upper steering column shaft.
17. To remove the clockspring, carefully lift the locating fingers of the clockspring assembly from the steering column as necessary. The clockspring
cannot be repaired. It must be replaced if faulty or damaged, or if the airbag has been deployed.
INSTALLATION
1. Before reinstalling the clockspring on the steering column, be certain that the wave washer is in place on the upper steering column shaft.
CAUTION: Before reinstalling the clockspring, be certain that the front wheels are still in the straight-ahead position, the alignment spline on the
upper steering column shaft is in the 12 o'clock position, and that the clockspring is centered. See Clockspring Centering in the Adjustments for
the centering procedure. Failure to follow these procedures may result in damage to the clockspring.
2. Align the hole in the clockspring hub with the horn tower and slide the clockspring onto the upper steering column shaft.
3. Reinstall the snap ring onto the upper steering column shaft. Be certain that the snap ring is fully seated in the groove on the shaft.
NOTE: The clockspring wire harness tie-wrap must be positioned above the upper steering column wire harness tie-wrap.
4. Route the clockspring wire harness along the steering column wire harness and secure the harnesses with two new tie-wraps. Be certain that the
new tie-wraps are installed in the same positions as those that were removed and that the steering column wire harnesses are routed so that they
will not be pinched or stretched.
5. Plug the clockspring wire harness connector into the instrument panel wire harness connector. Be certain that the connector latches are fully
engaged.
NOTE: Before reinstalling the upper shroud on the steering column, be certain that the upper shroud spacer mounting stud is fully seated to the
mounting boss on the inside surface of the shroud.
6. Reinstall the steering column shrouds. Be certain that the upper shroud spacer mounting stud is fully seated to the mounting boss on the inside of
the shroud. Tighten the upper shroud mounting screws to 1.4 N.m (12 in. lbs.). Tighten the lower shroud mounting screws to 3.4 N.m (30 in. lbs.).
7. Reinstall the steering column opening cover and the knee blocker to the instrument panel. Refer to Steering and Suspension/Steering/Steering
Column Opening Cover and to Knee Blocker.
8.
Install the steering wheel being certain to index the alignment splines in the hub of the steering wheel with the splines on the upper steering column
shaft. Pull the wire harnesses from the clockspring between the steering wheel back trim cover and the steering wheel armature. Tighten the
steering wheel nut to 61 N.m (45 ft. lbs.). Be certain not to pinch the wiring between the steering wheel and the nut.
9.
If the vehicle is so equipped, plug in the wire harness connectors to the vehicle speed control switches.
10. Install the driver side airbag module onto the steering wheel. See Airbag Module Replacement.