
RAM 1500 Van V8-5.9L VIN Z (1998)
9. Remove screws attaching converter clutch module to valve body and remove module and connecting tube.
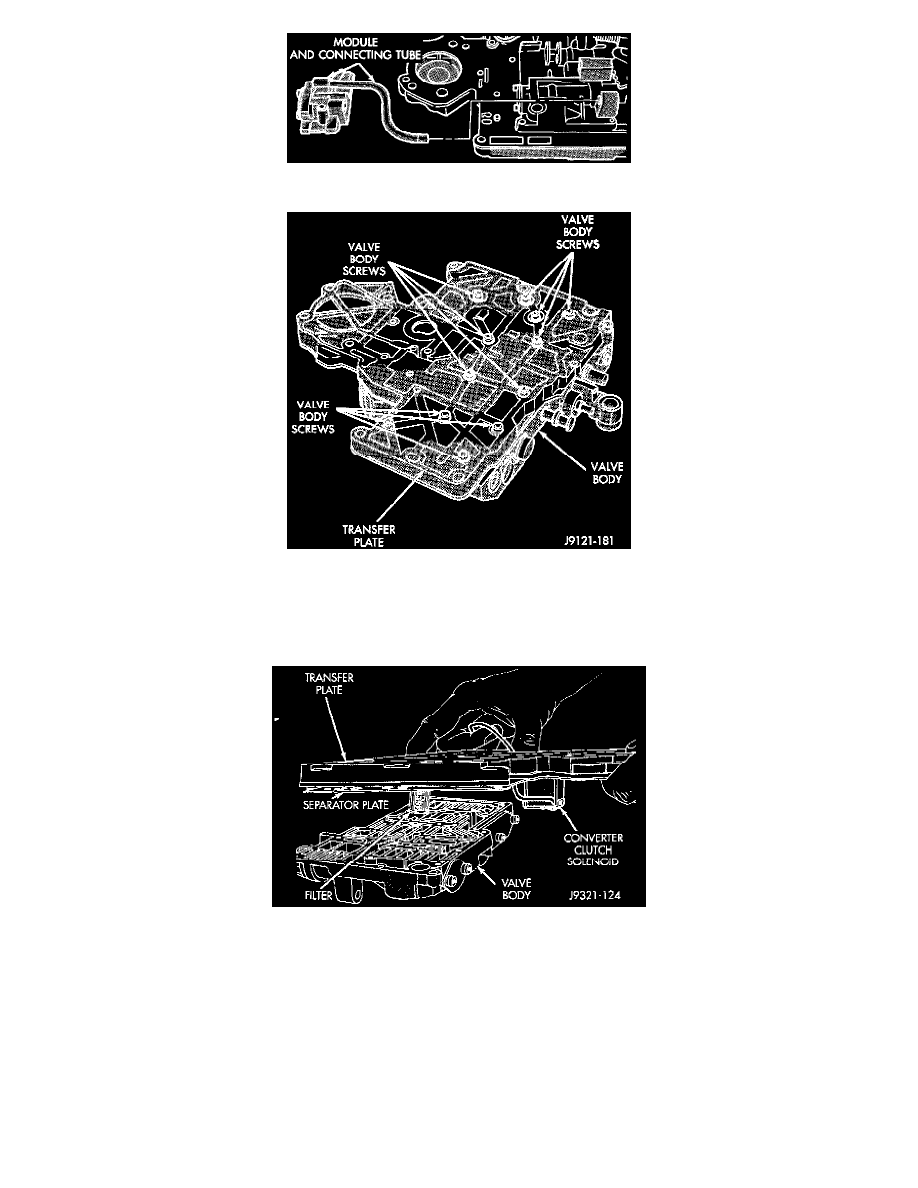
Valve Body-To-Transfer Plate Screw Locations
10. Turn valve body over so transfer plate is facing upward. With valve body in this position, valve body check balls will remain in place and not fall
out when transfer plate is removed.
11. Remove screws attaching transfer plate to valve body.
Transfer Plate Removal/Installation
12. Remove transfer plate and separator plate from valve body. Note position of filter and clutch solenoid for reference. Remove valve body check
balls. Note that check balls may be steel or plastic.
13. Position transfer plate on bench so separator plate, filter and lockup solenoid are facing up. This will avoid having rear clutch and rear servo check
balls fall out when plates are separated.
14. Remove screws attaching separator plate to transfer plate.