
RAM 1500 Van V8-5.9L VIN Z LDC (2001)
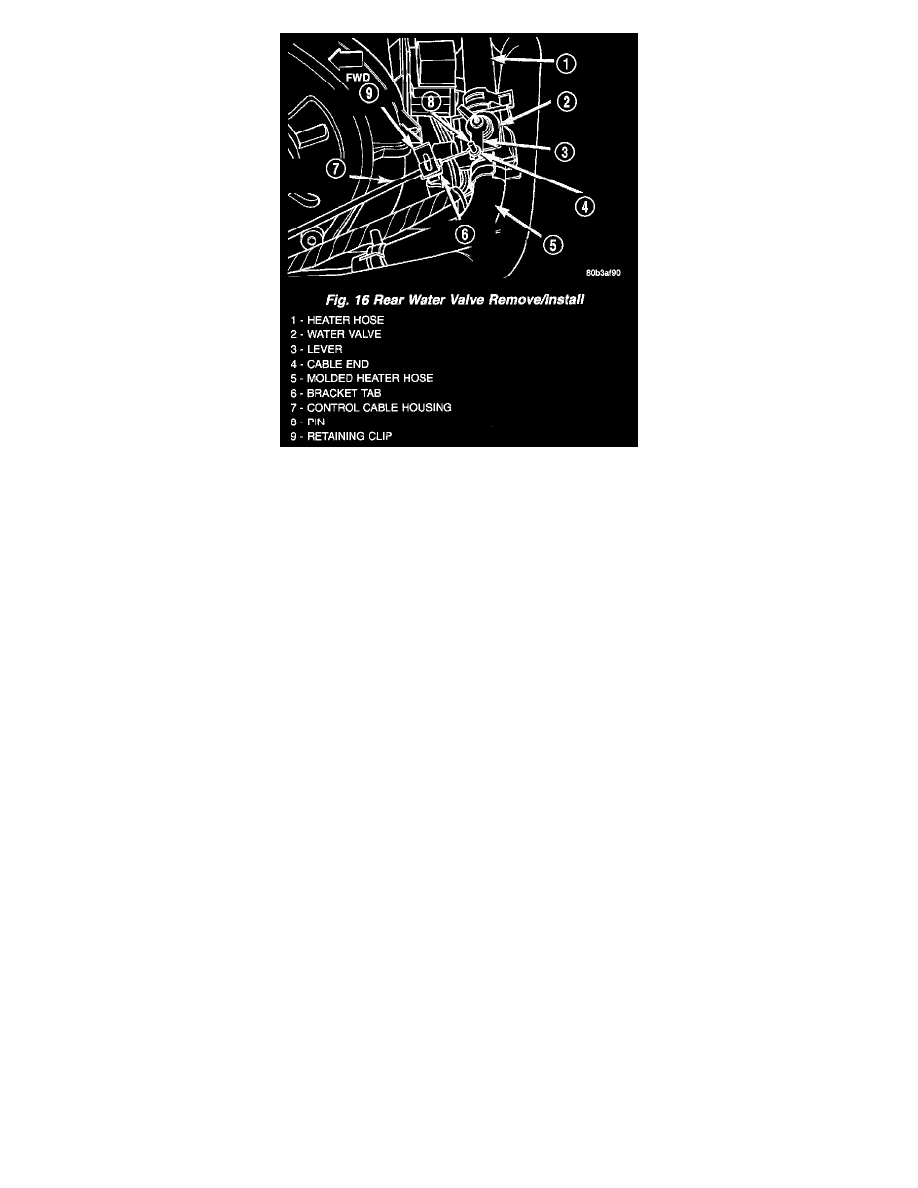
Fig. 16 Rear Water Valve Remove/Install
3. Release the retaining clip that secures the control cable housing to the bracket on the water valve.
4. Disengage the control cable end from the pin on the end of the rear water valve lever.
5. Remove the two rear heater-A/C unit heater hoses from the nipples on the rear water valve.
6. Remove the water valve from the rear heater- A/C unit.
INSTALLATION
Front
1. Position the water valve in the engine compartment. The arrow on the water valve should be pointed towards the heater core.
2. Install the heater hoses to the nipples on the water valve.
3. Plug in the vacuum harness connector to the front water valve actuator.
4. Fill the engine cooling system.
Rear
The rear water valve is used only on models with the optional rear heater-A/C unit. The water valve can be removed without removing the rear
heater-A/C unit from the vehicle.
1. Position the water valve to the rear heater-A/C unit and install the heater hoses to the nipples on the water valve.
2. Reinstall the control cable end to the pin on the end of the rear water valve lever.
3. Position the control cable housing to the bracket on the rear water valve. The end of the control cable housing should be aligned with the rear edge
of the bracket tab on which the retaining clip is secured.
4. Snap the retaining clip over the rear water valve control cable housing.
5. Reinstall the cover to the rear heater-A/C unit.
6. Fill the engine cooling system.