
RAM 1500 Van V8-5.9L VIN Z LDC (2001)
CAUTION: Never push the clutch piston straight in. This will fold the seals over causing leakage and clutch slip. In addition, never use any type
of metal tool to help ease the piston seals into place. Metal tools will cut, shave, or score the seals.
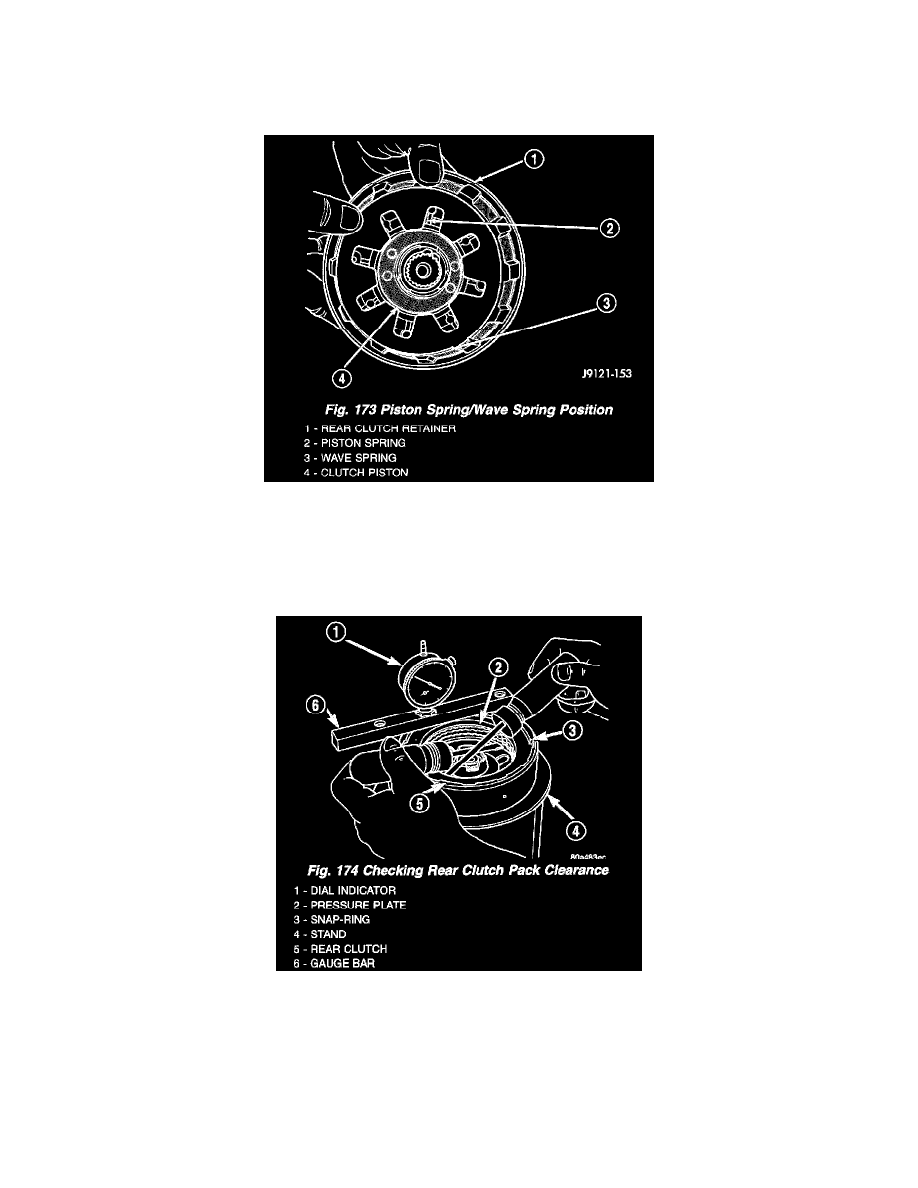
9. Install piston spring in retainer and on top of piston (Fig. 173). Concave side of spring faces downward (toward piston).
10. Install wave spring in retainer (Fig. 173). Be sure spring is completely seated in retainer groove.
11. Install bottom pressure plate (Fig. 168). Ridged side of plate faces downward (toward piston) and flat side toward clutch pack.
12. Install first clutch disc in retainer on top of bottom pressure plate. Then install a clutch plate followed by a clutch disc until entire clutch pack is
installed (4 discs and 3 plates are required) (Fig. 168).
13. Install top pressure plate.
14. Install selective snap-ring. Be sure snap-ring is fully seated in retainer groove.
15. Using a suitable gauge bar and dial indicator, measure clutch pack clearance (Fig. 174).
a. Position gauge bar across the clutch drum with the dial indicator pointer on the pressure plate (Fig. 174).
b. Using two small screw drivers, lift the pressure plate and release it.
c. Zero the dial indicator.
d. Lift the pressure plate until it contacts the snap-ring and record the dial indicator reading.
16. Clearance should be 0.559 - 0.914 mm (0.022 - 0.036 inch). If clearance is incorrect, steel plates, discs, selective snap-ring and pressure plates
may have to be changed. The selective snap-ring thicknesses are:
-
0.107 - 0.109 inch
-
0.098 - 0.100 inch