RAM 2500 Truck 2WD L6-359 5.9L DSL Turbo VIN D FI (1997)

Rocker Lever: Service and Repair
Rocker Arm Overhaul
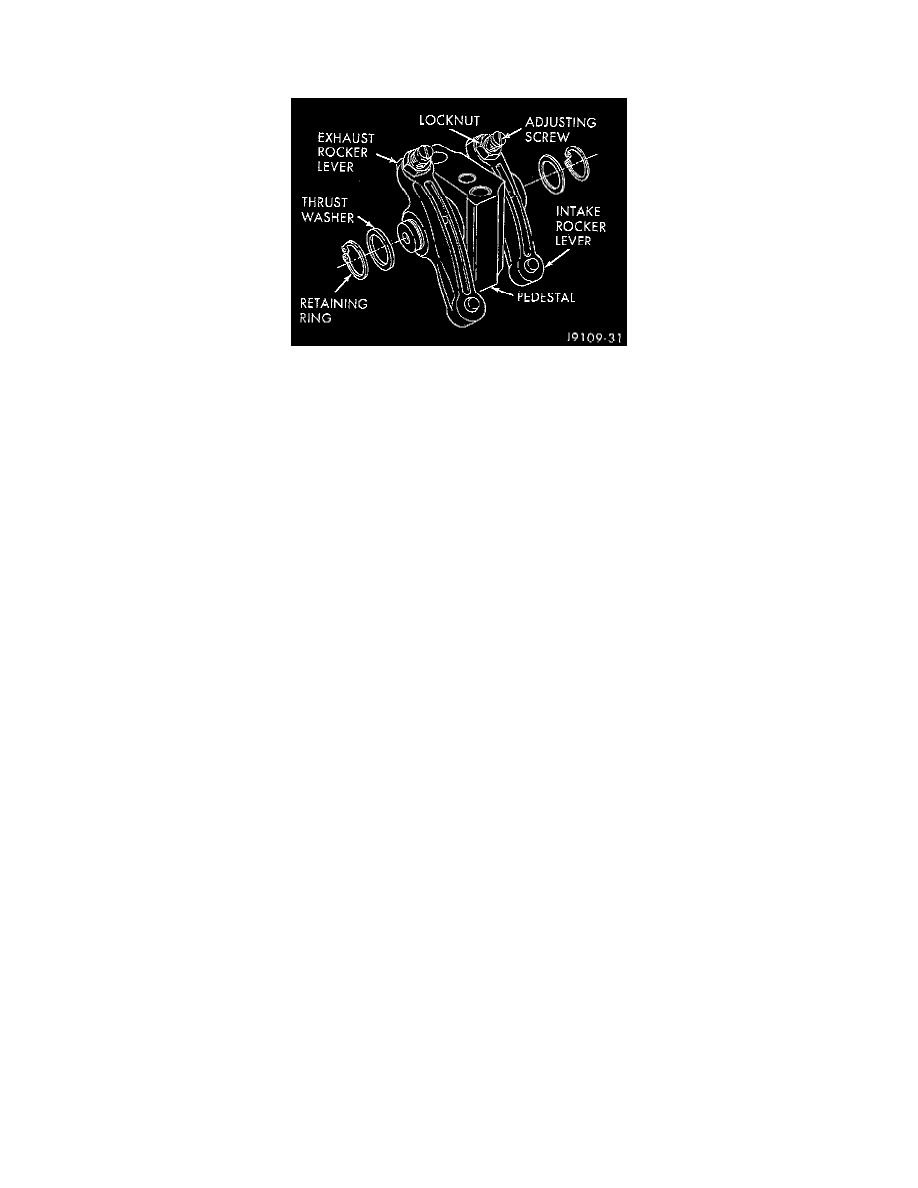
DISASSEMBLE
1. Remove the retaining rings and thrust washers.
2. Remove the rocker levers. DO NOT disassemble the rocker lever shaft and pedestal. The pedestal and shaft must be replaced as an assembly.
3. Remove the locknut and adjusting screw.
4. Clean all parts in a strong solution of laundry detergent in hot water.
5. Use compressed air to dry the parts after rinsing in clean hot water. The pedestals are made from powdered metal and may continue to show
wetness after they have been cleaned and dried.
6. Inspect for excessive wear in the bore and the contact surface for the valve stem.
7. Measure the rocker lever bore diameter. The maximum diameter is 19.05 mm (0.75 inch). Replace if out of limits.
8. Inspect the pedestal and shaft.
9. Measure the shaft diameter. The minimum diameter is 18.94 mm (0.746 inch). Replace if out of limits.
ASSEMBLE
1. Install the adjusting screw and locknut.
2. Lubricate the shaft with clean engine oil. Be sure to assemble the intake and exhaust rocker levers in the correct location.
3. Position the levers on the rocker shaft. Install the thrust washers.
4. Clean the push rods in the hot soapy water.
5. Inspect the push rod ball and socket for signs of scoring or cracks where the ball and the socket are pressed into the tube.
6. Check the push rods for roundness and straightness.
7. Install the push rods into the sockets of the valve tappets. Lubricate the push rod sockets with clean engine oil.
8. Make sure the rocker lever adjusting screws are completely backed out.
