
RAM 2500 Truck 2WD L6-359 5.9L DSL Turbo VIN D FI (1997)
Fuel Injector: Service and Repair
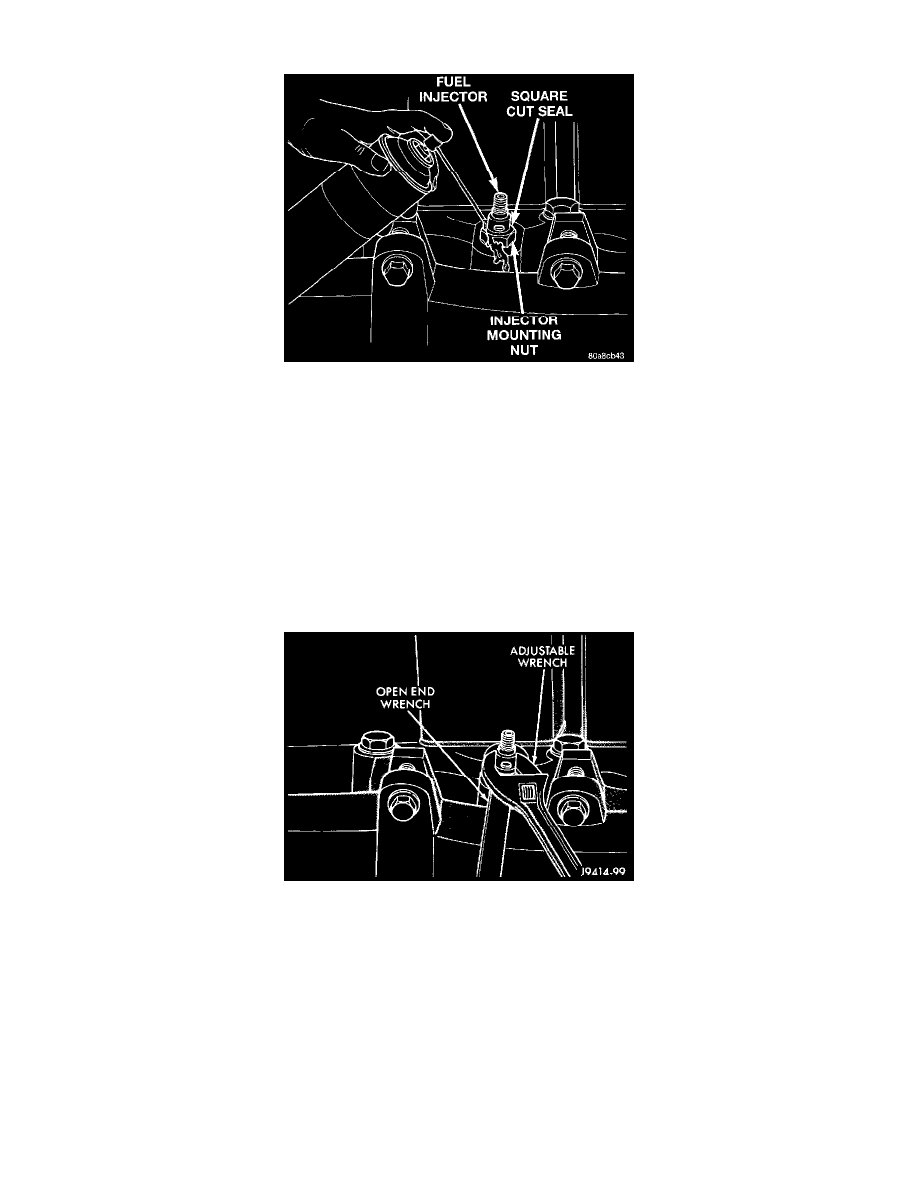
REMOVAL
1. Disconnect both negative battery cables from both batteries.
2. Remove high-pressure fuel lines. Refer to Fuel Supply Lines. Do not bend any high-pressure fuel line to gain access to fuel injector.
3. Remove fuel drain manifold. Refer to Fuel Drain Manifold.
4. Thoroughly clean the area around injector.
CAUTION: When rust has formed on the fuel injector nut, the injector (when being removed) can rotate in the cylinder head. This may cause
damage to the cylinder head bore. Use a rust penetrating solvent before attempting to loosen a rusted holddown nut.
5. Hold injector body with one wrench while removing injector mounting nut with another. If nut cannot be rotated, pry out the square cut rubber seal
from top of injector mounting nut and apply rust penetrating solvent to top of nut. Remove injector from cylinder head.
6. Remove injector mounting nut from injector.
7. Remove and discard square cut rubber seal from injector mounting nut.
8. If injector is tight in cylinder head, hit injector body with a brass drift to loosen it.
9. It may be necessary to tap the injector with an injector puller tool. Use Cummins Fuel Injector Removal Tool number 3823276 or equivalent
injector removal tool. If the injector cannot be removed, carbon may have formed at the injector nozzle. In this case use of carb cleaner is
recommended. Spray the carb cleaner along the side of injector bore in the cylinder head. Continue to use the injector removal tool while spraying
the injector.
10. Remove and discard copper washer (gasket) from bottom of injector.