
RAM 2500 Truck 2WD L6-5.9L DSL Turbo (2008)
Transmission Cooler: Removal and Replacement
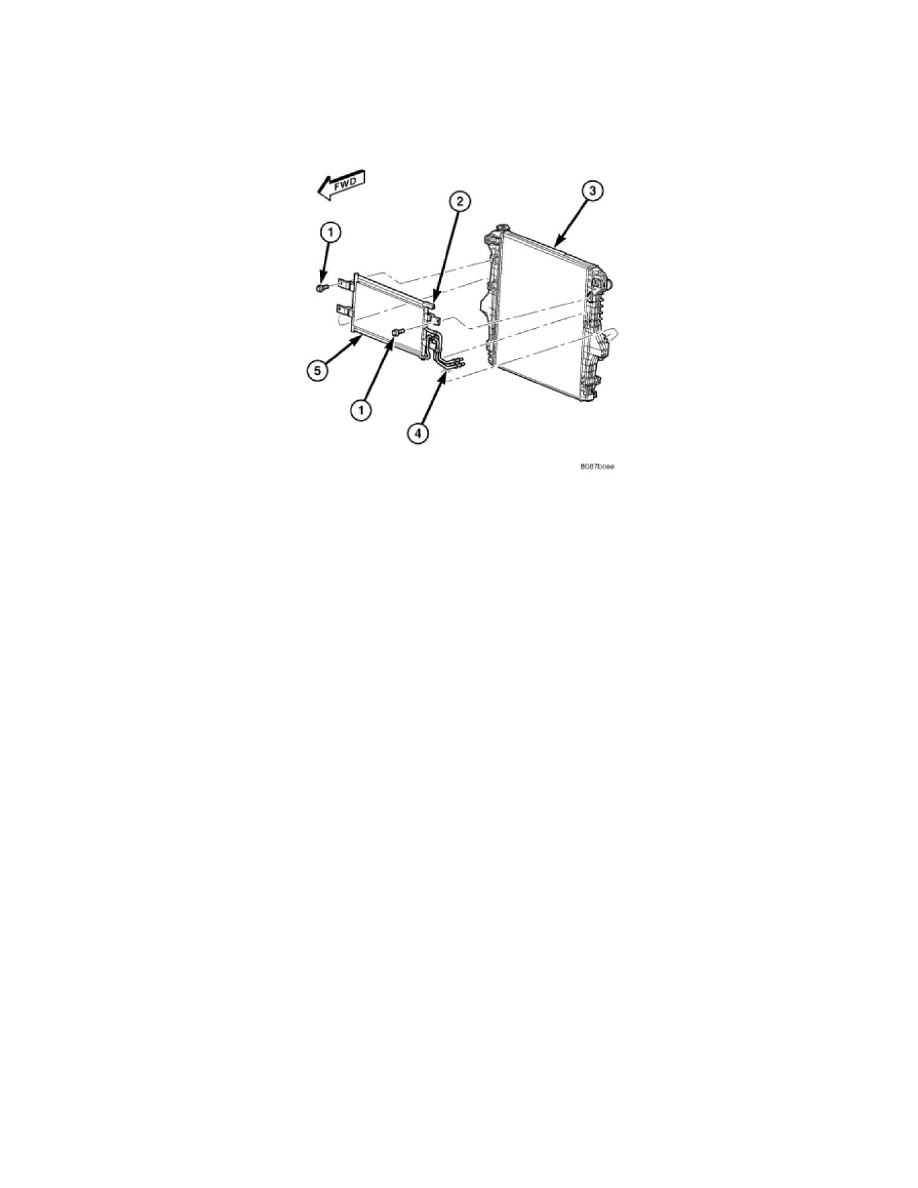
Air To Oil Cooler - Diesel
AIR TO OIL COOLER - DIESEL
1. Remove Charge Air Cooler See: Powertrain Management/Fuel Delivery and Air Induction/Turbocharger/Intercooler/Service and Repair/Removal
.
2. Place a drain pan under the oil cooler.
3. Raise the vehicle.
4. Disconnect the oil cooler quick-connect fittings from the transmission lines See: Procedures .
5. Remove the charge air cooler-to-oil cooler bolt.
6. Remove two mounting nuts.
7. Remove the oil cooler and line assembly towards the front of vehicle. Cooler must be rotated and tilted into position while removing.
Water To Oil Cooler
REMOVAL - WATER TO OIL COOLER
CAUTION: If a leak should occur in the water-to-oil cooler mounted to the side of the engine block, engine coolant may become mixed with
transmission fluid. Transmission fluid may also enter engine cooling system. Both cooling system and transmission should be drained and
inspected in case of oil cooler leakage.
1. Disconnect both battery negative cables.
2. Remove starter See: Starting and Charging/Starting System/Starter Motor/Service and Repair/Starter Motor - Removal .
3. Drain cooling system See: Engine, Cooling and Exhaust/Cooling System/Service and Repair .
4. Disconnect coolant lines from cooler.
NOTE: Use a back-up wrench on the transmission cooler fittings to prevent damage to the cooler.
5. Disconnect transmission oil lines from cooler. Plug cooler lines to prevent oil leakage.
6. Remove cooler bracket to transmission adapter bolt.
7. Remove wire harness push in clip at bottom of coolant bracket.
8. Remove wire harness push in clip at bottom of coolant bracket.
9. Remove two cooler bracket to block bolts.
10. Remove cooler assembly from vehicle.