
RAM 2500 Truck 2WD L6-5.9L DSL Turbo VIN 6 (1998)
Condenser HVAC: Service and Repair
WARNING: REVIEW THE WARNINGS AND CAUTIONS BEFORE PERFORMING THE FOLLOWING OPERATION.
CAUTION: Before removing the condenser, note the location of each of the radiator and condenser air seals. These seals are used to direct air through
the condenser and radiator. The air seals must be reinstalled in their proper locations in order for the air conditioning and engine cooling systems to
perform as designed.
REMOVAL
1. Disconnect and isolate the battery negative cable.
2. Recover the refrigerant from the refrigerant system. See Refrigerant Recovery in the Service Procedures.
3. Remove the nut that secures the block fitting to the stud on the condenser inlet and disconnect the discharge line from the condenser. Install plugs
in, or tape over all of the opened refrigerant line fittings.
4. Disconnect the refrigerant line fitting that secures the liquid line to the condenser outlet. See Refrigerant Line Coupler Replacement procedures.
Install plugs in, or tape over all of the opened refrigerant line fittings.
5.
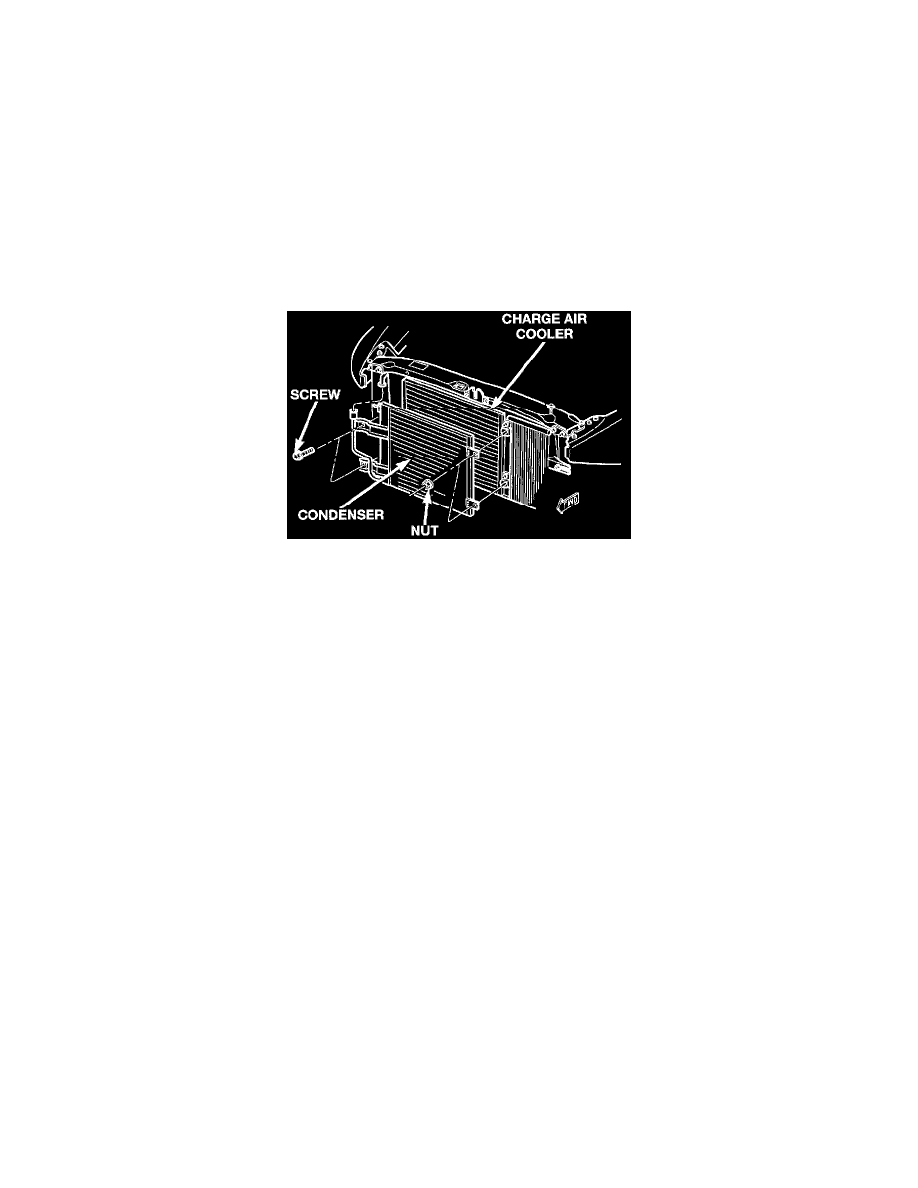
Condenser Remove/Install - Diesel Engine
a. Remove the two screws that secure the brackets on the passenger side end of the condenser to the charge air cooler.
b. Remove the two nuts that secure the driver side end of the condenser to the studs on the charge air cooler.
c. Remove the condenser from the vehicle.
INSTALLATION
1.
a. Install the driver side condenser mounting brackets over the two studs on the charge air cooler.
b. Install the two screws that secure the brackets on the passenger side end of the condenser to the charge air cooler. Tighten the mounting screws
to 10.5 N.m (95 in. lbs.).
c. Install the two nuts that secure the driver side end of the condenser to the studs on the charge air cooler. Tighten the mounting nuts to 10.5 N.m
(95 in. lbs.).
2. Remove the plugs or tape from the refrigerant line fittings on the liquid line and the condenser outlet. Connect the liquid line to the condenser
outlet. See Refrigerant Line Coupler Replacement procedures.
3. Install a new gasket and the discharge line block fitting over the stud on the condenser inlet. Tighten the mounting nut to 20 N.m (180 in. lbs.).
4. Check that all of the condenser and radiator air seals are in their proper locations.
5. Connect the battery negative cable.
6. Evacuate the refrigerant system. See Refrigerant System Evacuate in the Service Procedures.
7. Charge the refrigerant system. See Refrigerant System Charge in the Service Procedures.
NOTE: If the condenser is replaced, add 30 milliliters (1 fluid ounce) of refrigerant oil to the refrigerant system. Use only refrigerant oil of the
type recommended for the compressor in the vehicle.