
RAM 2500 Truck 2WD L6-5.9L DSL Turbo VIN 6 (1998)
4.
The end link can now be easily removed from the crank arm.
CAUTION:
THE ACTUATOR ROD MAY RETRACT WITH FORCE INTO THE ACTUATOR IF SHOP AIR DOES NOT RELIEVE THE TENSION. KEEP
HANDS AND FINGERS CLEAR WHEN PRYING THE END LINK FROM THE CRANK ARM.
5.
Remove shop air from the actuator and remove the actuator from the turbocharger.
6.
Thread the new end link (from kit) 4 or 5 turns onto the new actuator.
7.
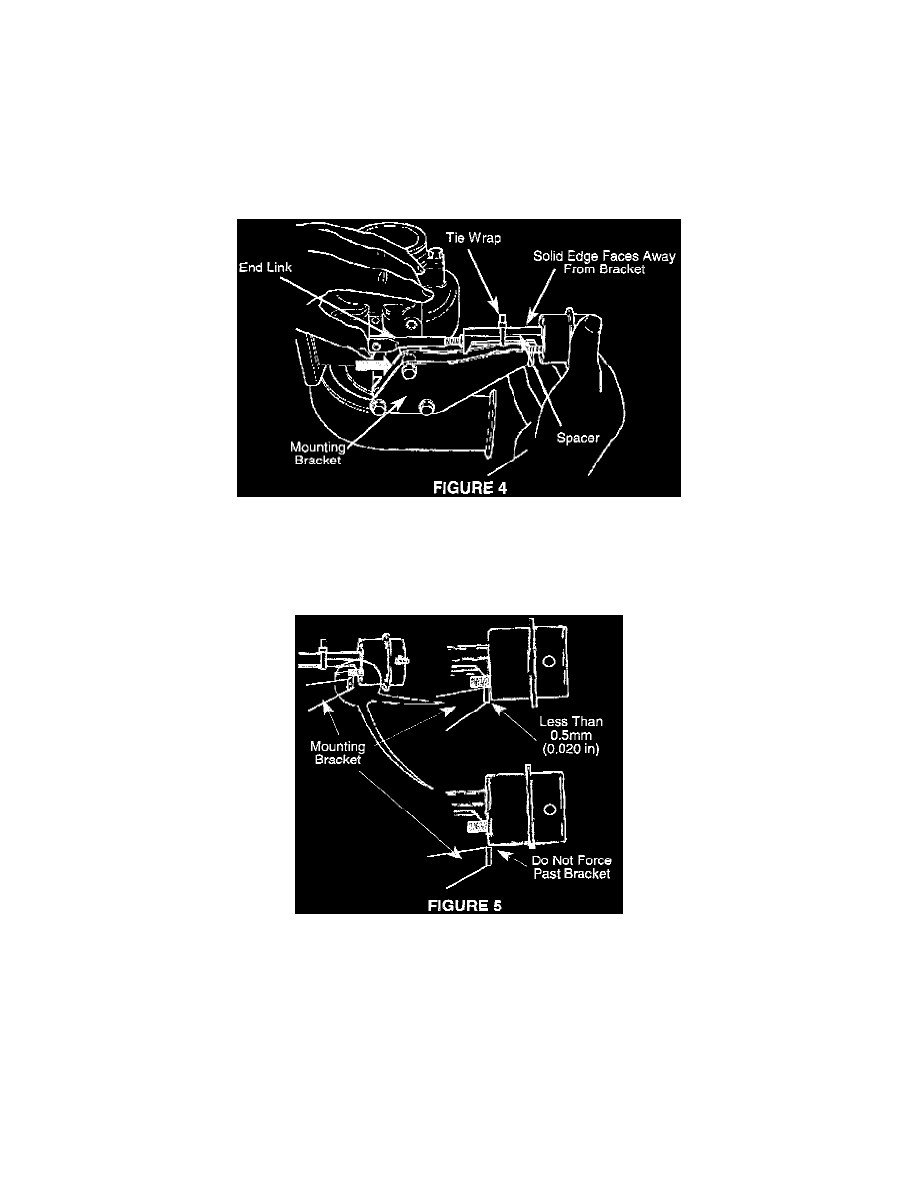
Fit the end link over the crank arm with the solid edge of the spacer facing away from the actuator mounting bracket. Push the crank arm toward
the actuator (Figure 4).
NOTE:
DO NOT FIT THE ACTUATOR STUDS INTO THEIR MOUNTING HOLES AT THIS TIME.
8.
Adjust the end link by rotating it on the actuator shaft until the body of the actuator just clears the bracket with less than 0.5 mm (0.020 in)
clearance (Figure 5).
NOTE:
THE ACTUATOR BODY MUST NOT BE FORCED TO CLEAR THE MOUNTING BRACKET.
9.
While holding the end link from rotating, remove the end link from the crank arm.
10.
Install the actuator studs through the mounting holes of the bracket and install the end link to the crank arm.
11.
Attach the end link to the crank arm with the new e-clip (from kit) and install the new actuator mounting nuts (from kit) onto the actuator studs.
Torque the nuts to 8.5 Nm (75 in lbs.).