
RAM 2500 Truck 2WD L6-5.9L DSL Turbo VIN 7 (2001)
Accumulator HVAC: Service and Repair
REMOVAL
WARNING: REVIEW THE WARNINGS AND CAUTIONS BEFORE PERFORMING THE FOLLOWING OPERATION.
1. Disconnect and isolate the battery negative cable.
2. Recover the refrigerant from the refrigerant system..
3. Remove the a/c low pressure switch from the accumulator.
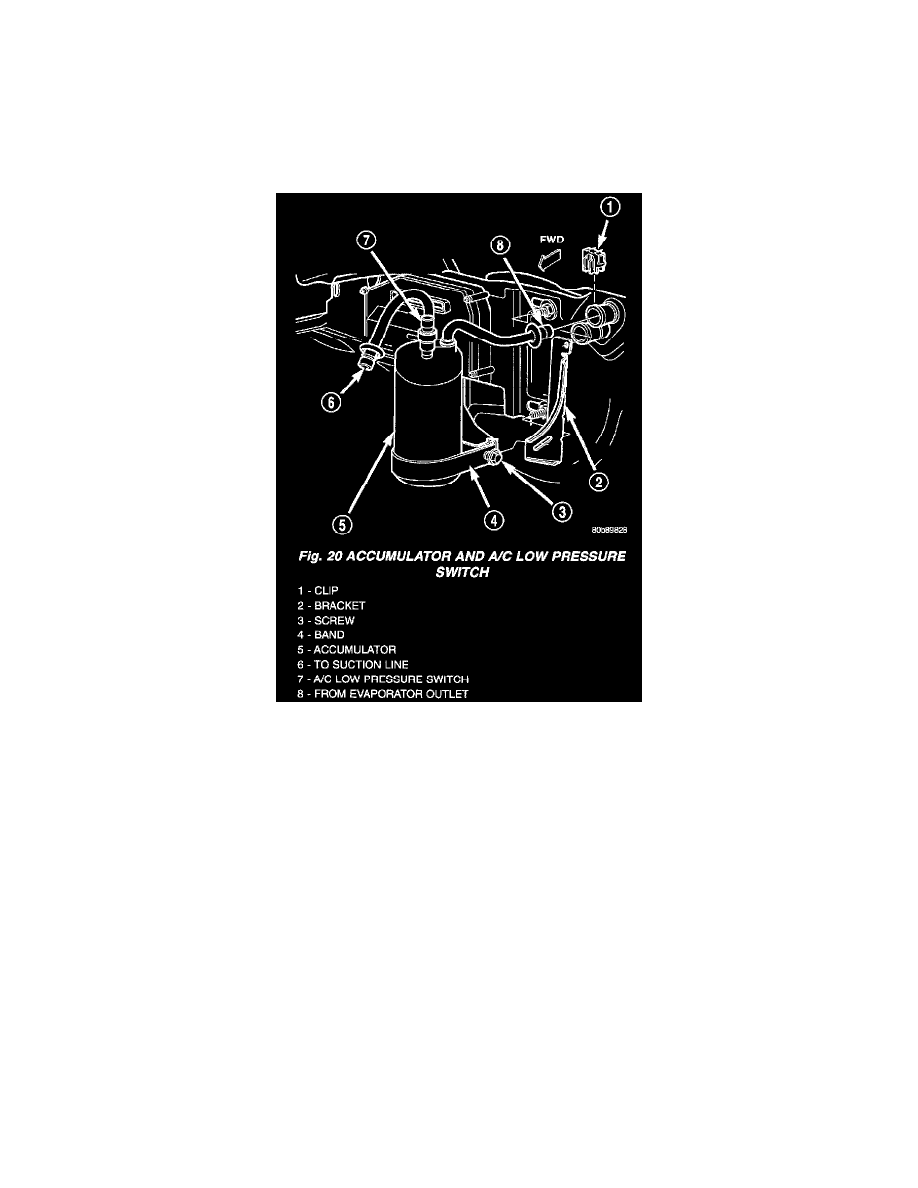
Fig.20 Accumulator And A/C Low Pressure Switch
4. Loosen the screw that secures the accumulator retaining band to the support bracket on the dash panel.
5. Disconnect the suction line refrigerant line fitting from the accumulator outlet. Install plugs in, or tape over all of the opened refrigerant line
fittings.
6. Disconnect the accumulator inlet refrigerant line fitting from the evaporator outlet. Install plugs in, or tape over all of the opened refrigerant line
fittings.
7. Pull the accumulator out of the retaining band.
8. Remove the accumulator from the engine compartment.
INSTALLATION
WARNING: REVIEW THE WARNINGS AND CAUTIONS BEFORE PERFORMING THE FOLLOWING OPERATION.
1. Install the accumulator in the retaining band.
2. Remove the tape or plugs from the refrigerant line fittings on the accumulator inlet and the evaporator outlet. Connect the accumulator inlet
refrigerant line coupler to the evaporator outlet.
3. Tighten the accumulator retaining band screw to 4.5 Nm (40 in. lbs.).
4. Remove the tape or plugs from the refrigerant line fittings on the suction line and the accumulator outlet. Connect the suction line refrigerant line
coupler to the accumulator outlet.
5. Reinstall the a/c low pressure switch on the accumulator.
6. Connect the battery negative cable.
7. Evacuate the refrigerant system.
8. Charge the refrigerant system.