
RAM 2500 Truck 2WD L6-5.9L DSL Turbo VIN 7 (2001)
Air Door Actuator / Motor: Service and Repair
Blend Door Actuator Replacement
REMOVAL
WARNING: ON VEHICLES EQUIPPED WITH AIRBAGS, DISABLE THE AIRBAG SYSTEM BEFORE ATTEMPTING ANY
STEERING WHEEL, STEERING COLUMN, OR INSTRUMENT PANEL COMPONENT DIAGNOSIS OR SERVICE. DISCONNECT
AND ISOLATE THE BATTERY NEGATIVE (GROUND) CABLE, THEN WAIT TWO MINUTES FOR THE AIRBAG SYSTEM
CAPACITOR TO DISCHARGE BEFORE PERFORMING FURTHER DIAGNOSIS OR SERVICE. THIS IS THE ONLY SURE WAY TO
DISABLE THE AIRBAG SYSTEM. FAILURE TO TAKE THE PROPER PRECAUTIONS COULD RESULT IN AN ACCIDENTAL
AIRBAG DEPLOYMENT AND POSSIBLE PERSONAL INJURY.
1. Turn the ignition switch to the run position.
2. Locate the temperature control knob in the mid (12 o'clock) position.
3. Turn the ignition switch to the OFF position.
4. Disconnect and isolate the battery negative cable.
5. Remove the instrument panel from the vehicle. Refer to Instrument Panel System for the procedures.
6. Remove the HVAC housing from the vehicle..
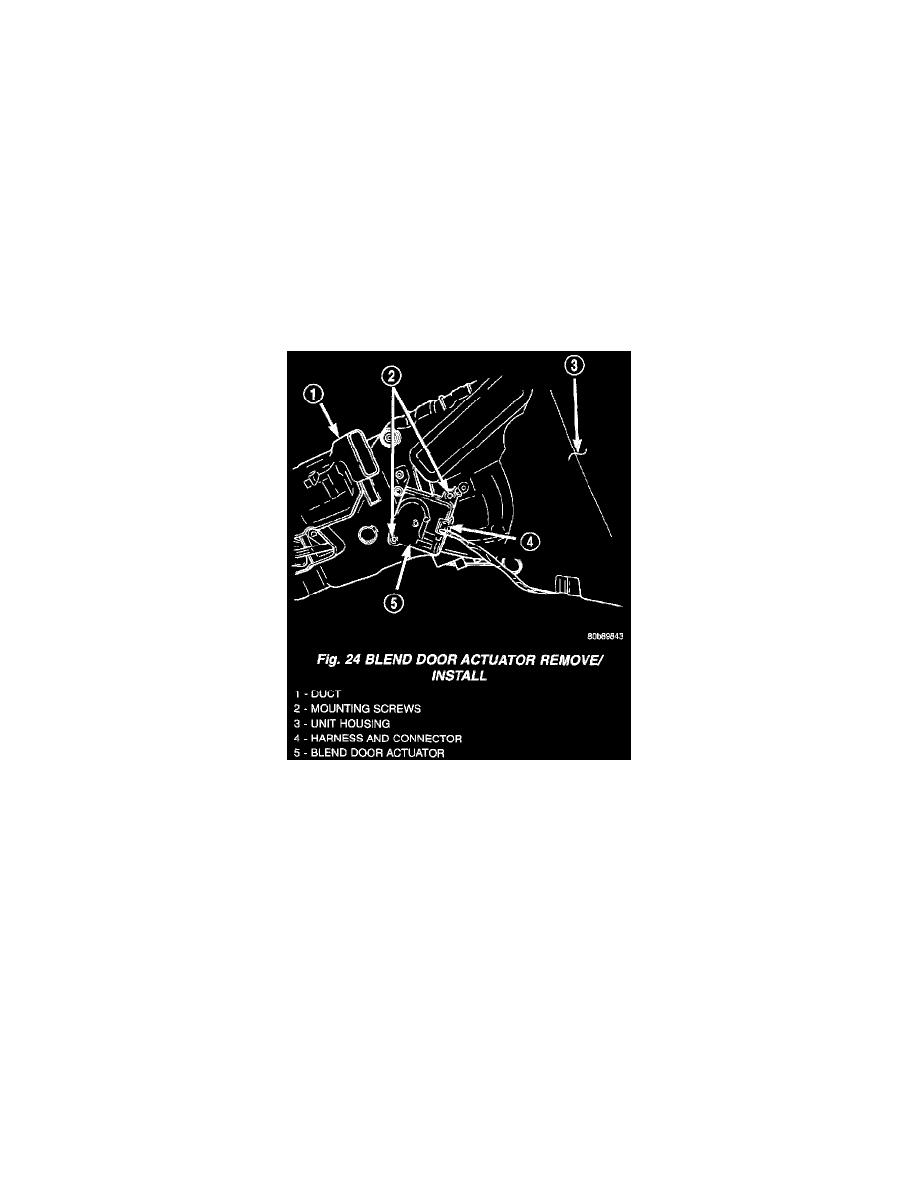
Fig.24 Blend Door Actuator Remove/Install
7. Unplug the wire harness connector from the blend door actuator.
8. Remove the two mounting screws which secure the actuator to the housing.
9. Slide the blend door actuator off the blend door shaft.
NOTE: A black plastic coupler may be attached to the blend door shaft. Remove the coupler and inspect for damage. Reinstall if there is no
damage found.
INSTALLATION
NOTE: Before installing the blend door actuator, be certain that the blend door is not binding and is capable of full travel in both directions.
1. Align the actuator with the blend door shaft and rotate the actuator to align it to the mounting bosses on the HVAC housing.
2. Align and install the actuator screws. Tighten the mounting screws to 2.2 Nm (20 in. lbs.).
3. Plug in the wire harness connector to the blend door actuator.
4. Install the HVAC housing in the vehicle.
5. Install the instrument panel in the vehicle. Refer to Instrument Panel System for the procedures.
6. Make sure the Temperature Control Knob is in the mid (12 o'clock) position to allow the actuator to automatically position itself in the mid
position and come to a complete stop when powered up.
7. Connect the battery negative cable.