
RAM 2500 Truck 2WD L6-5.9L DSL Turbo VIN 7 (2001)
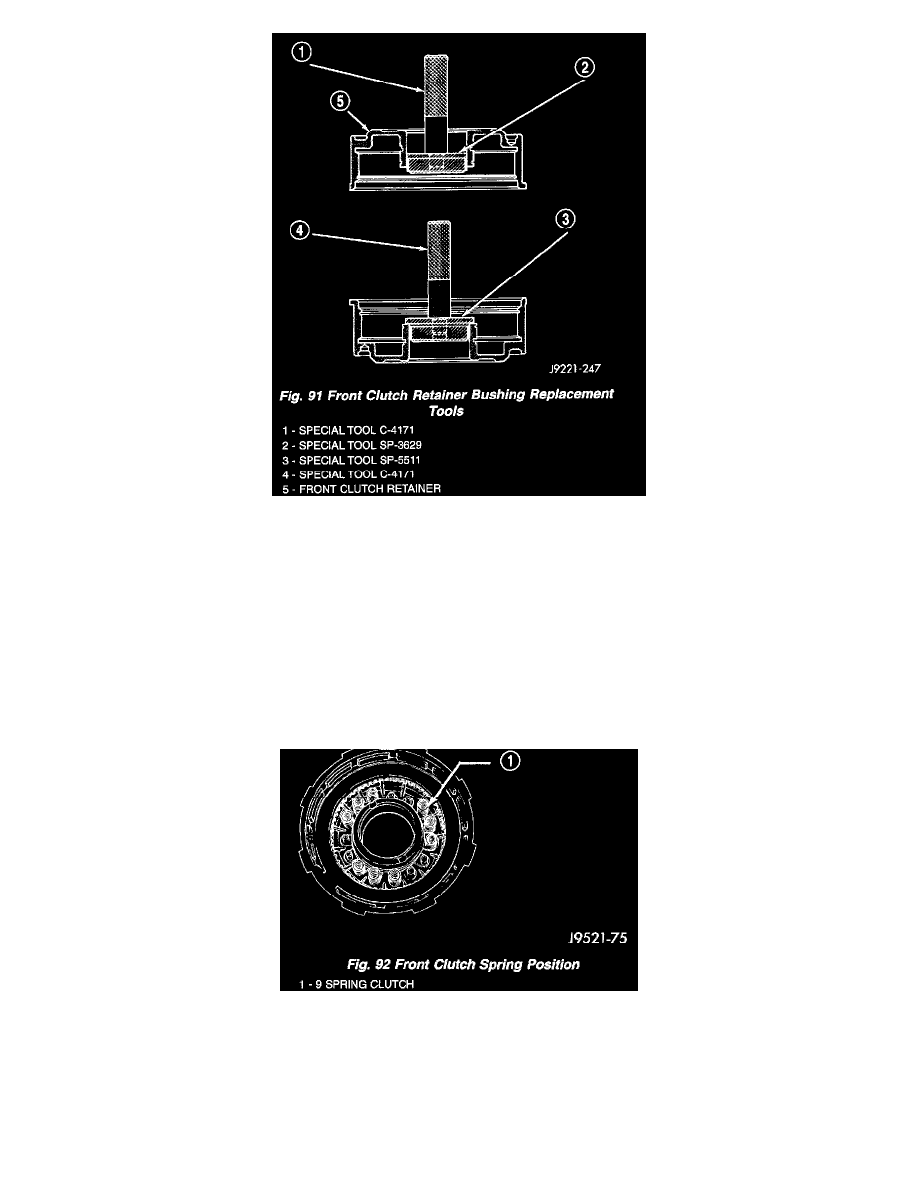
1. Mount Bushing Installer SP-5511 on tool handle (Fig. 91).
2. Slide new bushing onto installer tool and start bushing into retainer.
3. Tap new bushing into place until installer tool bottoms against clutch retainer.
4. Remove installer tools and clean retainer thoroughly.
5. Soak clutch discs in transmission fluid.
6. Install new inner piston seal onto the outer diameter of the clutch retainer inner hub.
7. Install new outer seal onto the clutch piston. Be sure seal lips of both seals face the interior of the retainer.
8. Lubricate new inner and outer piston seals with Ru-Glyde TM, or Mopar Door Ease.
9. Install clutch piston in retainer. Use twisting motion to seat piston in bottom of retainer. A thin strip of plastic (about 0.015 - 0.020 in. thick), can
be used to guide seals into place if necessary.
CAUTION: Never push the clutch piston straight in. This will fold the seals over causing leakage and clutch slip. In addition, never use any type
of metal tool to help ease the piston seals into place. Metal tools will cut, shave, or score the seals.
10. Install and position nine clutch piston springs (Fig. 92).
11. Install spring retainer on top of piston springs.
12. Compress spring retainer and piston springs with Tool C-3863-A.
13. Install spring retainer snap-ring and remove compressor tool.