
RAM 2500 Truck 2WD L6-5.9L DSL Turbo VIN 7 (2001)
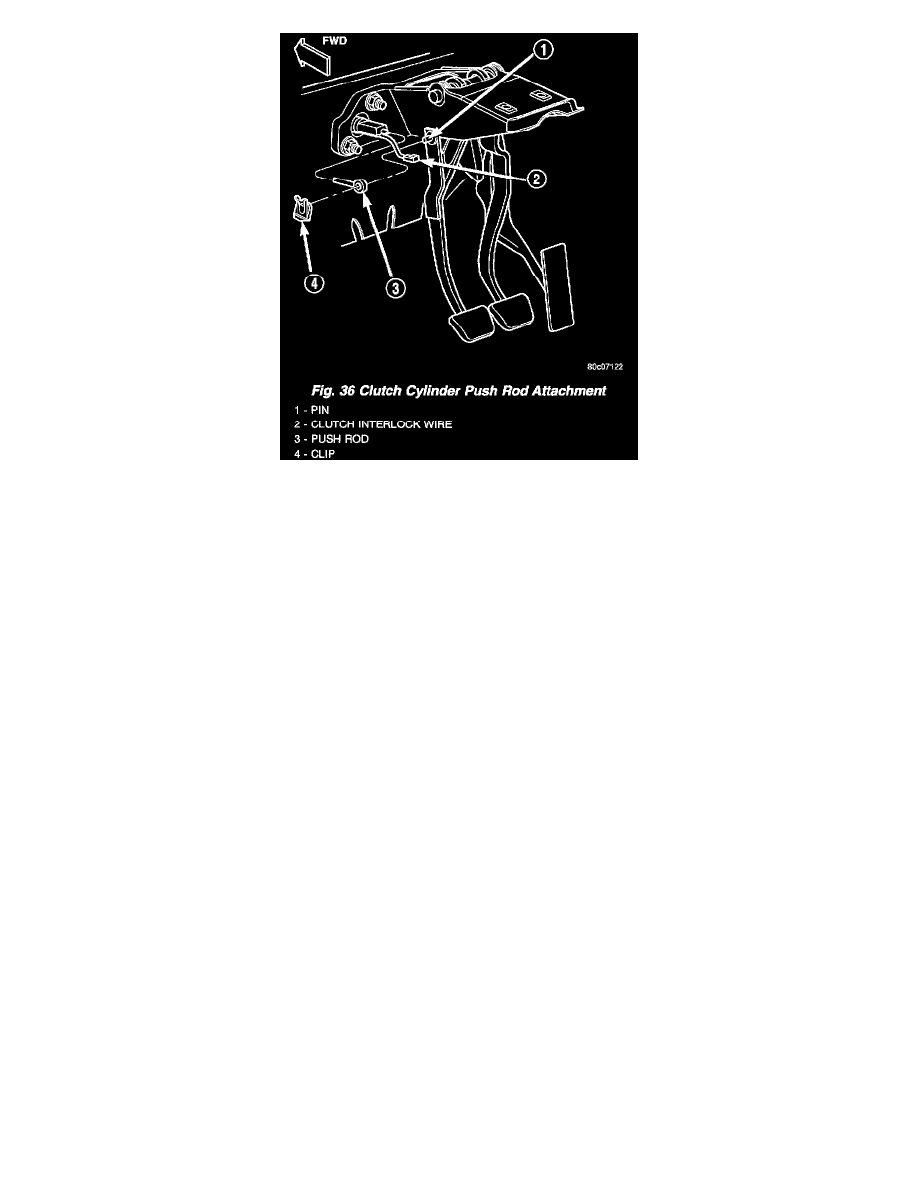
8. Remove retaining clip (Fig. 36).
9. Slide clutch master cylinder push rod off pedal pin.
10. Inspect condition of bushing in the clutch master cylinder pushrod (Fig. 36). Replace the clutch hydraulic linkage if bushing is worn or damaged.
11. Verify that cap on clutch master cylinder reservoir is tight. This will avoid spillage during removal.
12. Remove the nuts holding the clutch master cylinder to the dash panel.
13. Remove screws that attach clutch fluid reservoir to dash panel.
14. Remove the clutch master cylinder from the dash panel.
15. Remove clutch cylinders, reservoir and connecting lines from vehicle.
INSTALLATION
The factory installed hydraulic linkage has a quick disconnect at the slave cylinder. This fitting should not be disconnected or tampered with. The
hydraulic linkage is serviced as an assembly only, but it comes as two pieces to ease installation. Once the clutch hydraulic line is connected to the
slave cylinder, it should not be disconnected. The individual components that form the linkage assembly cannot be overhauled or serviced separately.
1. Tighten cap on clutch fluid reservoir to avoid spillage during installation.
2. Position cylinders, connecting lines and reservoir in vehicle engine compartment. Locate the clutch hydraulic line against the dash panel and
behind all engine hoses and wiring.
3. Insert clutch master cylinder in dash panel. Install and tighten the nuts to hold the clutch master cylinder to the dash panel.
4. Apply a light coating of grease to the inside and outside diameter of the master cylinder bushing.
5. Install clutch master cylinder push rod on clutch pedal pin. Secure rod with retaining clip.
6. Connect clutch pedal position (interlock) switch wires.
7. Position clutch fluid reservoir on dash panel and install reservoir screws. Tighten screws to 5 Nm (40 inch lbs.) torque.
8. Install the plastic clip securing the hydraulic line to the dash panel into the lower dash panel flange.
9. Install the plastic clip securing the hydraulic line to the dash panel onto the upper dash panel stud.
10. Raise vehicle.
11. Install slave cylinder. Be sure cap at end of cylinder rod is seated in release lever. Check this before installing cylinder attaching nuts.
NOTE: If new linkage is being installed, do not remove the plastic shipping strap from slave cylinder push rod. The shipping strap will break on
its own upon the first clutch application.
12. Install and tighten slave cylinder attaching nuts to 23 Nm (200 inch lbs.) torque.