
RAM 2500 Truck 2WD L6-6.7L DSL Turbo (2010)
Crankshaft Main Bearing Seal: Service and Repair
Rear Crankshaft Oil Seal - Installation
INSTALLATION
CAUTION: The seal lip and the sealing surface on the crankshaft must be free from all oil residue to prevent seal leaks. The crankshaft and
seal surfaces must be completely dry when the seal is installed. Use a soap and water solution on outside diameter of seal to ease
assembly.
1. Clean the crankshaft journal with a suitable solvent and dry with a clean shop towel or compressed air. Wipe the inside bore of the crankshaft seal
retainer with a clean shop towel.
2. Inspect the crankshaft journal for gouges, nicks, or other imperfections. If the seal groove in the crankshaft is excessively deep, install the new seal
1/8" deeper into the retainer bore, or obtain a crankshaft wear sleeve that is available in the aftermarket.
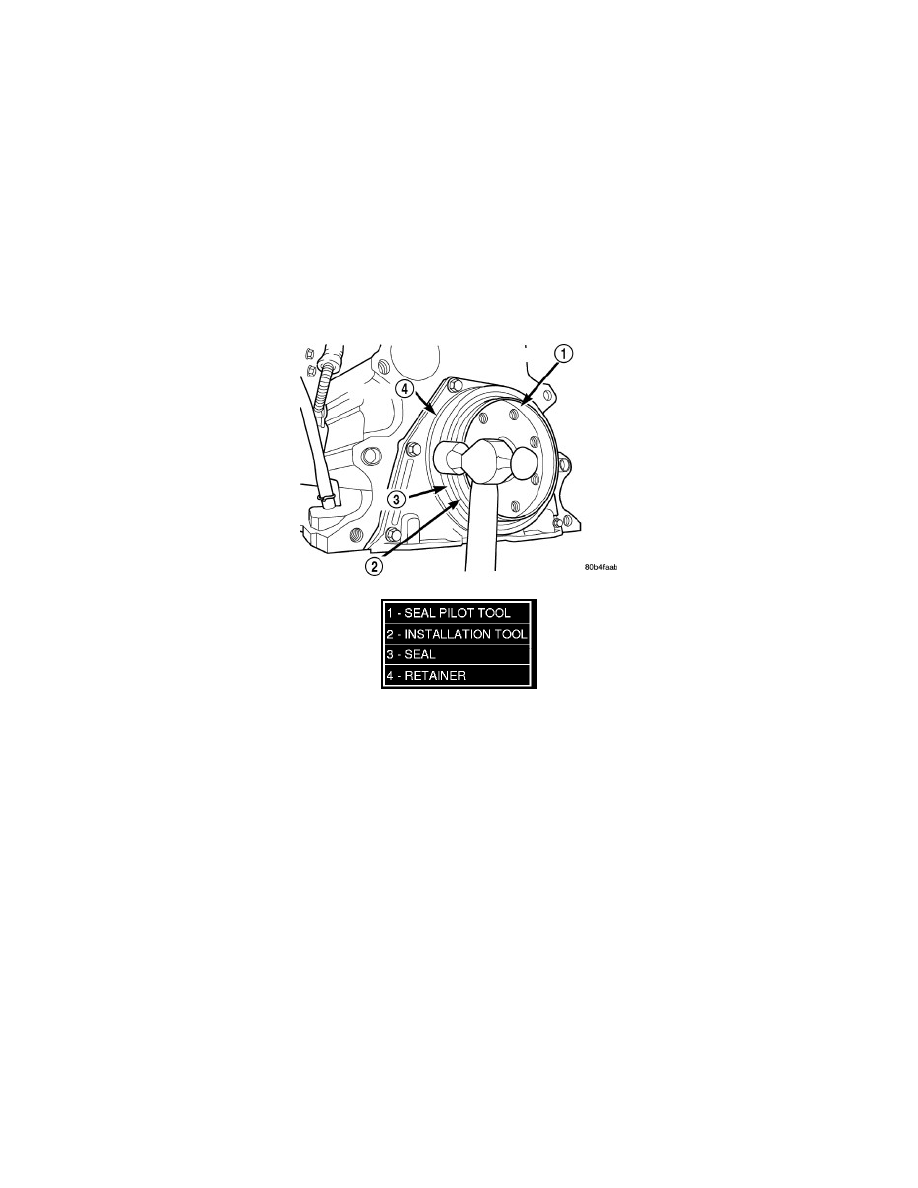
3. Install the seal pilot and new seal, provided in the replacement kit, onto the crankshaft.
4. Remove the seal pilot.
5. Install the installation tool over crankshaft.
6. Using a ball peen hammer, strike the tool (2) at the 12, 3, 6, and 9 o'clock positions until the alignment tool bottoms out on the retainer.
NOTE: Always install a new clamping ring, never reuse the old clamping ring.
7. Install the flywheel or converter drive plate, and clamping ring. Tighten the bolts to 137 Nm (101 ft. lbs.).
8. Install the clutch cover and disc (if equipped) See: Transmission and Drivetrain/Clutch/Clutch Disc/Service and Repair/Clutch Disc - Installation.
9. Install the transmission and transfer case (if equipped).
10. Lower vehicle.
11. Connect battery negative cables.
12. Check engine oil level and adjust, if necessary.
13. Start engine and check for oil leaks.