
RAM 2500 Truck 2WD L6-6.7L DSL Turbo (2010)
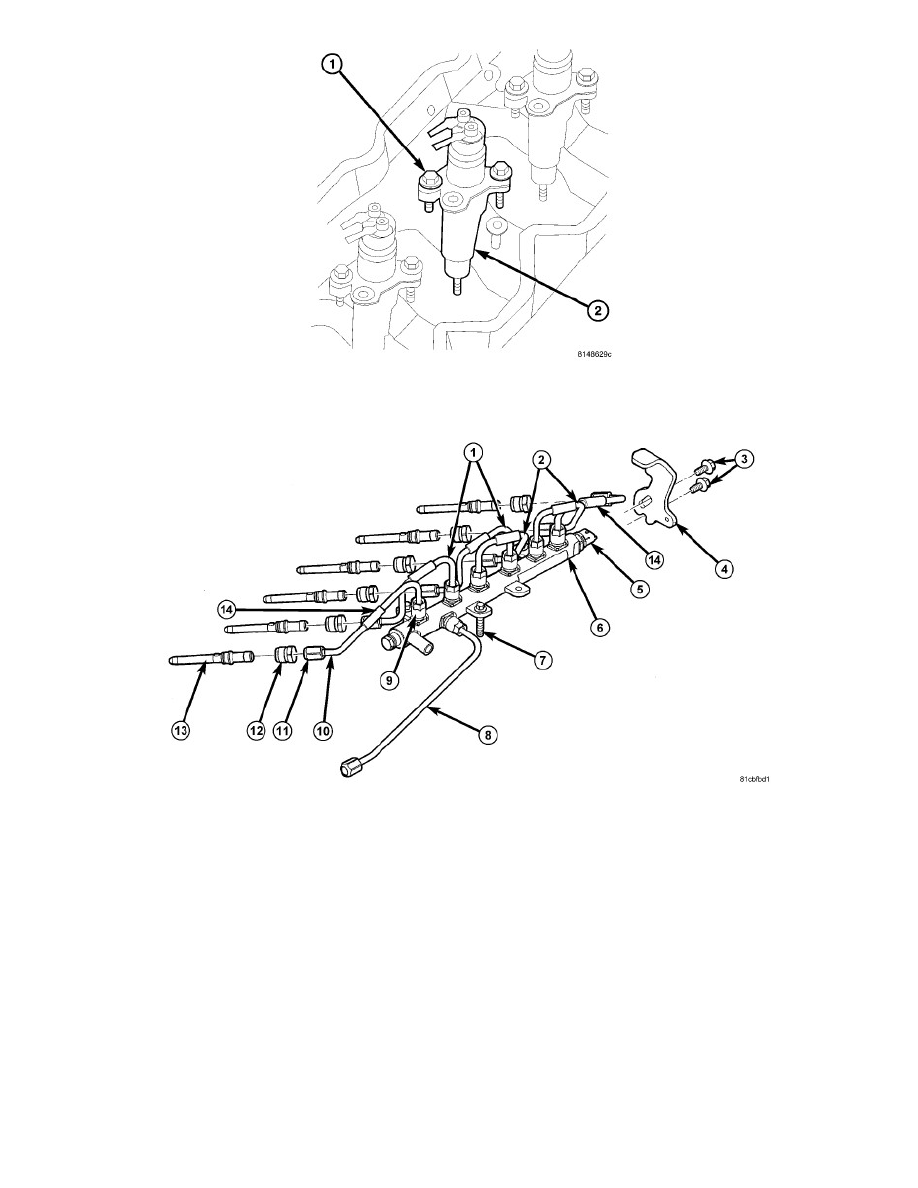
8. Install injector into cylinder head with male (high-pressure) connector port facing the intake manifold. Push down on fuel injector mounting flange
to engage O-ring and seat injector.
9. Tightening Sequence:
a. Install fuel injector hold-down clamp (mounting flange) bolts. Be sure the clamp is perpendicular to the injector body. Do a preliminary
tightening of these bolts to 5 Nm (44 in. lbs.) torque. This preliminary tightening insures the fuel injector is seated and centered.
b. After tightening, relieve bolt torque, but leave both bolts threaded in place.
c. Install high-pressure connector (13) and retaining nut (12). Do a preliminary tightening of nut (12) to 15 Nm (133 in. lbs.).
d. Alternately tighten injector hold-down bolts to 10 Nm (89 in. lbs.).
e. Do a final tightening of the high-pressure connector and retaining nut (12). Tighten to 50 Nm (37 ft. lbs.).
10. Noise isolators (14) are used on the six high-pressure fuel lines. They should be positioned in the middle of the horizontal or longest straight
section of each fuel line. The split on each isolator should be facing downward. Be sure the noise isolator is not touching another isolator or any
other components.