
RAM 2500 Truck 2WD L6-6.7L DSL Turbo (2010)
7. Connect battery and test all affected systems.
Wire Splicing
WIRE SPLICING
CAUTION: If additional wire is needed when making a splice repair to any wire, it is important that the same or next larger size wire gauge be
used. Refer to the appropriate wiring diagram for the original wire gauge size.
1. Remove 13 millimeters (0.50 inch) of insulation from each wire that needs to be spliced.
2. Place a piece of adhesive sealant-lined heat shrink tubing (Part Number 04778570 or equivalent) over the wire on one side of the splice. Be certain
the length of tubing will be sufficient to cover and seal the entire repair area.
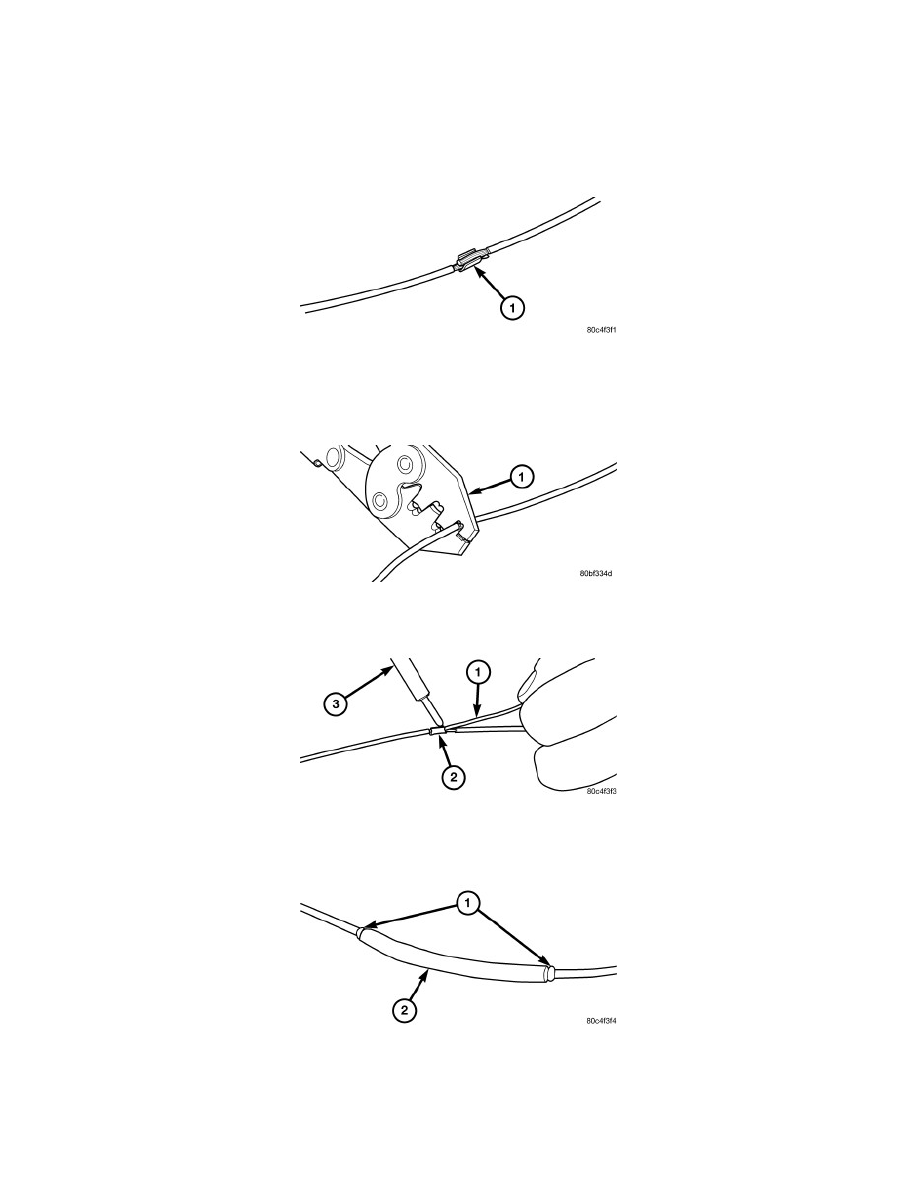
3. Place the strands of the wires being spliced so that they are overlapping each other within the splice band (1).
4. Using a crimping tool (1) (MOPAR Part Number 05019912AA, Miller Special Tool Number 10042 or equivalent) crimp the splice band and wires
together securely.
CAUTION: Never use acid core solder for electrical wiring repairs.
5. Using rosin core type solder (1) only and a suitable soldering iron (3), solder the wire and splice band connection (2) together.
6. Center the heat shrink tubing (2) over the splice joint repair and heat using a suitable heat gun. Heat the joint until the tubing is tightly sealed and
sealant (1) begins to ooze out of both ends of the tubing.