RAM 2500 Truck 2WD L6-6.7L DSL Turbo (2010)

Fuel Pressure Sensor: Service and Repair
Installation
INSTALLATION
1. Inspect fuel pressure sensor sealing surface.
2. Lubricate sensor threads with clean diesel fuel.
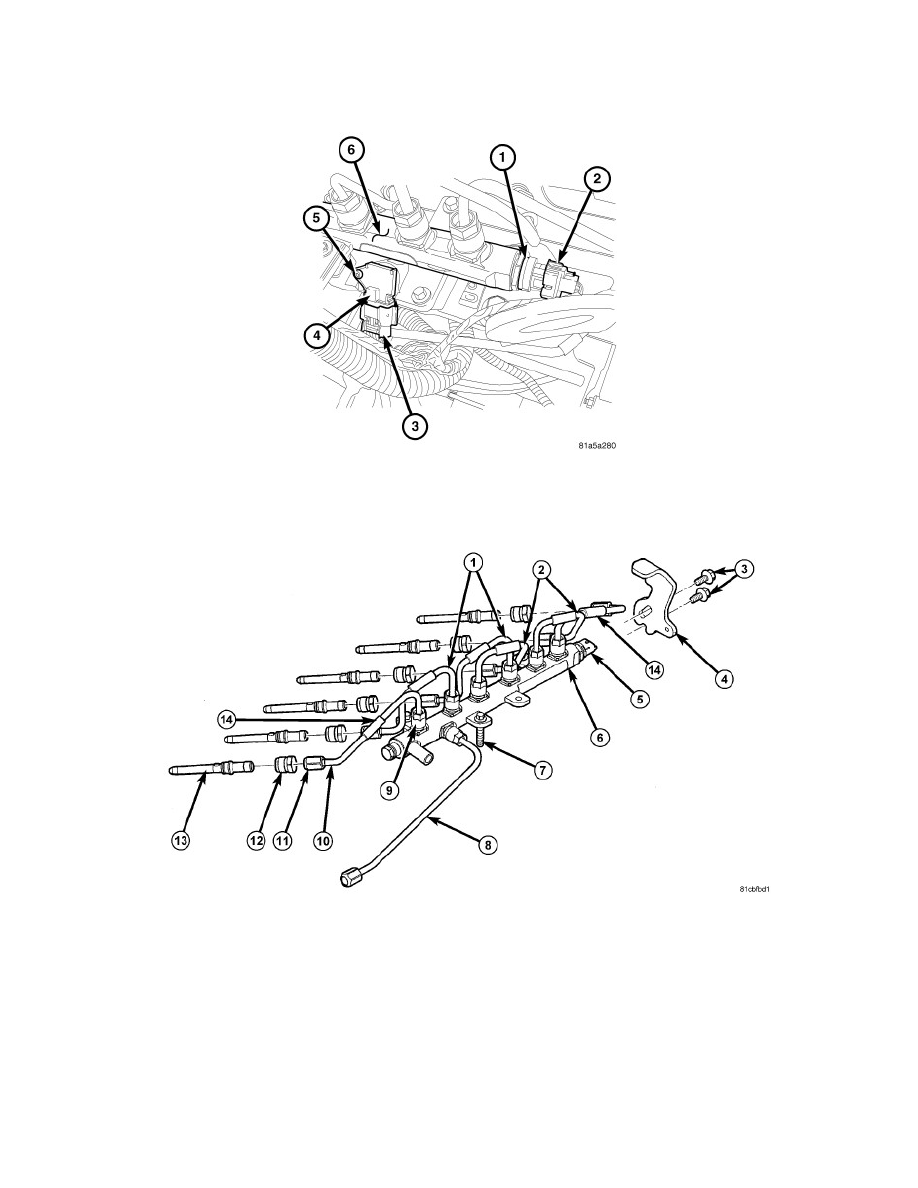
3. Install fuel pressure sensor (1). Tighten to 70 Nm (52 ft. lbs.).
4. Connect fuel pressure sensor harness connector (2).
CAUTION: Anytime a high-pressure line is removed from the engine, its fuel connector nut (12) at the cylinder head must first be retorqued.
5. Tighten nuts (12) at high pressure injector connector nut at the cylinder head to 50 Nm (37 ft. lbs.).
6. Install cylinder No. 5 and No. 6 fuel lines (1).
7. Tighten fuel line at cylinder head to 40 Nm (30 ft. lbs.).
8. Tighten fuel line nuts at fuel rail to 40 Nm (30 ft. lbs.).
9. Install rear engine lift bracket (4). Tighten bolts (3) to 43 Nm (32 ft. lbs.).
Noise isolators (14) are used on the six high-pressure fuel lines. They should be positioned in the middle of the horizontal or longest straight section of
each fuel line. The split on each isolator should be facing downward. Be sure the noise isolator is not touching another isolator or any other
components.
10. Start engine and check for fuel leaks.
